COZYING UP TO THE HOLIDAYS WITH MAGICLINEN

It’s that time of year again, with the holidays fast approaching and the anticipatory desire to add some special touches to our homes as we open our doors to family and friends in celebration of this special season! As I am always keen to incorporate elements that bring comfort, quality and elegance to our spaces during these festive months, I was ecstatic when the opportunity arose to partner with the amazing team at MagicLinen … they are a company that I have long admired for their superb offerings and sound production methods, so it is an absolute delight to share some of their gorgeous goods with you!

But first, let me share a little bit of backstory for those unfamiliar with the brand. MagicLinen is a small, family-run operation based in Lithuania which specializes in handmade linen textiles for the home, with an accompanying clothing line as well. Each beautiful piece is expertly handcrafted in their studio by artisans using only high-quality, European OEKO-Tex certified linen. One of the distinctive features of their organic linen is that it is stonewashed, a technique employed to soften the fabric without resorting to the use of any toxic chemicals, which ultimately lends THE most incredibly soft feel to the fabric. With a most exquisite array of colorways, ranging from muted, dusty pastels to a deliciously inky aubergine, they have produced such a stunning collection of fine fabrics used in bedding, tablecloths, napkins, aprons, curtains, garments, etc. which are readily shipped to customers worldwide. What I particularly adore about their textiles is how their linens manage to look and feel both casual and luxe at once, which is a quality I appreciate as it just amplifies the decorating possibilities!

‘Tis the season, of course, so I couldn’t help but choose a set of their festive table runner and napkins to create a holiday tablescape in our dining room, juxtaposing natural and refined elements…

ML dining 00

This very merry set is comprised of the Limited Edition Red Pom Pom Trim Linen Table Runner and the accompanying Limited Edition Red Pom Pom Trim Linen Napkin Set.

ML dining 02

ML dining 04 B

This set is so perfectly simple and striking in its appeal!

ML dining 03

ML dining 05

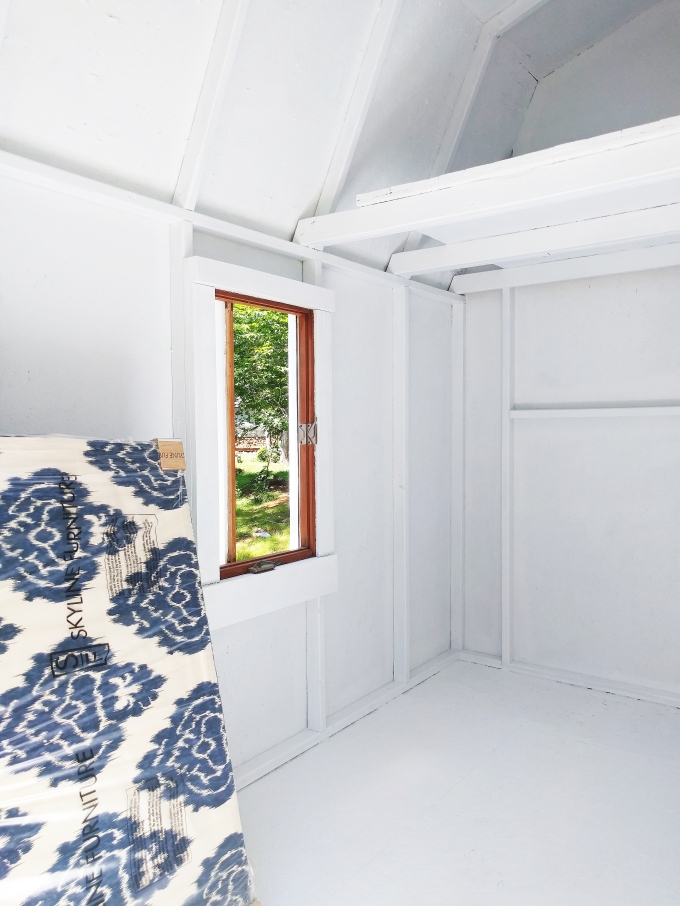
Because MagicLinen is especially known and loved for their bedding, I also chose one of their cozy waffle blankets and a pair of their linen pillowcases to use in our tiny guest room. I just love the interplay of the yellow and orange hues (their colorways are so fun to mix and match with!) in this bed I dressed just in time for holiday visitors.

ML bedding 1

I am so enamored with the textural beauty that is their Cinnamon Waffle Blanket!

ML bedding 2

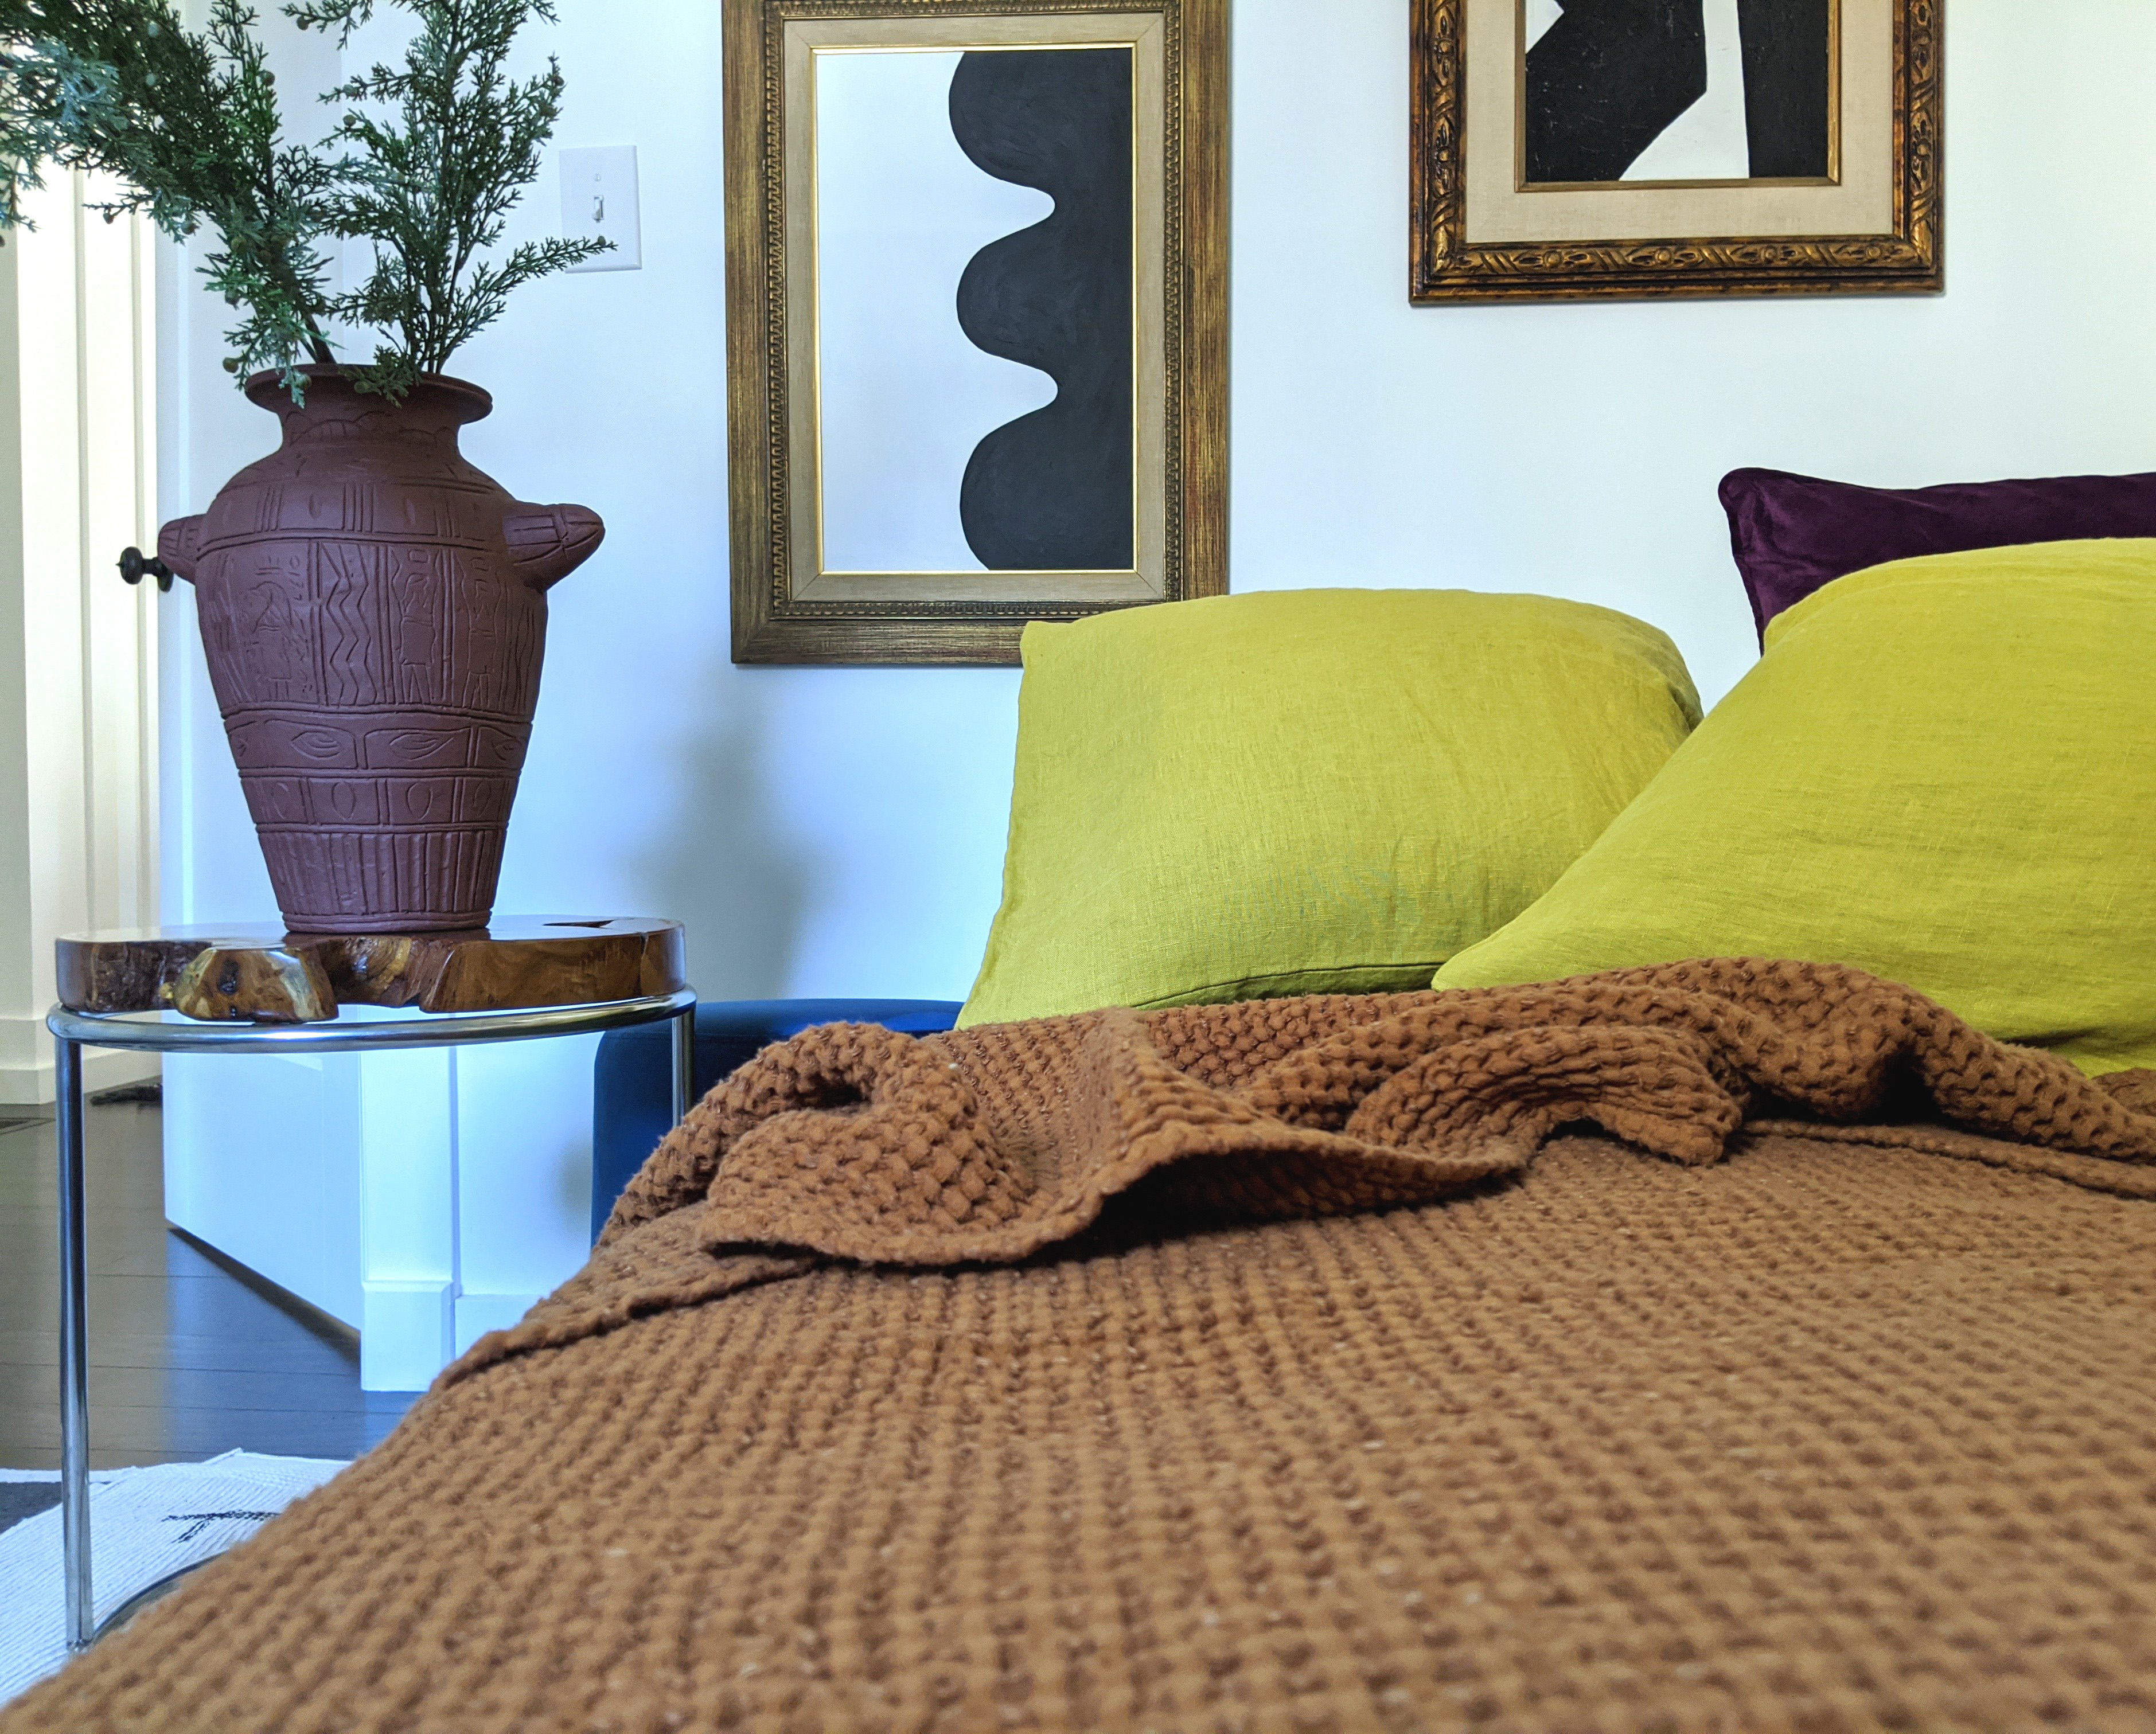
Their Moss Yellow Linen Pillowcase is such a gorgeous shot of saturated color and so lovely to the touch. There’s nothing better than sleeping on crisp linen!

ML bedding 3

And also, the blanket is perfect as a throw to keep warm on these chilly winter nights! It can move from bedside to fireside very easily…

ML living room 1

ML living room 2

Now is the perfect time of year to treat yourself or a special someone with an amazing piece of artisanal linen which will certainly be cherished for posterity…check out their full collection of beautiful product at MagicLinen! Happy Holidays, everyone!

  • I have partnered with MagicLinen and received product in exchange for this post. All expressed opinions are 100% my own.
  • *Images and text by Astrid Insieme

ALL DECKED OUT WITH RAYMOUR & FLANIGAN

After the excessively brutal winter we experienced here in New Hampshire, there was no prospect more exciting than preparing for outdoor living as the days began to lengthen and the temperatures slowly but surely rose. Well, the planning actually began in the form of desperate fantasizing about lounging in the sun and nighttime cocktails on the deck as we were pummeled with blizzard after blizzard…haha! We live in a wooded area by a lake and because nature plays such an integral role in our day-to-day backdrop, we’ve made it a point during the renovation of our property to maximize the potential for enjoying our surroundings during those very short months when the weather actually permits it. And here in New England, that essentially translates to deck living.  After the framework to our addition was completed last spring, we built decks in the front and back of our modified A-frame and constructed an attached pergola on the back deck. Although we have a sizeable yard in the back (which is now seeded, thankfully, and no longer a lunar-like wasteland of of weeds, rocky soil and construction debris), our intention was to create one long, expansive space where all of the entertaining/lounging areas would be concentrated. We managed to have all of the structures built and stained/painted before last winter, but we didn’t have the opportunity to actually “deck” it out and properly enjoy it. Until now. I’ve styled it up in partnership with the amazing people at Raymour & Flanigan and it is ready for the season!

So for the sake of visualizing the evolution of this project, I’ll share some before shots:

DECK MAKEOVER BUILD

This was taken last summer as the back deck was being built. Yes, we’ve been living in a perpetual construction site. Check out that luscious lawn!

DECK MAKEOVER PERGOLA

At this point, the attached pergola had just been built and we were about to embark on the always fun stage of endless painting and staining. Irony intended.

Fast forward to over a month ago, when the outdoor furniture from Raymour & Flanigan was delivered! I chose the Tilley Outdoor Sofa and the Tilley Outdoor Chair (I got a pair) to create an outdoor living room beneath the pergola. I was so incredibly excited to see these gorgeous pieces in place, with their incredibly clean, modern lines and deep seating, that I couldn’t help but temporarily set it up, even though there was still quite a bit of prep work needing to be addressed before the install.

BEFORE DECK MAKEOVER

As soon as the weather was warm enough to actually start working outside, we started with retouching all of the white paint on the pergola and restaining the entire back deck because unfortunately, even treated wood takes quite a beating from the harsh elements here in New England.

DECK MAKEOVER BEFORE 1

We also installed waterproof, bamboo blinds on the three (exposed) sides of the pergola so that we’d have the option of sun filtering on those super bright days. And for ambient lighting in the evenings, we hung string lights and a cluster of solar pendant lights which were an easy DIY hack we fashioned using five rattan-style baskets (they’re actually resin-coated, because as you can imagine, everything stays out and needs to be weatherproof around here!).

DECK MAKEOVER BEFORE 2

Now the decorating fun begins. Notice the mammoth pillow pile in the back…those are the Sunbrella cushions for the sofa and chair set.  I have never seen or sat on cushier things in my life! I am strangely obsessed with them.

DECK MAKEOVER BEFORE 3

And so with the outdoor rug down and the seating intact, I brought in greenery and items from my personal hoard (decorative pillows, textiles and tables, etc.) to pull this outdoor space together. Ultimately, I wanted it to be comfortable and inviting; after all, this is where we are going to do some serious lounging, whether chilling out as a family or entertaining. It is where we will have lazy coffees in the morning and unwind after a grilled meal in the evening with drinks. And of course, I wanted it to feel like a bit of an escape. A sensorial retreat from reality…like a vacation, but conveniently, at home. Everything is weatherproof and can be left out in the rain, except for my kilim pillows which I just toss into one of our sheds when the weather promises to be inclement. And voila…

AFTER DECK MAKEOVER 5

AFTER DECK MAKEOVER 9

AFTER DECK MAKEOVER 10

AFTER DECK MAKEOVER 13

AFTER DECK MAKEOVER 8

AFTER DECK MAKEOVER 3

AFTER DECK MAKEOVER 15

AFTER DECK MAKEOVER 6

AFTER DECK MAKEOVER 7

Can’t get over the stunning, modern design and roominess of these pieces! I also fell in love with their black Coil Solar Outdoor Lantern and got a few for scattering around on the floor and on tabletops.

AFTER DECK MAKEOVER 12

AFTER DECK MAKEOVER 14

AFTER DECK MAKEOVER 4

And there you have it! It took a while, but this deck is finally transformed and more than ready for what is guaranteed to be much use until the cold weather kicks in again! Cheers to spring and summer on the horizon!

  • I have partnered with Raymour & Flanigan and received product in exchange for this post. All expressed opinions are 100% my own.

*Images and text by Astrid Insieme

#BOHOFOLKDECOR WITH LOLA Y TULA

When it comes to defining my personal style – or at least the aesthetic that most resonates with me – it always incorporates elements of the exotic. Worldly environments that are global and artful in their appeal are especially meaningful and inspiring to me because they feel most authentic, for the simple reason that there is an uncontrived, cultural richness and boldness imparted by those special pieces which speak of other lands and their traditions.

So in collaboration with Gardenia, the amazing woman behind the California-based brand, Lola y Tula, we have decided to embrace and celebrate what we both collectively identify with and love in the vast realm of design. #BOHOFOLKDECOR encompasses two essential notions – a penchant for bohemian style and an appreciation for that which is considered “folk”. It is that always original vibe which is an organic and unpretentious fusion of the free-spirited and unconventional with the artisanal.

Here I’ve styled some incredibly unique pieces from Gardenia’s beautifully curated collection of Mexican soft furnishings, including her otomi pillows and Tlaxcala geometric blanket, in the spirit of #BOHOFOLKDECOR … won’t you join us and show us your interpretations too?

LOLA Y TULA 5

Stunning otomi pillows with their whimsical depictions of animalia and delightfully colored thread work.

LOLA Y TULA 3

LOLA Y TULA 2

LOLA Y TULA 7

Playful and saturated hues make these soft goods an absolute chromatic sensation!

LOLA Y TULA 4

This Tlaxcala geometric throw is a stunner with its bold and graphic pattern … perfect for draping on a bed or sofa, curling up with on a chilly evening outdoors, and versatile enough to be used as a beach or picnic blanket.

LOLA Y TULA 1

#BOHOFOLKDECOR vibes…

LOLA Y TULA 6

Don’t forget to check out Lola y Tula to view her full gallery of artisanal offerings which honor the heritage of Mexican artistry and craftsmanship! And don’t forget to showcase your #BOHOFOLKDECOR on Instagram … we’d love to see!

*Images and text by Astrid Insieme

AN ECLECTIC HOLIDAY HOME TOUR

So, it’s that time of year…and how quickly it descended upon us! I’m very excited to be participating, alongside so many talented creatives, in the Winter Eclectic Home Tour hosted by the amazing Jess of Domicile 37 (thanks for organizing this blog hop and the invite, Jess!). If you’ve made your way over from Monica Wants It, welcome!

For those who are new here, I thought it would be apropos to preface by disclosing a few things about our lifestyle before jumping into the visuals. We are a family of three who live in the woods of New Hampshire, in a tiny A-frame cottage which is currently in the throes of a renovation; we’ve recently added on an addition which is still a work in progress, but for the moment, our actual living area is simply comprised of the A-frame which totals just under 800 square feet. With steeply angled walls. So as you can imagine, it is a very small home with some very particular and unusual spatial limitations! However, this conveniently aligns with my penchant for a “less is more” approach to decorating for the holidays, despite my otherwise maximalist leanings when it comes to interiors. As far as “decking our halls”, I prefer incorporating a few subtle and intentional flourishes which remind us of the celebratory season, and rely mostly on cultivating a cozy, layered, and wintry mood throughout. The vibe (hopefully!) translates to an unfussy melange of eclectic/bohemian/Scandinavian/rustic styles with a touch of Christmas cheer.

OK, that’s enough of my virtual babbling…come on in!

facade-1

So here is the entry to our little A-frame which I always spruce up with greenery this time of year, opting to keep things rather elemental and natural. Except, of course, for the star perched atop the peak of our roof…haha!

new-facade-2

This is the view from our front door as you enter a narrow foyer which leads into our open-plan downstairs.  The foyer essentially serves as a mudroom where we stash our shoes, hats, umbrellas, etc. and although the space is primarily utilitarian in purpose, there’s always room for some seasonal dressing in the form of garlands and wreaths, right?

foyer-001

foyer-1

A square, boxwood wreath and some pine boughs gathered from trees on our property provide just enough deliberate doses of green while not overwhelming the tight space.

foyer-2

This is a bit of an odd photo, but it shows the layout of the open-plan downstairs, and the placement of the kitchen (in the background) in relation to the living area. The stairs lead upstairs to two tiny bedrooms and an even tinier loft.

living-room-01

I like surprising and unconventional mixes in my decor, as I tend to find beauty in the unexpected. Global, traditional and rustic aesthetics juxtapose effortlessly, I feel, and still manage to feel discreetly festive. I truly believe that if you do anything with conviction and wild abandon, it will always work!

living-room-02

We can’t hang our stockings by the chimney with care…so they hang by our sliding glass doors, dangling (carefully?) from a curtain rod. And please behold our baby tree beneath…haha! Yep, that’s about as much tree as we can fit in our living room at the moment!

living-room-04

Some more living room details, keeping it minimal but still evocative of the holiday spirit:

living-room-06

living-room-05

And a close-up of our baby tree. All 15 inches of her! I love her though…she seriously cracks me up.

living-room-07

Shall we head outside to our back deck? Here is where we can appreciate the woods on the edge of our property, so this space is all about experiencing the rusticity of cabin life. Bundled up, we can still enjoy a quick morning coffee or glass(es) of wine in the late afternoon here. But not for too much longer, as the temperatures are dropping quickly!

outside-deck-1

outside-deck-3

new-outside-deck-5

So, the reality is that I had finished taking all the photos that I intended to include in this holiday home tour last week. But then Mother Nature intervened a few days ago, rather opportunely, and this happened…and so I thought it would be a perfect, final shot for this wintry blog hop!

winter-wonderland

And that’s how we do the holidays around here! Thanks so much for stopping by, and don’t forget to pay a visit next to Mila of Jest Cafe to see how she works her seasonal magic, as well as all of the other talented creatives (listed below) who participated in this week’s Winter Eclectic Home Tour. Happy Holidays, everyone!

winter-eclectic-home-tour-3

(Please Note: Links to Home Tours are not live until day of tour!)

Monday

Bright Green Door // Michelle Matangi Home // Sharon Williams // CAD Interiors // Domicile 37

Tuesday

Casa Watkins Living //  Maggie Overby Studios // House Homemade // French & French Interiors // Style Mutt Home

Wednesday

Up to Date Interiors // The Striped House // Designing Vibes // Iris Nacole // Fearfully & Wonderfully Made // Blue i Style

Thursday

PMQ for Two // Maker of Home // Go Haus Go // Whimsical Blue Living // FOXY OXIE

Friday

This is Our Bliss // Monica Wants It // Insieme House // Jest Cafe // The Gathered Home

ECO DEER – IN THE SPIRIT OF SPONTANEITY

It’s been such a busy season around here, with absurd numbers of ongoing outdoor projects being tackled as we try and get as much crossed off of our endless punch list before the advent of the colder days. Lots of things being built, and subsequently, lots and lots of mess…and more often than not, these new installations are pending true completion as they require more work before they can actually be deemed finished. Case in point: decks, pergolas and the like, which in our case, were constructed using pressure-treated wood and need considerable time before being painted or stained. Admittedly, I refuse to subscribe to the idea that we should wait to use our spaces and belongings only and until they are fully “done” or the timing is perfect, because I feel like those are absolutely illusory notions anyway. And so, prompted by a mix of impatience and a dedication to living in the moment as much as possible, I made it a point to set up and style our new outdoor areas to enjoy in the meanwhile, even if said set up is temporary.

So when the lovely people of Eco Deer contacted me about sharing their product,  I was elated. Not just because it is such a clever concept, but because there is something about the spontaneity of its application that deeply appeals to me. And I knew just the place where I wanted it to live. For now, anyhow. No clue what I am talking about? For those unfamiliar with the incredibly cool Eco Deer, here it is:

eco-deer-2

Could there be a more perfect and creative format for displaying nature of your choosing? Shaped like a deer’s head, and when filled with foliage, flowers or branches – whatever you’re inclined to use – it mimics a trophy mount. Minimalist design genius, as far as I am concerned!

eco-deer-7

They are handmade in Ukraine and come in several styles, including solid eco wood (both raw and painted) as well as metal. Simply hang, insert the two glass tubes in place, and fill with the foliage of your choosing. If you opt to fill it with blooms or leaves, add water to ensure their longevity, naturally. If you want to use thick branches instead, you could even forego the use of the tubes. And there you have it…an incredibly striking and sculptural, decorative statement in the form of a botanical wall display!

My favorite aspect of the Eco Deer is how it can be used to create so many different looks, depending on what design direction you’re into at the moment. Leafy palm fronds in the summer, wispy wildflowers in the spring, and dried branches in the late fall and winter…I just love how it can be used so variably, so seasonally, so spontaneously! I intend on moving it indoors during the snowy months but until then, I adore seeing it mounted under our pergola on our back deck. Although this area is still very unfinished at the moment, it was all about having fun with the space in the meanwhile…spontaneously. And the Eco Deer came at just the right time, and seriously delivered. Serendipitously…and spontaneously!

eco-deer-6

Visit the Eco Deer Etsy shop to check out their inventory and buy online…if you are an aficionado of plants and brilliant design, it is an absolute must for your home decor!

  • I have partnered with Eco Deer and received product in exchange for this post. All expressed opinions are 100% my own.

* Images and text by Astrid Insieme

THE MAKING OF A SHE SHED (OR SHEd)

This summer has been replete with seemingly endless outdoor projects in our quest to finalize the exterior of the addition, address some seriously daunting landscaping issues, and ultimately, to create usable spaces around our property for lounging and entertaining. Because let me tell you…it’s been obscenely muddy and chaotic around here for what seems like an eternity! We’ve just finished building front and back decks, and are in the throes of reconstructing the neighborhood’s old pump house (which was kindly given to us) in our backyard, which we will be using for storage of seasonal and recreational items. This new acquisition has left one of our existing sheds entirely freed up for…well, the possibilities were infinite. Admittedly, I’ve always been fascinated with the idea of creating a special space – a sort of fantastical retreat – in a tiny structure, and so here was my opportunity. The decision was an easy one, and I am ecstatic to have partnered with my friends at Raymour & Flanigan in the transformation of our 10 x 10 foot utilitarian shed into an outdoor oasis for summertime chilling!

Because the shed clearly has spatial limitations, I wanted to ensure that it efficiently served two functions: providing leisurely spots for seating, and offering surfaces for entertaining (and by that, I mean places to rest drinks and such…haha!). As far as its aesthetic direction, my vision was to create a space that was equal parts global and chic, with a subdued, tropical vibe. This little, outdoor room had to feel like a bit of a sanctuary, an inviting refuge. And here’s how I did it:

Giving the dingy, interior walls and floor a fresh coat of white paint was the first step.

SHE SHED BEFORE  1    SHE SHED BEFORE  2

(Let us please ignore the newly hydro-seeded grass that has started to come in and that we have managed to kill. Despite obsessive watering.)

Once painted, then the true fun began!

SHE SHED INSTALL 0     SHE SHED INSTALL 1

I had chosen some beautifully striking and functional pieces from Raymour & Flanigan and planned on mixing them with items from my own stash to decorate and style the space. Once all the wares had been delivered, it was time for installation! I laid down a sisal rug banded with a brown border that I had in storage to create a natural, neutral grounding for the colorful and bold furnishings and decorative accents that I would be layering in the SHEd. The gorgeous ikat settee (Emelio Loveseat) and luxuriously tufted chaise lounge in navy (Lansing Chaise Lounge) add the ideal dose of sophisticated, bohemian flavor and in addition to being supremely comfortable, feel perfectly scaled in this intimate setting. The turquoise coffee table is from India and is one of my most cherished pieces from my hoard…I mean collection. Gilded wall plates and a federal-style, convex mirror (also from my hoard) were added for a touch of gilded glam, and some greenery was brought in to inject a touch of tropicalia. Can you tell I have a penchant for blue? Probably not.

SHE SHED INSTALL 2     SHE SHED INSTALL 3

Soft furnishings (pillows and suzani textiles from my hoard/collection) were added liberally. I am such a shameless fan of pattern mixing and believe it should be done with conviction…more is definitely more in this case! Saturated colors and ethnic prints always make an incredible visual impact, especially when juxtaposed against the crispness of white walls. Once all the final touches were made and everything was styled accordingly, the SHEd was ready for her debut…and here is how she looked!

SHE SHED 7

SHE SHED 2

SHE SHED 4

SHE SHED 10

SHE SHED 3

SHE SHED 12

SHE SHED 5

I also chose the Irina Outdoor Armchair and the Lodi Outdoor Serving Cart which collectively provide a wonderful, woodsy warmth to the space. Both are crafted from acacia wood and are such solid and functional pieces. No oasis would be complete without a station to replenish one’s drinks, right?

SHE SHED 9

SHE SHED 6

Essentially, I couldn’t neglect the outside of the SHEd, now that she was all done up on the inside. The Karoo Outdoor Bench is truly the most perfect of outdoor benches that I could have placed alongside one of the exterior walls. It is beautifully crafted, super long, super sturdy and has absolutely gorgeous lines. Dressed with heaps of vintage kilim pillows from Turkey, it has become my favorite perch for indulging in extra-long morning coffees.

SHE SHED OUTDOOR BENCH 1

And there you have it…as the old adage goes, good things (can) come in little packages! A huge thanks to Raymour & Flanigan for helping make this transformation happen. They have such an incredibly vast and varied array of inventory to suit any decor style, and have been such a dream to partner with!

  • I have partnered with Raymour & Flanigan and received product in exchange for this post. All expressed opinions are 100% my own.


* Images and text by Astrid Insieme

A TALE OF TRANSFORMATION

Just thought I’d begin by sharing a brief chronicle of the progress we have made transforming a once derelict (but teeming with potential) A-frame in the woods of New Hampshire into our year-round home! This particular story commences about five years ago, when my Husband, Brian, and I began tackling the initial phase of this remodel primarily on our own, except for the electrical and plumbing work which we (naturally) hired out. I should mention, if only to humor myself in remembrance of our joint insanity, that we were actually living onsite while carrying out this extremely laborious, messy and protracted renovation. This could have proven to be a very poor decision, as sleeping on a mattress on the floor, amidst power machinery and mammoth piles of construction debris, isn’t usually the prescribed formula for ensuring a newly married couple’s happiness and stability…haha! But thankfully, we have survived and are still at it!

So here is the evolution of phase one of the undertaking, which essentially involved a full exterior and interior facelift. (For more photos and details, you can check out our “Before & After” feature on Design*Sponge here from a couple of years ago.)

The exterior (before, during and after):

cottage before reno    cottage reno phase 2    summer aframe

The interior (before and after):

looking into the kitchen before 1

interior after

(I have kindly spared you the sight of the bathroom in its unadulterated, “before” state. But if you are curious, I hope you will be satiated with the knowledge that there were relentless colonies of mushrooms growing from the soggy floorboards. And stenciled, green ducks on tongue and groove walls stained every hideous shade of orange imaginable.)

Once the A-frame was fully rehabilitated, we took about a year off to recuperate our energies before embarking on phase two of our grand plans for this property. For familial reasons, we knew that adding onto the tiny cottage was imperative, and fortunately, we had the land and the space to expand. So we drafted the design ourselves and once all the bureaucratic steps were taken to secure the go-ahead to build the addition, we enlisted a contractor to execute our vision. And here’s how that chapter of the story went:

aframe reno snow

remodel spring

This is where we stepped back into the picture. Ambitious (read: crazy) people that we are, Brian and I have resumed putting our collective stamp on our home by beginning to paint the exterior (at the moment, we have only finished the facade), and initializing some minor hardscaping projects, such as laying a rustic entry path of bluestone pavers to the front deck. Which as you can see, clearly needs to be repainted at this point given the abuse it’s been taking as of late!

remodel pavers

remodel painting 0

remodel painting

remodel painting 1

The to-do list for this summer is frighteningly massive and involves: painting the rest of the house, installing shutters and flower boxes, extending and painting the front deck, building a back deck with an attached pergola, depositing loam around the remainder of the property in preparation for hydro seed, building a backyard fire pit, and giving three of our sheds facelifts. Reasonable or delusional? We shall see in a few months…haha!

remodel back final

And that’s where we’re currently at! If all goes according to plan, this utilitarian shed in the foreground will be receiving a bit of an unexpected makeover very soon…stay tuned!


*Images and text by Astrid Insieme