REFINING OUR FAMILY ROOM WITH RAYMOUR & FLANIGAN

It’s definitely been a while since I’ve shared any updates here with regard to the continuing renovation work at our place! But as always, the work is being slowly but surely carried out (usually at the oddest of hours whenever free time presents itself…haha!) and we’re so happy to report that our efforts have come full circle. As in, we’ve essentially finished the rough construction work in the addition, and have circled back to the original A-frame structure. Which, some of you may know we renovated from a once dilapidated cabin some years ago before eventually adding on the expansion. When we initially tackled the A-frame, we configured the downstairs to be an open-plan area that included the tiniest of kitchens, an even tinier bathroom, and a living room which also incorporated an office nook. All of which was contained by the steeply angled walls of the A-frame design. And let us not forget the incredibly cumbersome staircase in the middle of said open-plan space which led to the loft upstairs, where two miniature bedrooms were previously located. Once the addition was built and we created the opening to link the two structures together, that incredibly cumbersome staircase, which had always been such a space hog, became obsolete. (The original loft bedrooms have been converted into closets which are now accessed through our main bedroom in the new addition, which obviously has a new staircase.) And so, now we had the ultimate opportunity to remove that beast of a staircase and reclaim some much-needed square footage in that integral part of the house. We didn’t really change too much of the footprint, but merely decided to revamp and refine the newly opened up space to serve our needs better. I thought it was important to include a bit of background as to the purpose and scope of this particular project, so now let us get on with the visuals!

The staircase which served us well, but just had to go:

In order to demolish and extricate this thing from our lives, we had to take it apart, literally piece by piece. It admittedly took us longer to build it, but dismantling it was a whole other realm of construction nightmare…haha!

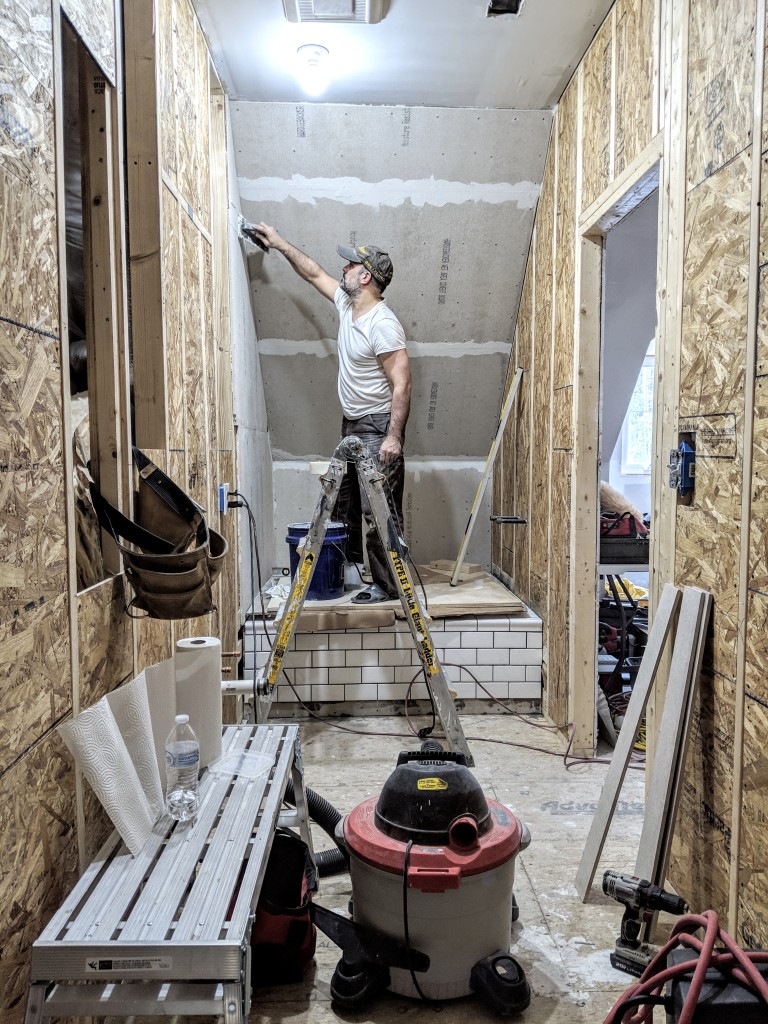
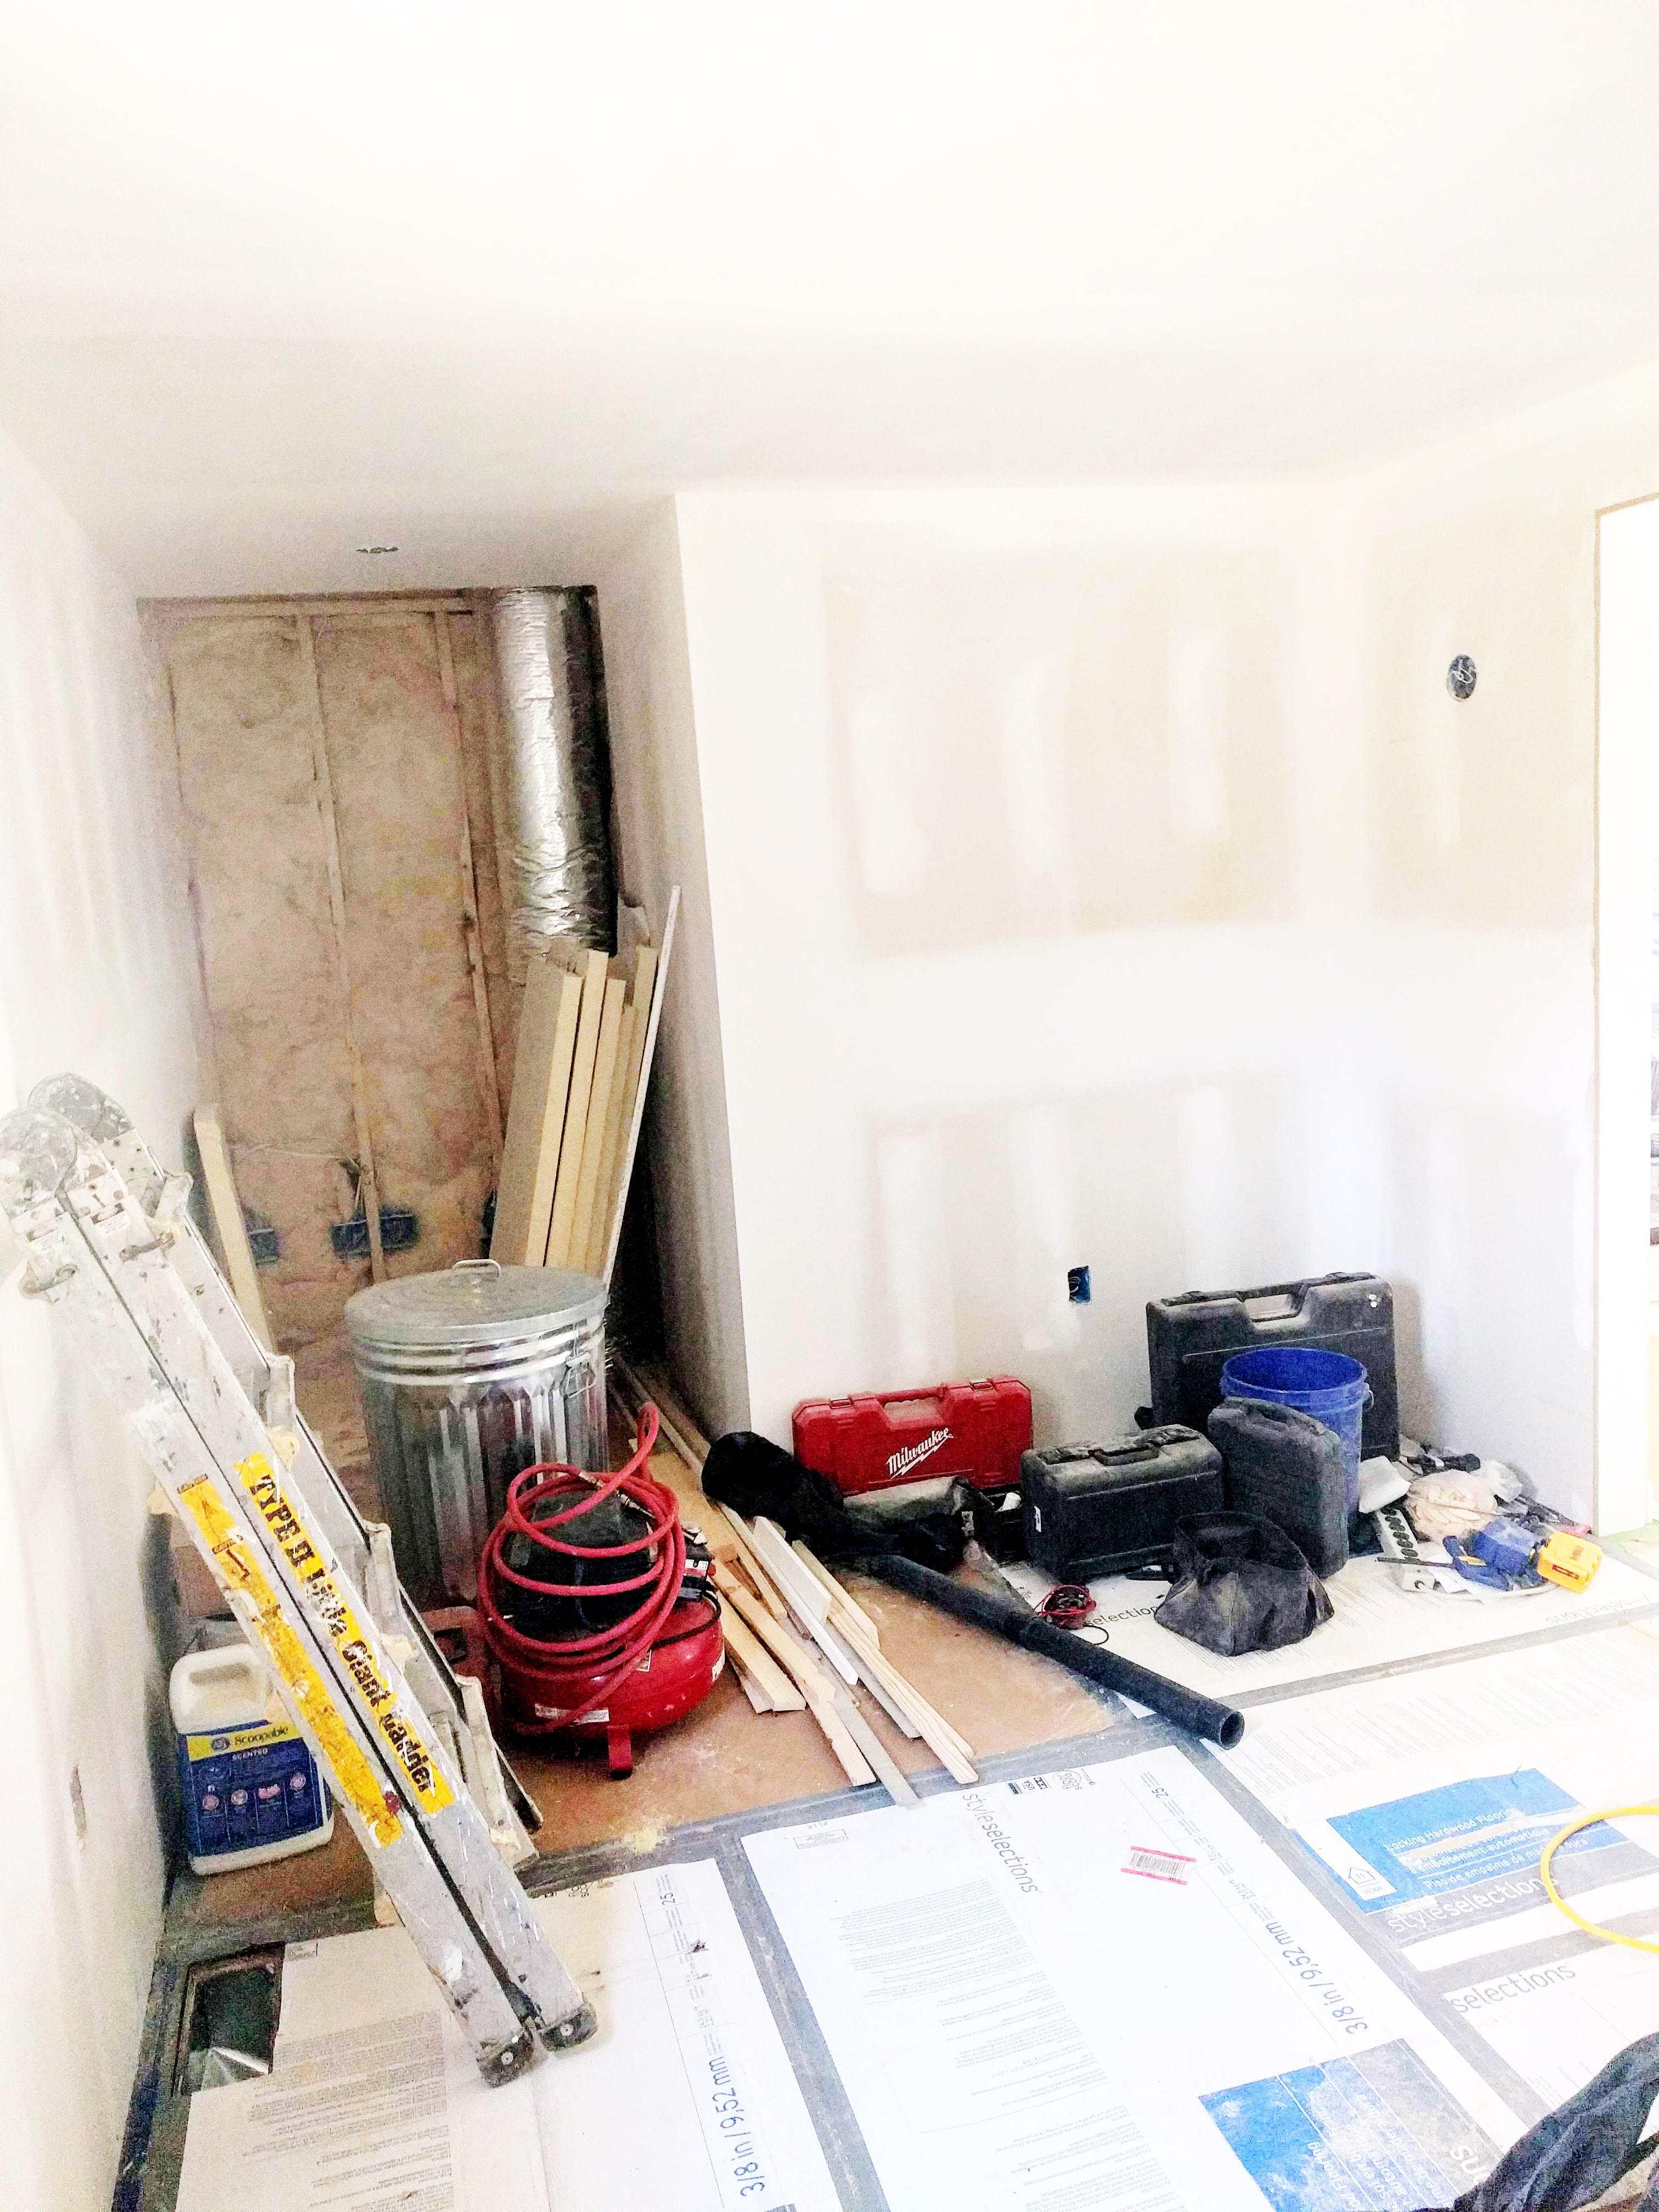
Here, you can see how much space it occupied in the already small downstairs area. For perspective, the kitchen is in the foreground, and the office nook lies behind that half-wall partition adjacent to the stairs.

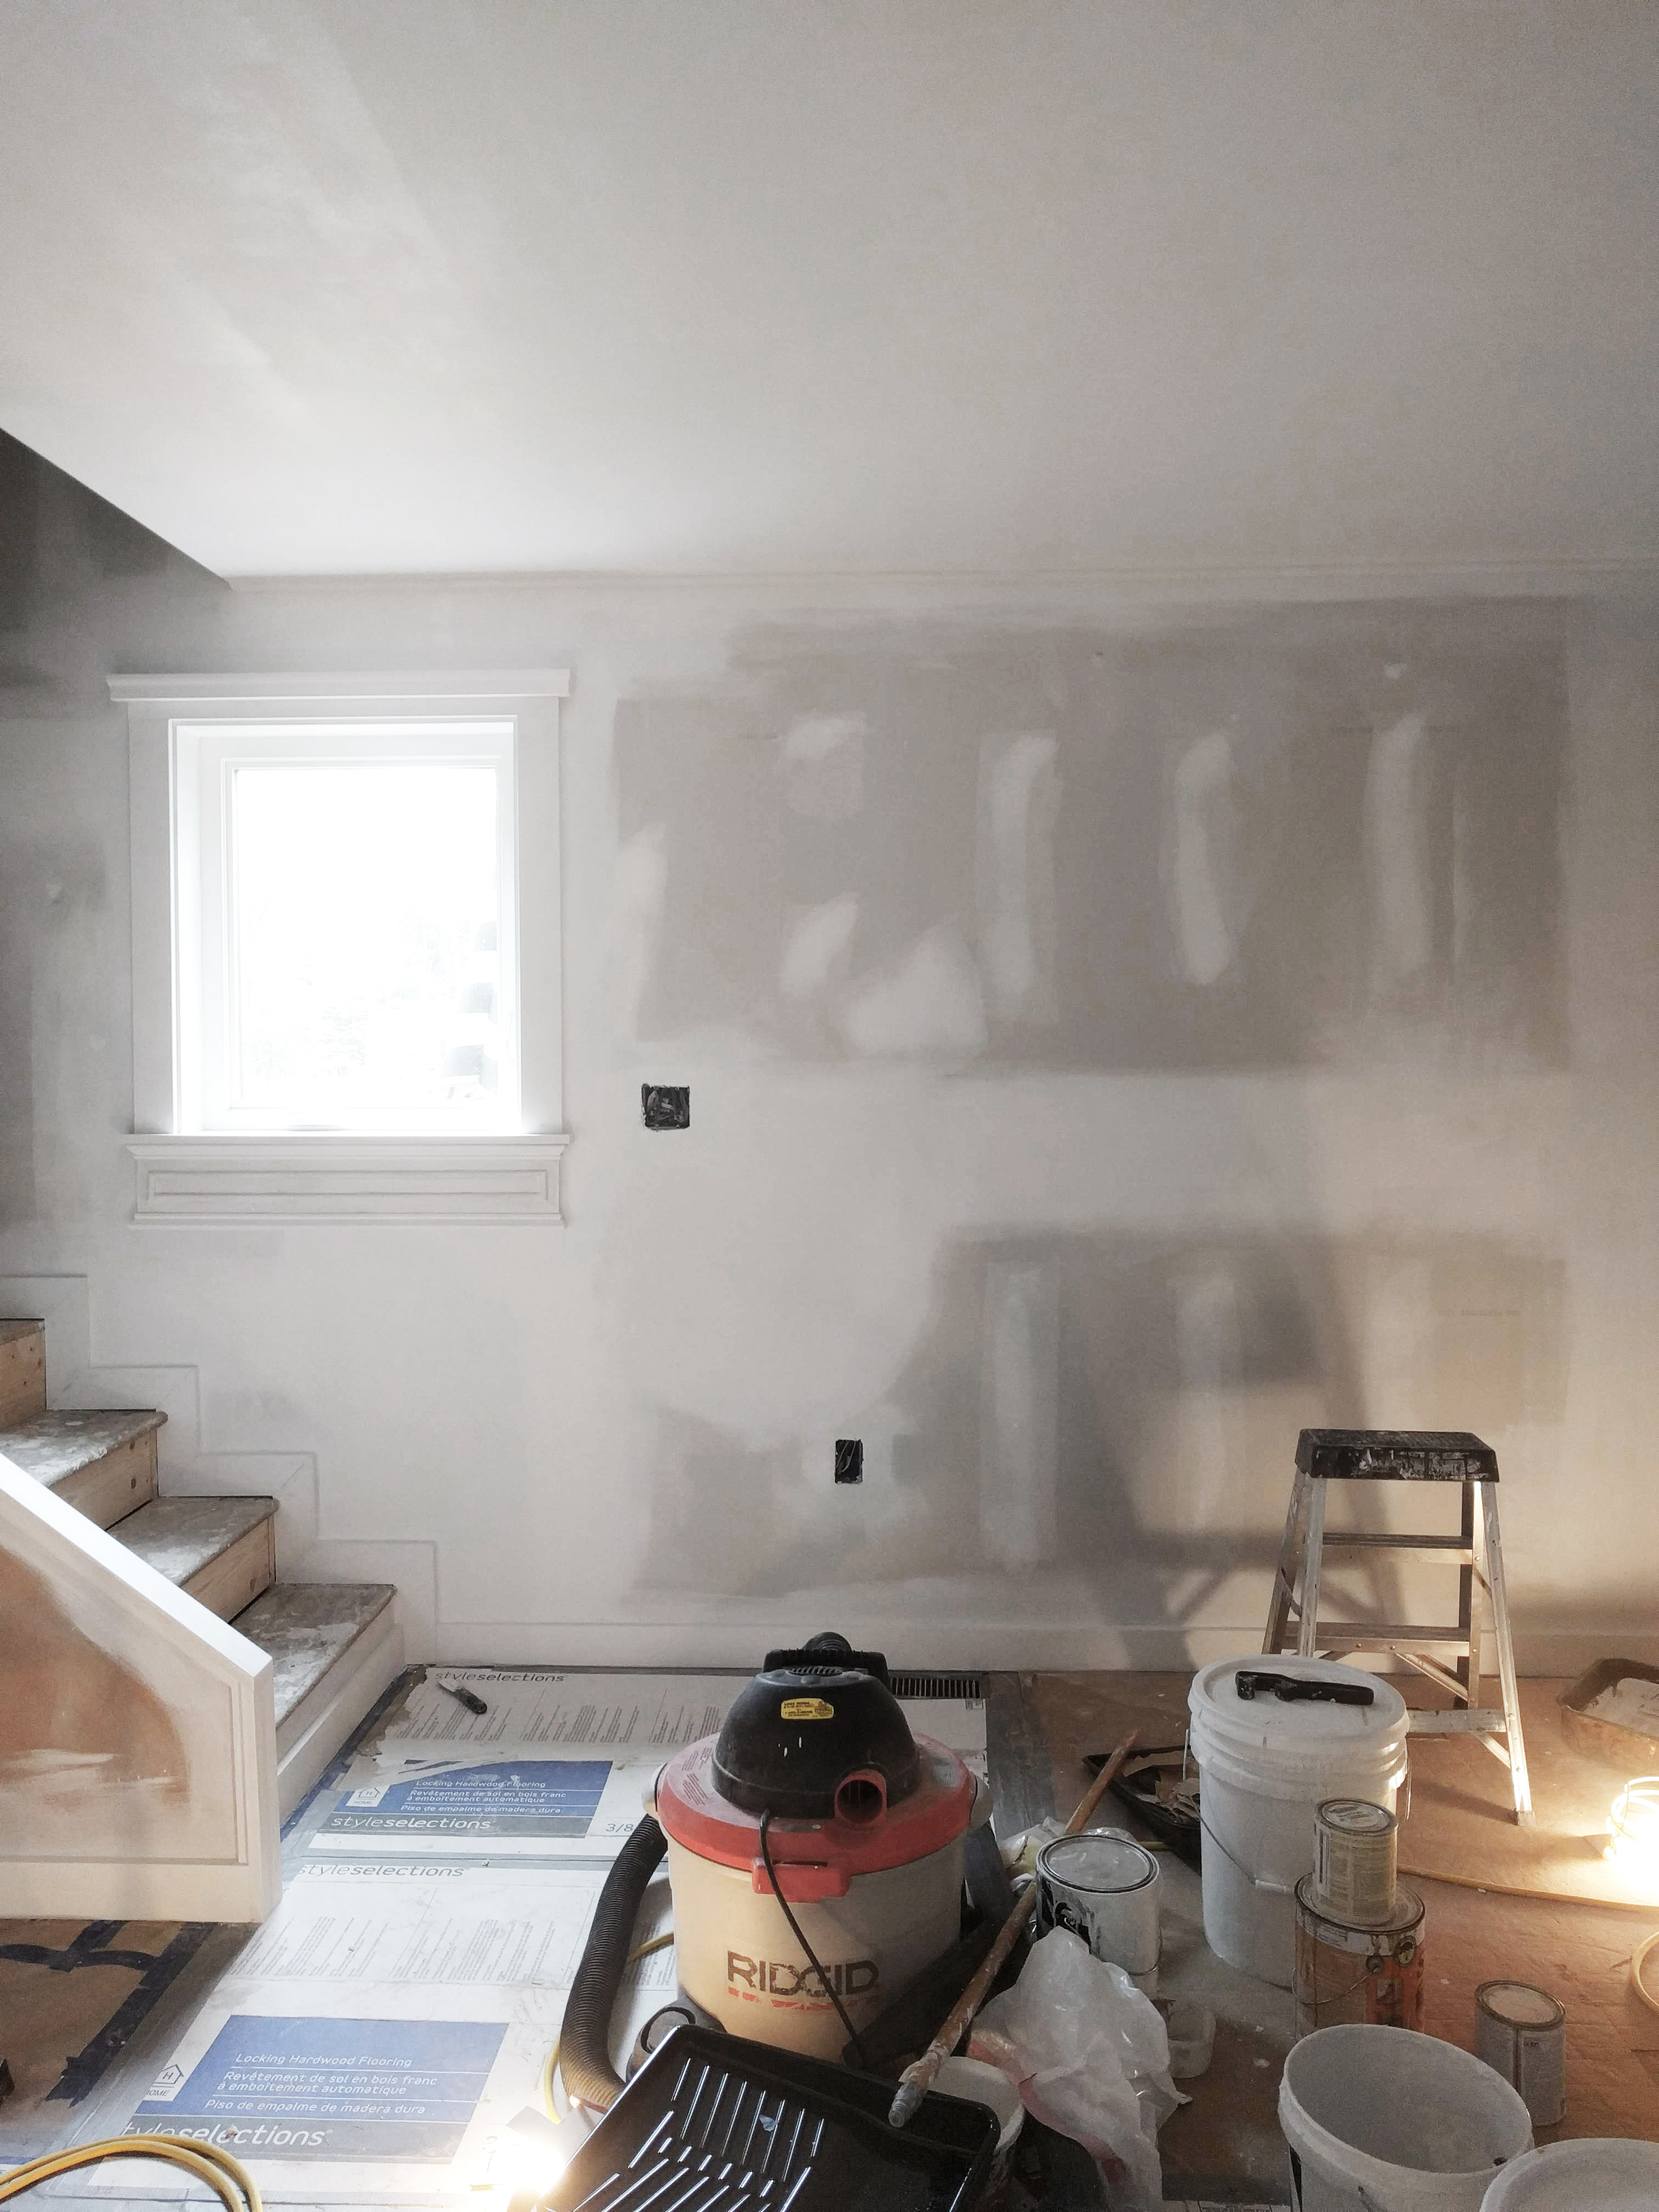
Dismantling and removing the treads, one by one.

Then, we had to pull the stringers…a pursuit which I would say was as frightening as it was freeing…hahah!

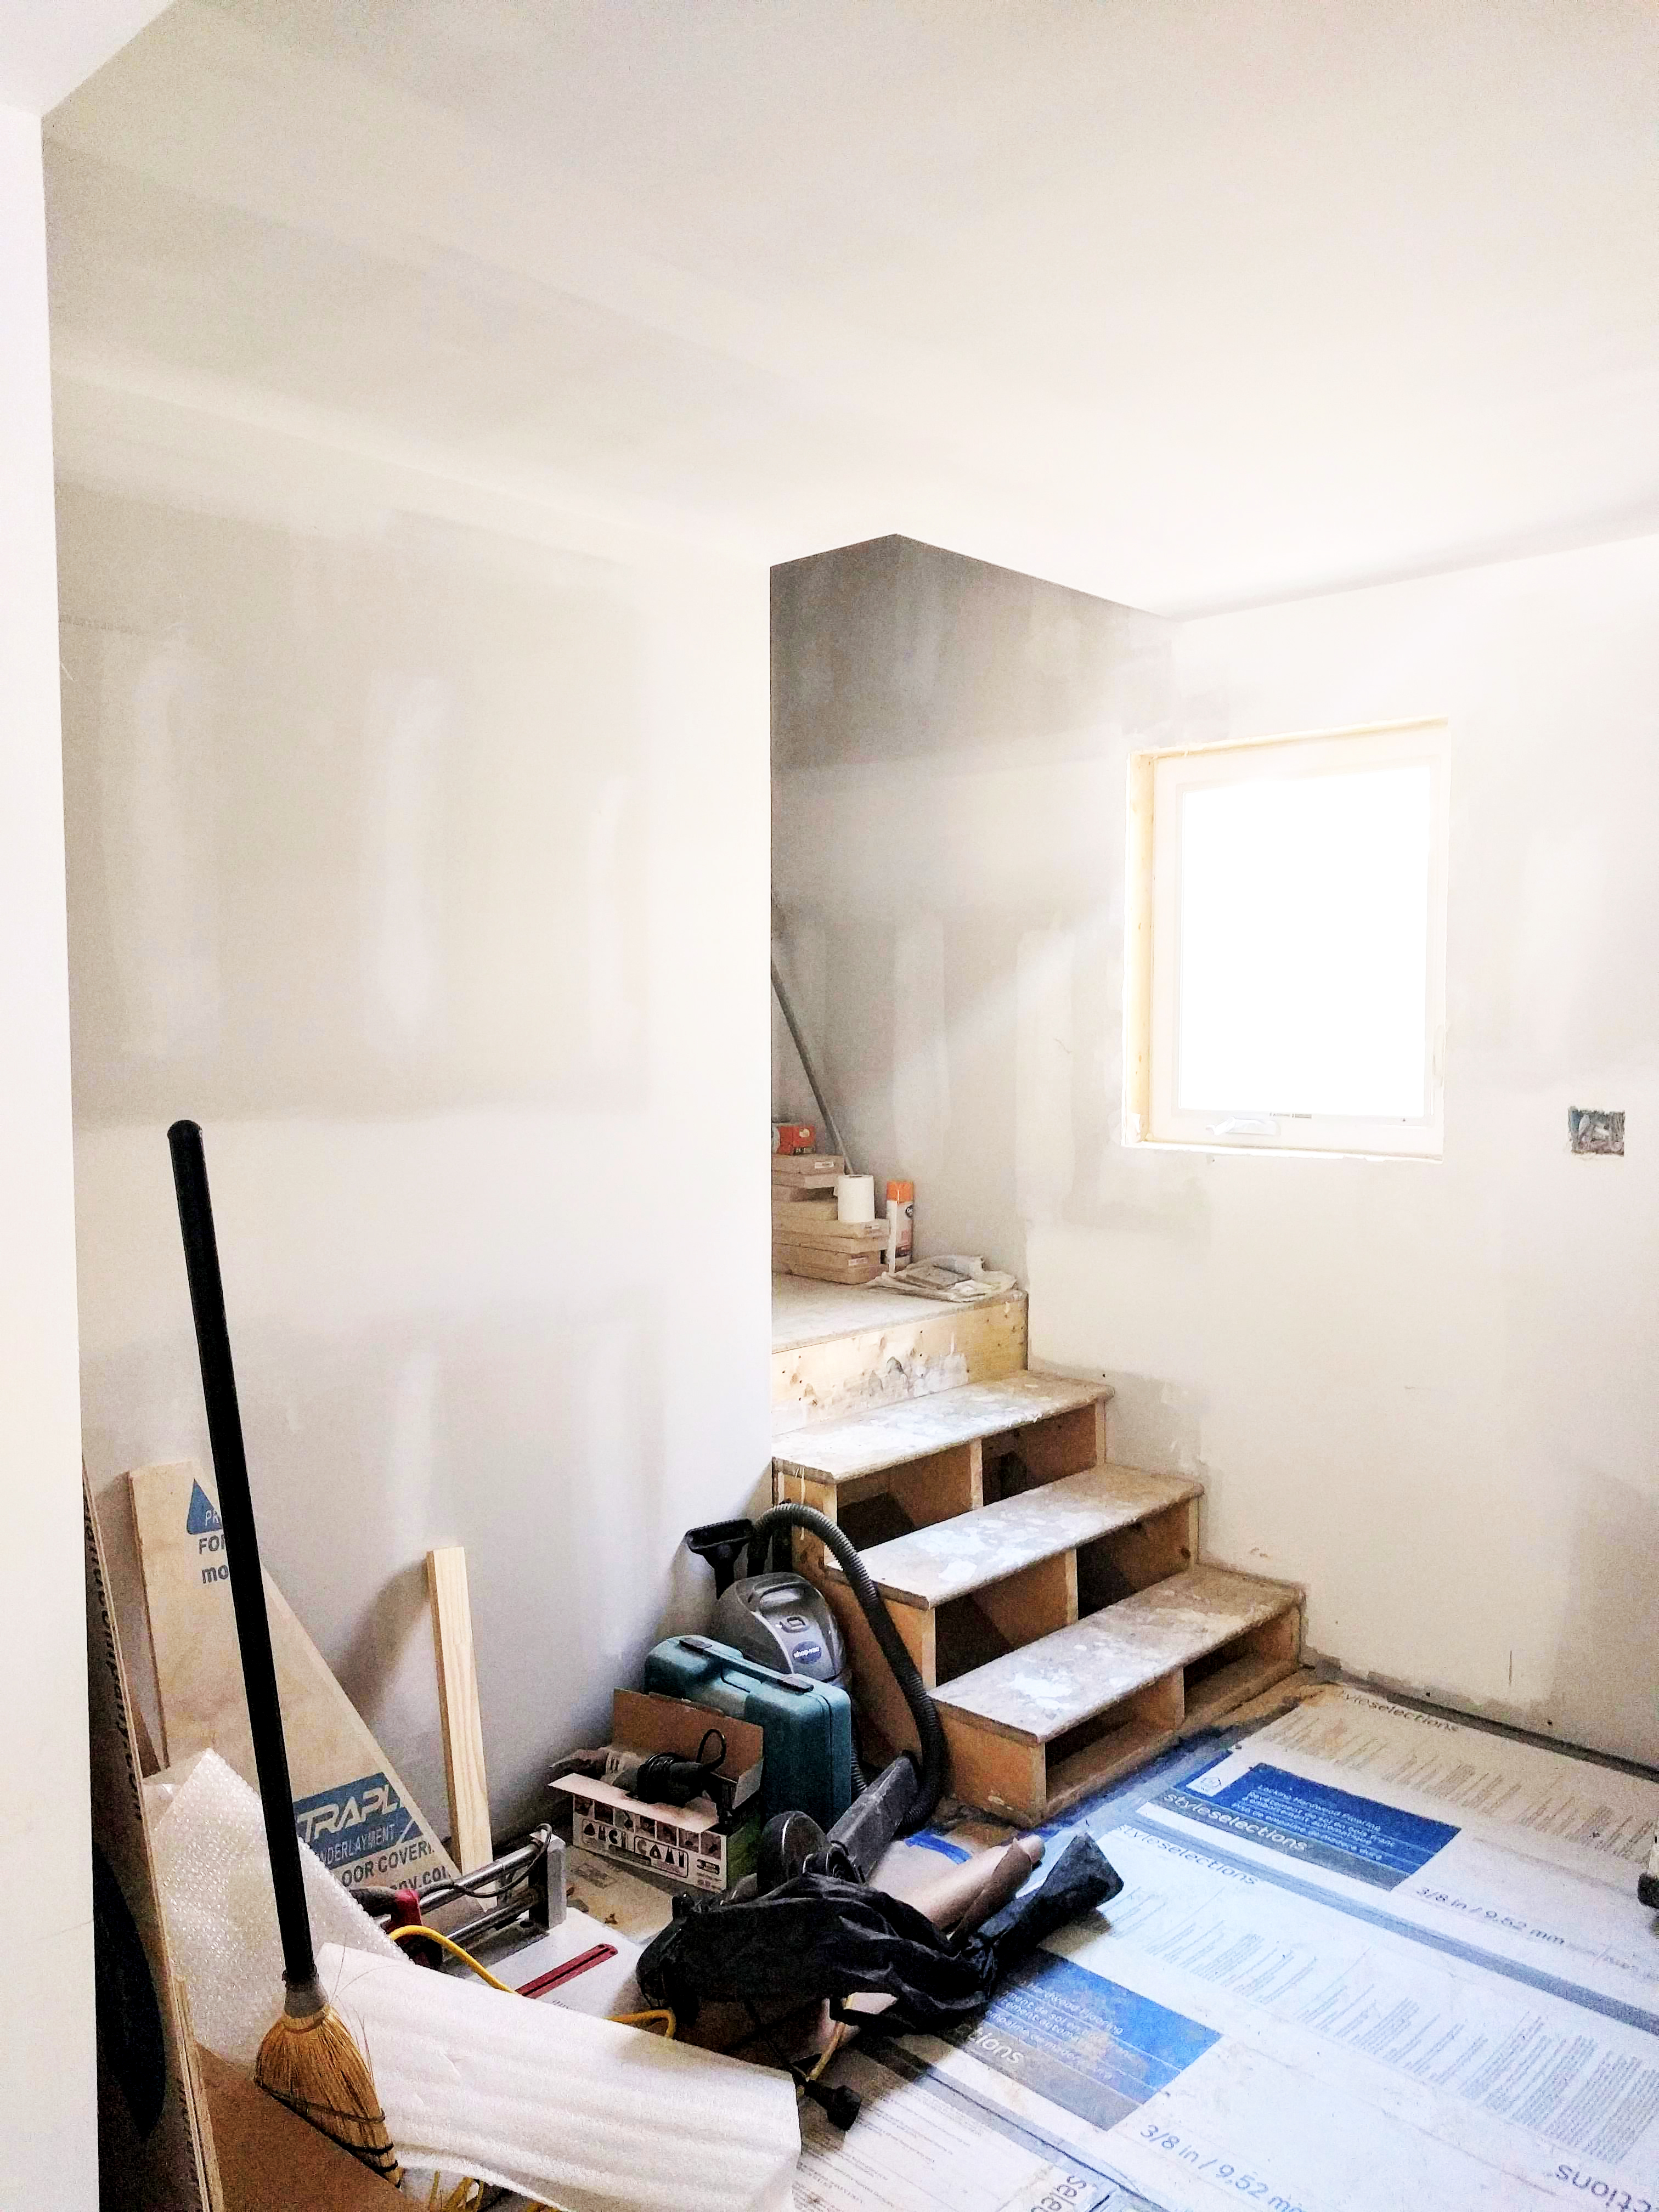
Note the utter chaos, and the witching hour in which this task was conducted. This is how we live, people…haha!

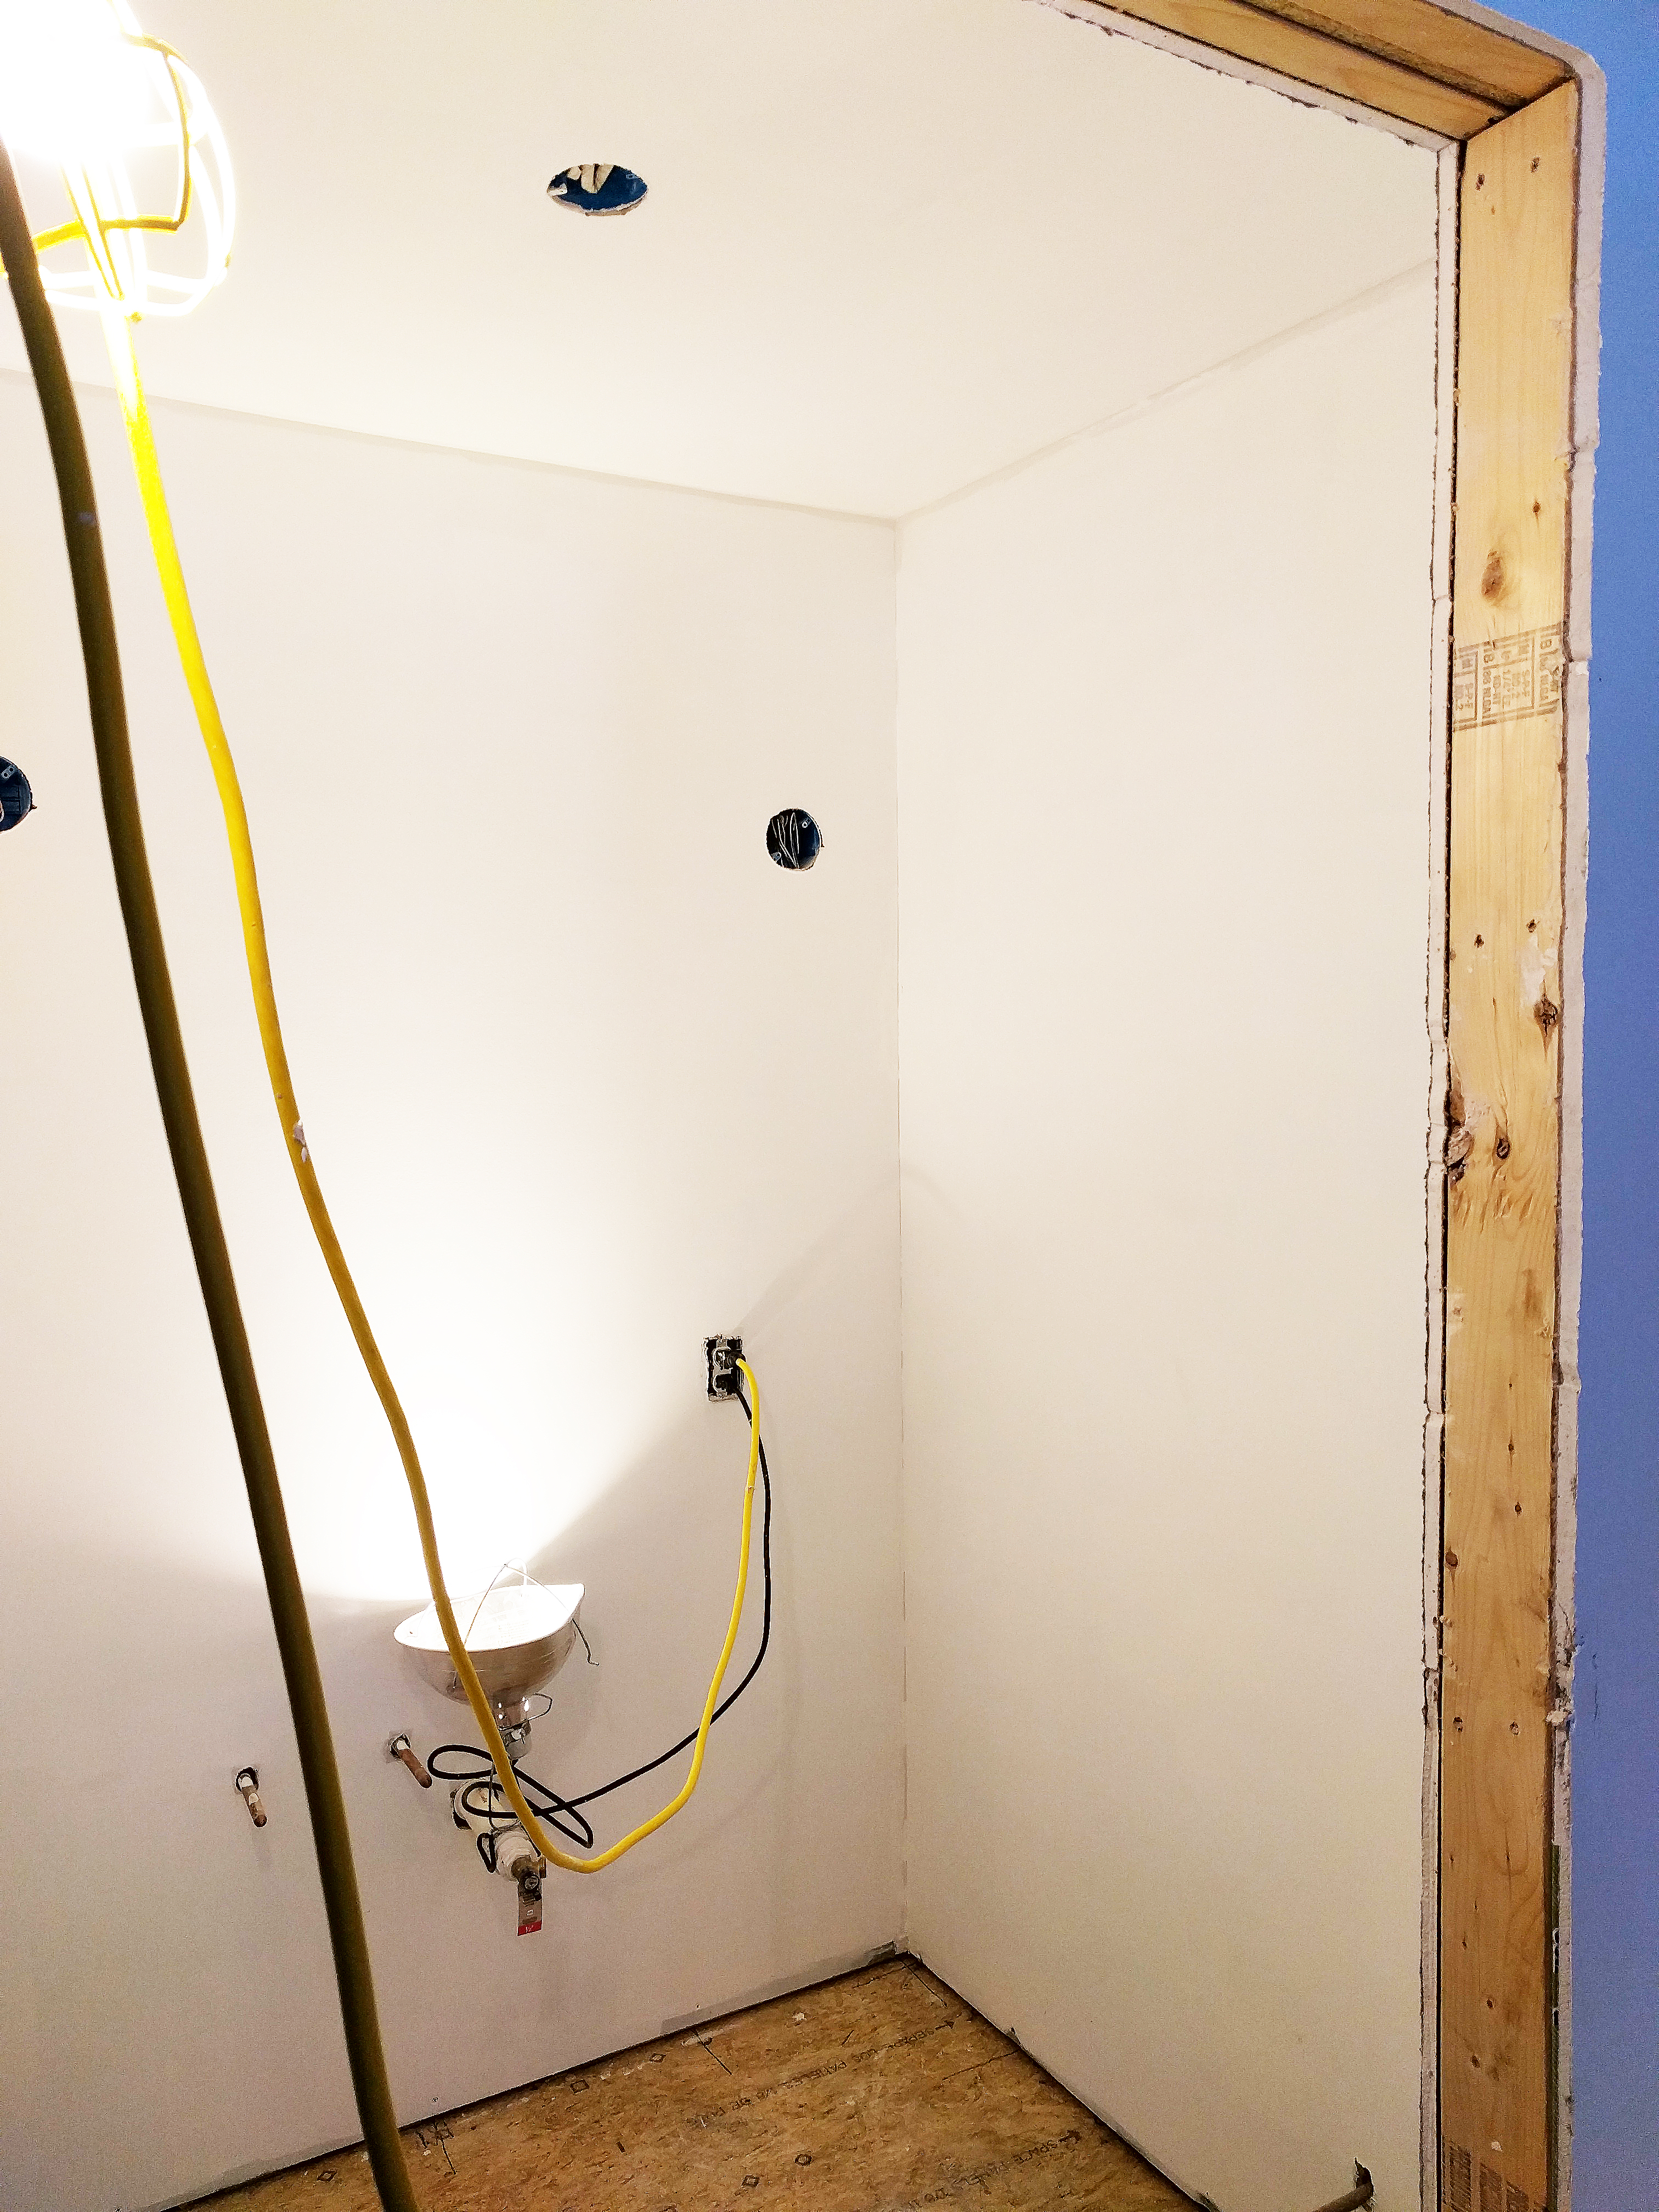
So at this stage, we had already sealed up the gaping hole in the ceiling which was left behind by the now absent staircase, as is evidenced by the raw wood planking in its place. The plan now involved stripping the millwork and shelving from the existent bookshelf area to create a continuous run of built-ins along that angled wall. I wanted this space to function as a family room as it occupies the heart of the home (due to its proximity to the kitchen), while also evoking the vibe that we’ve created in the addition since both areas are now contiguous. And so began the carpentry…

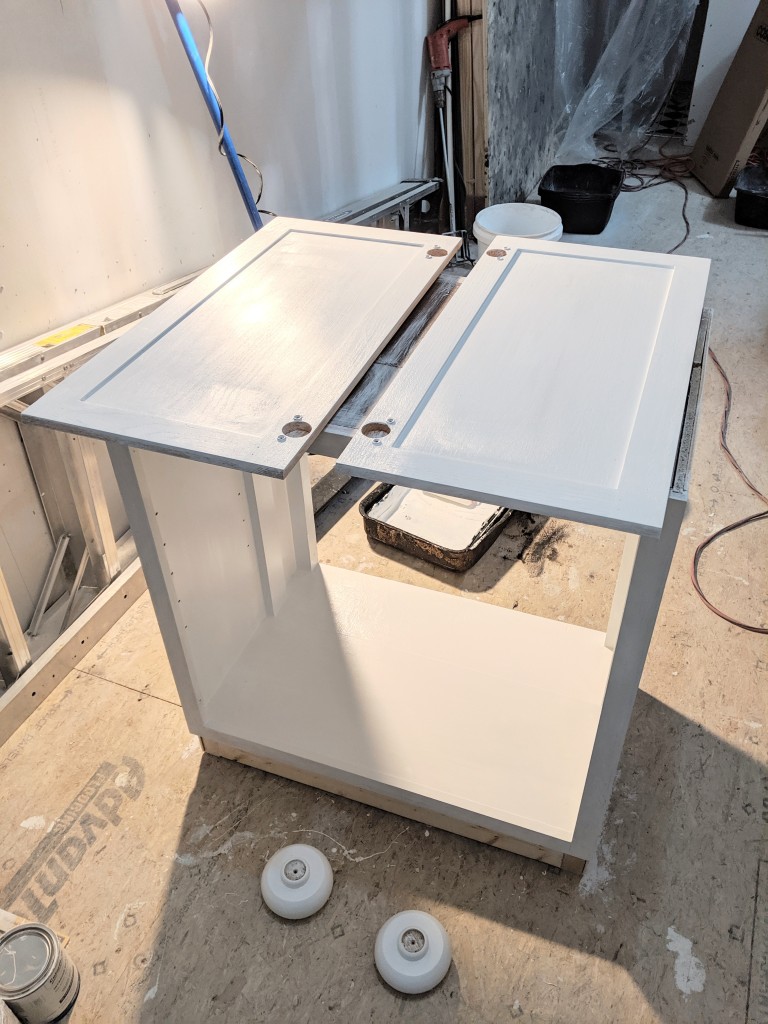
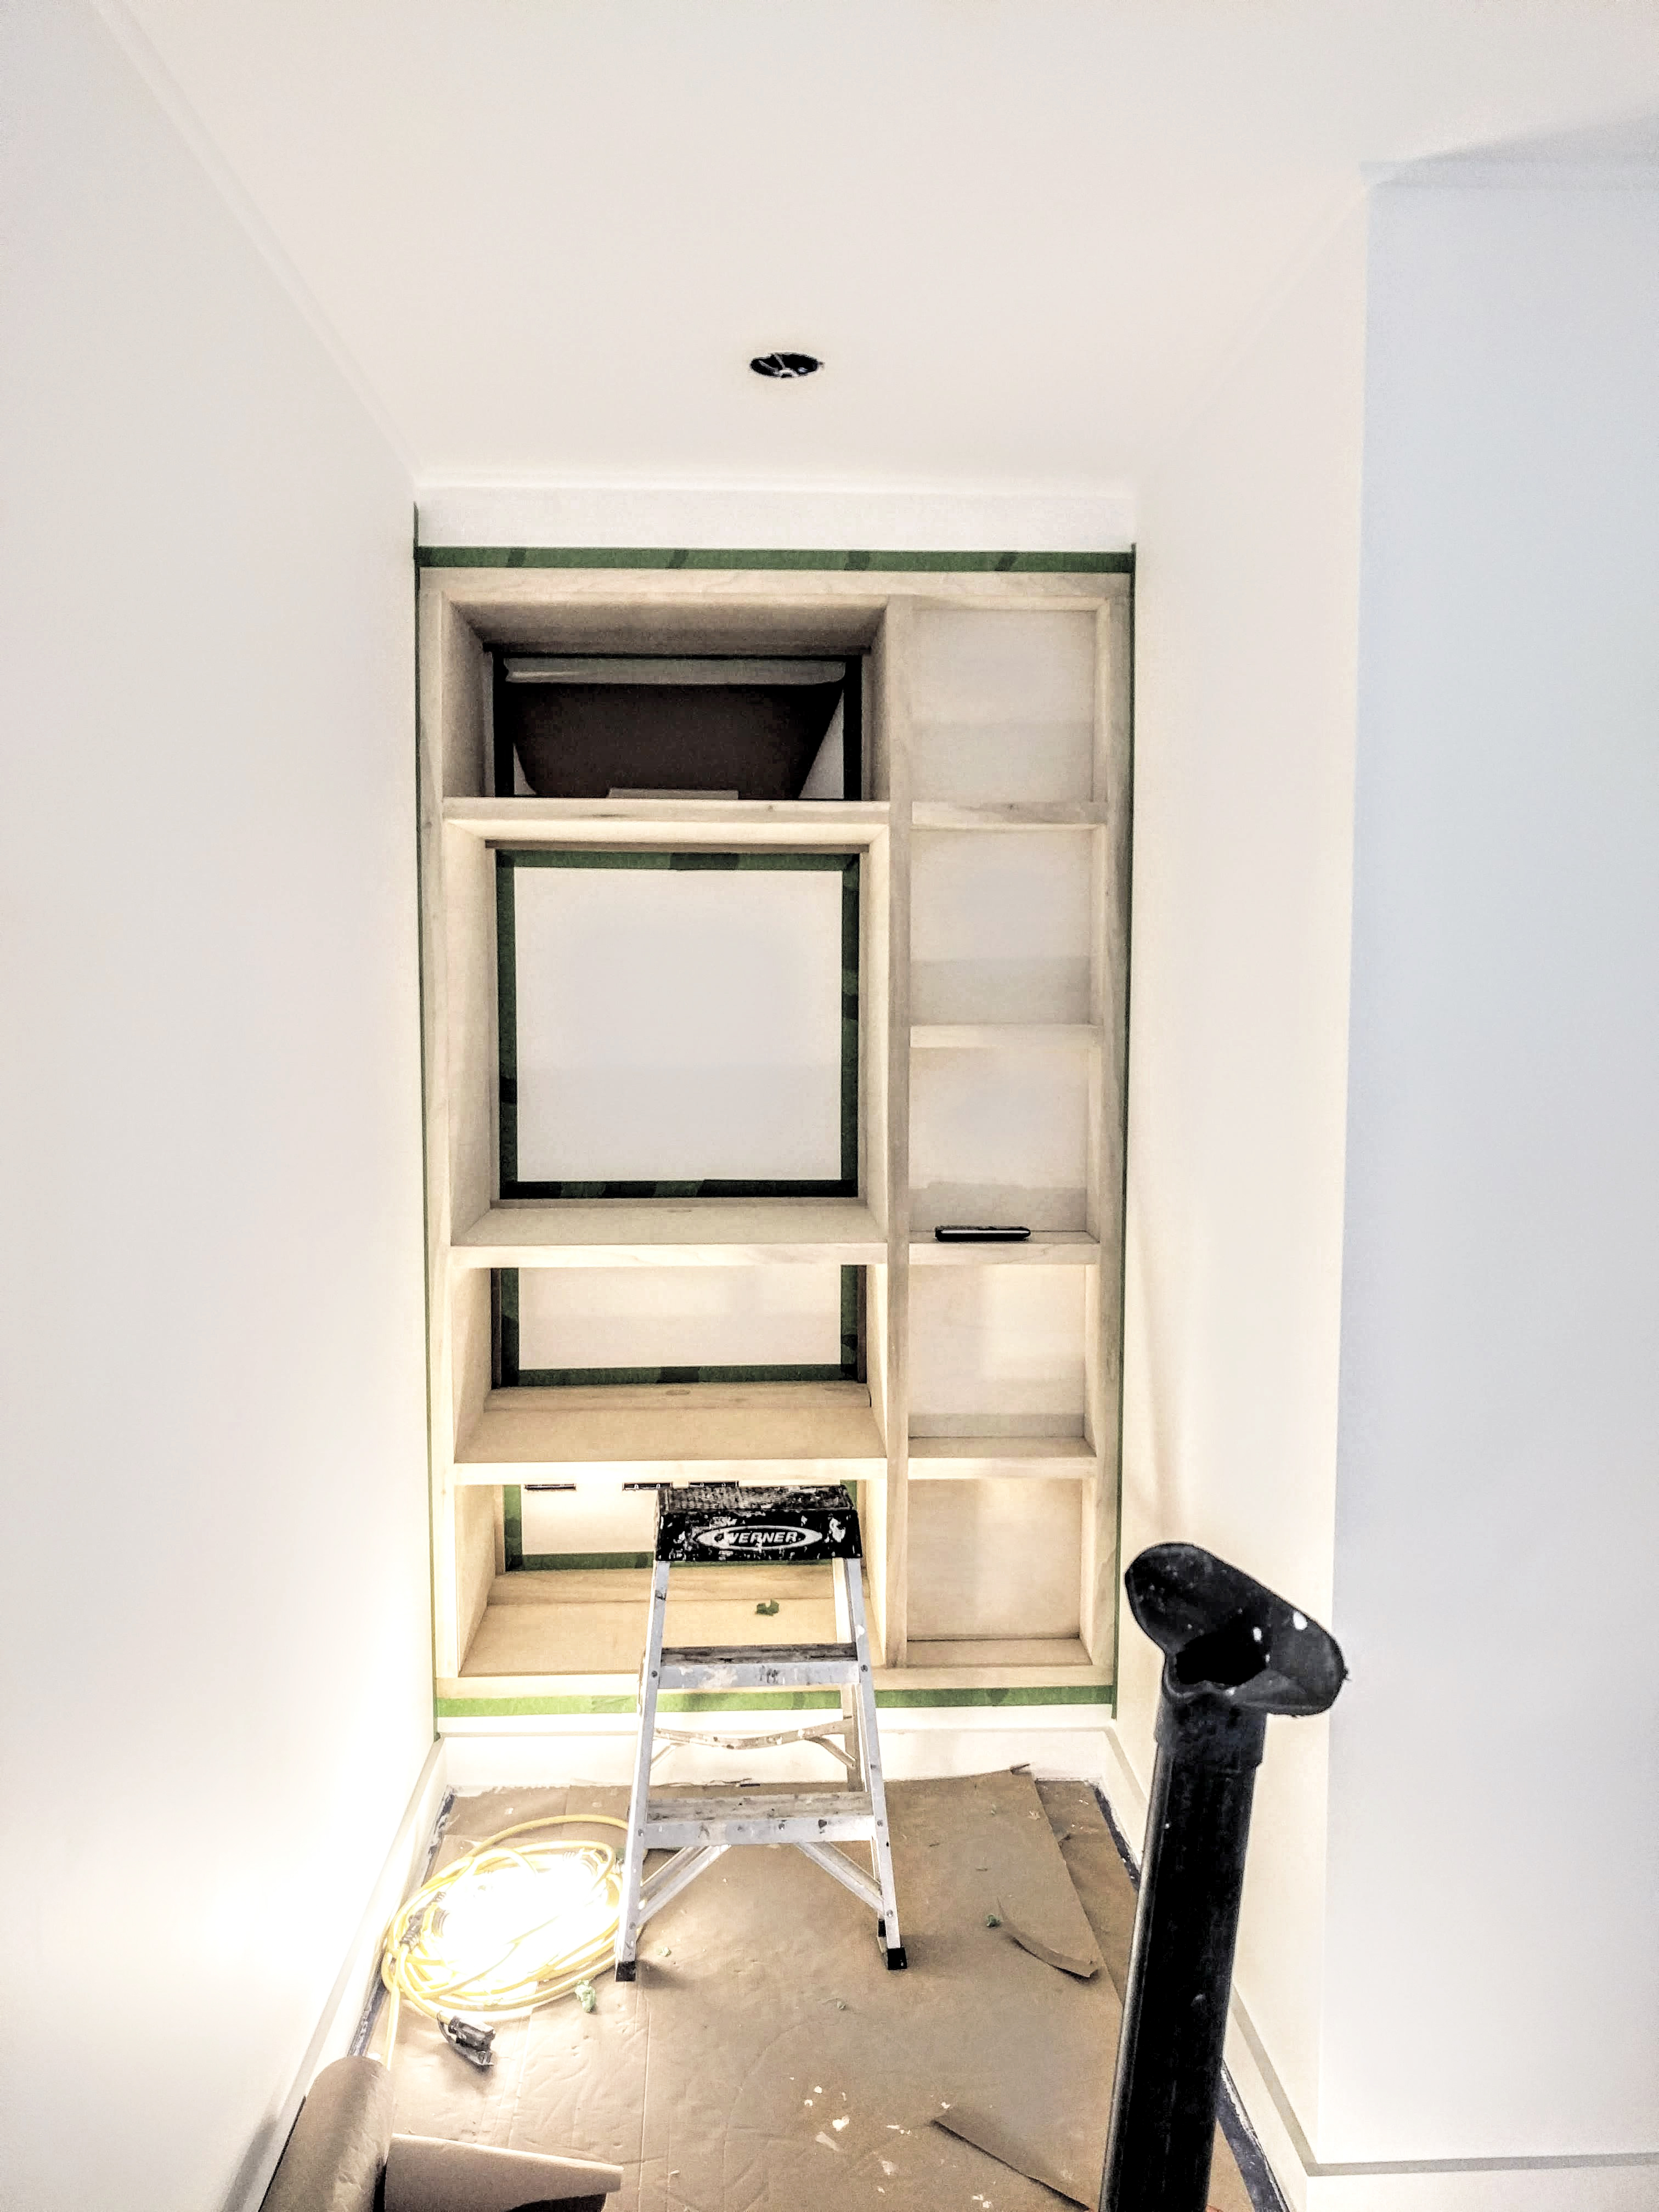
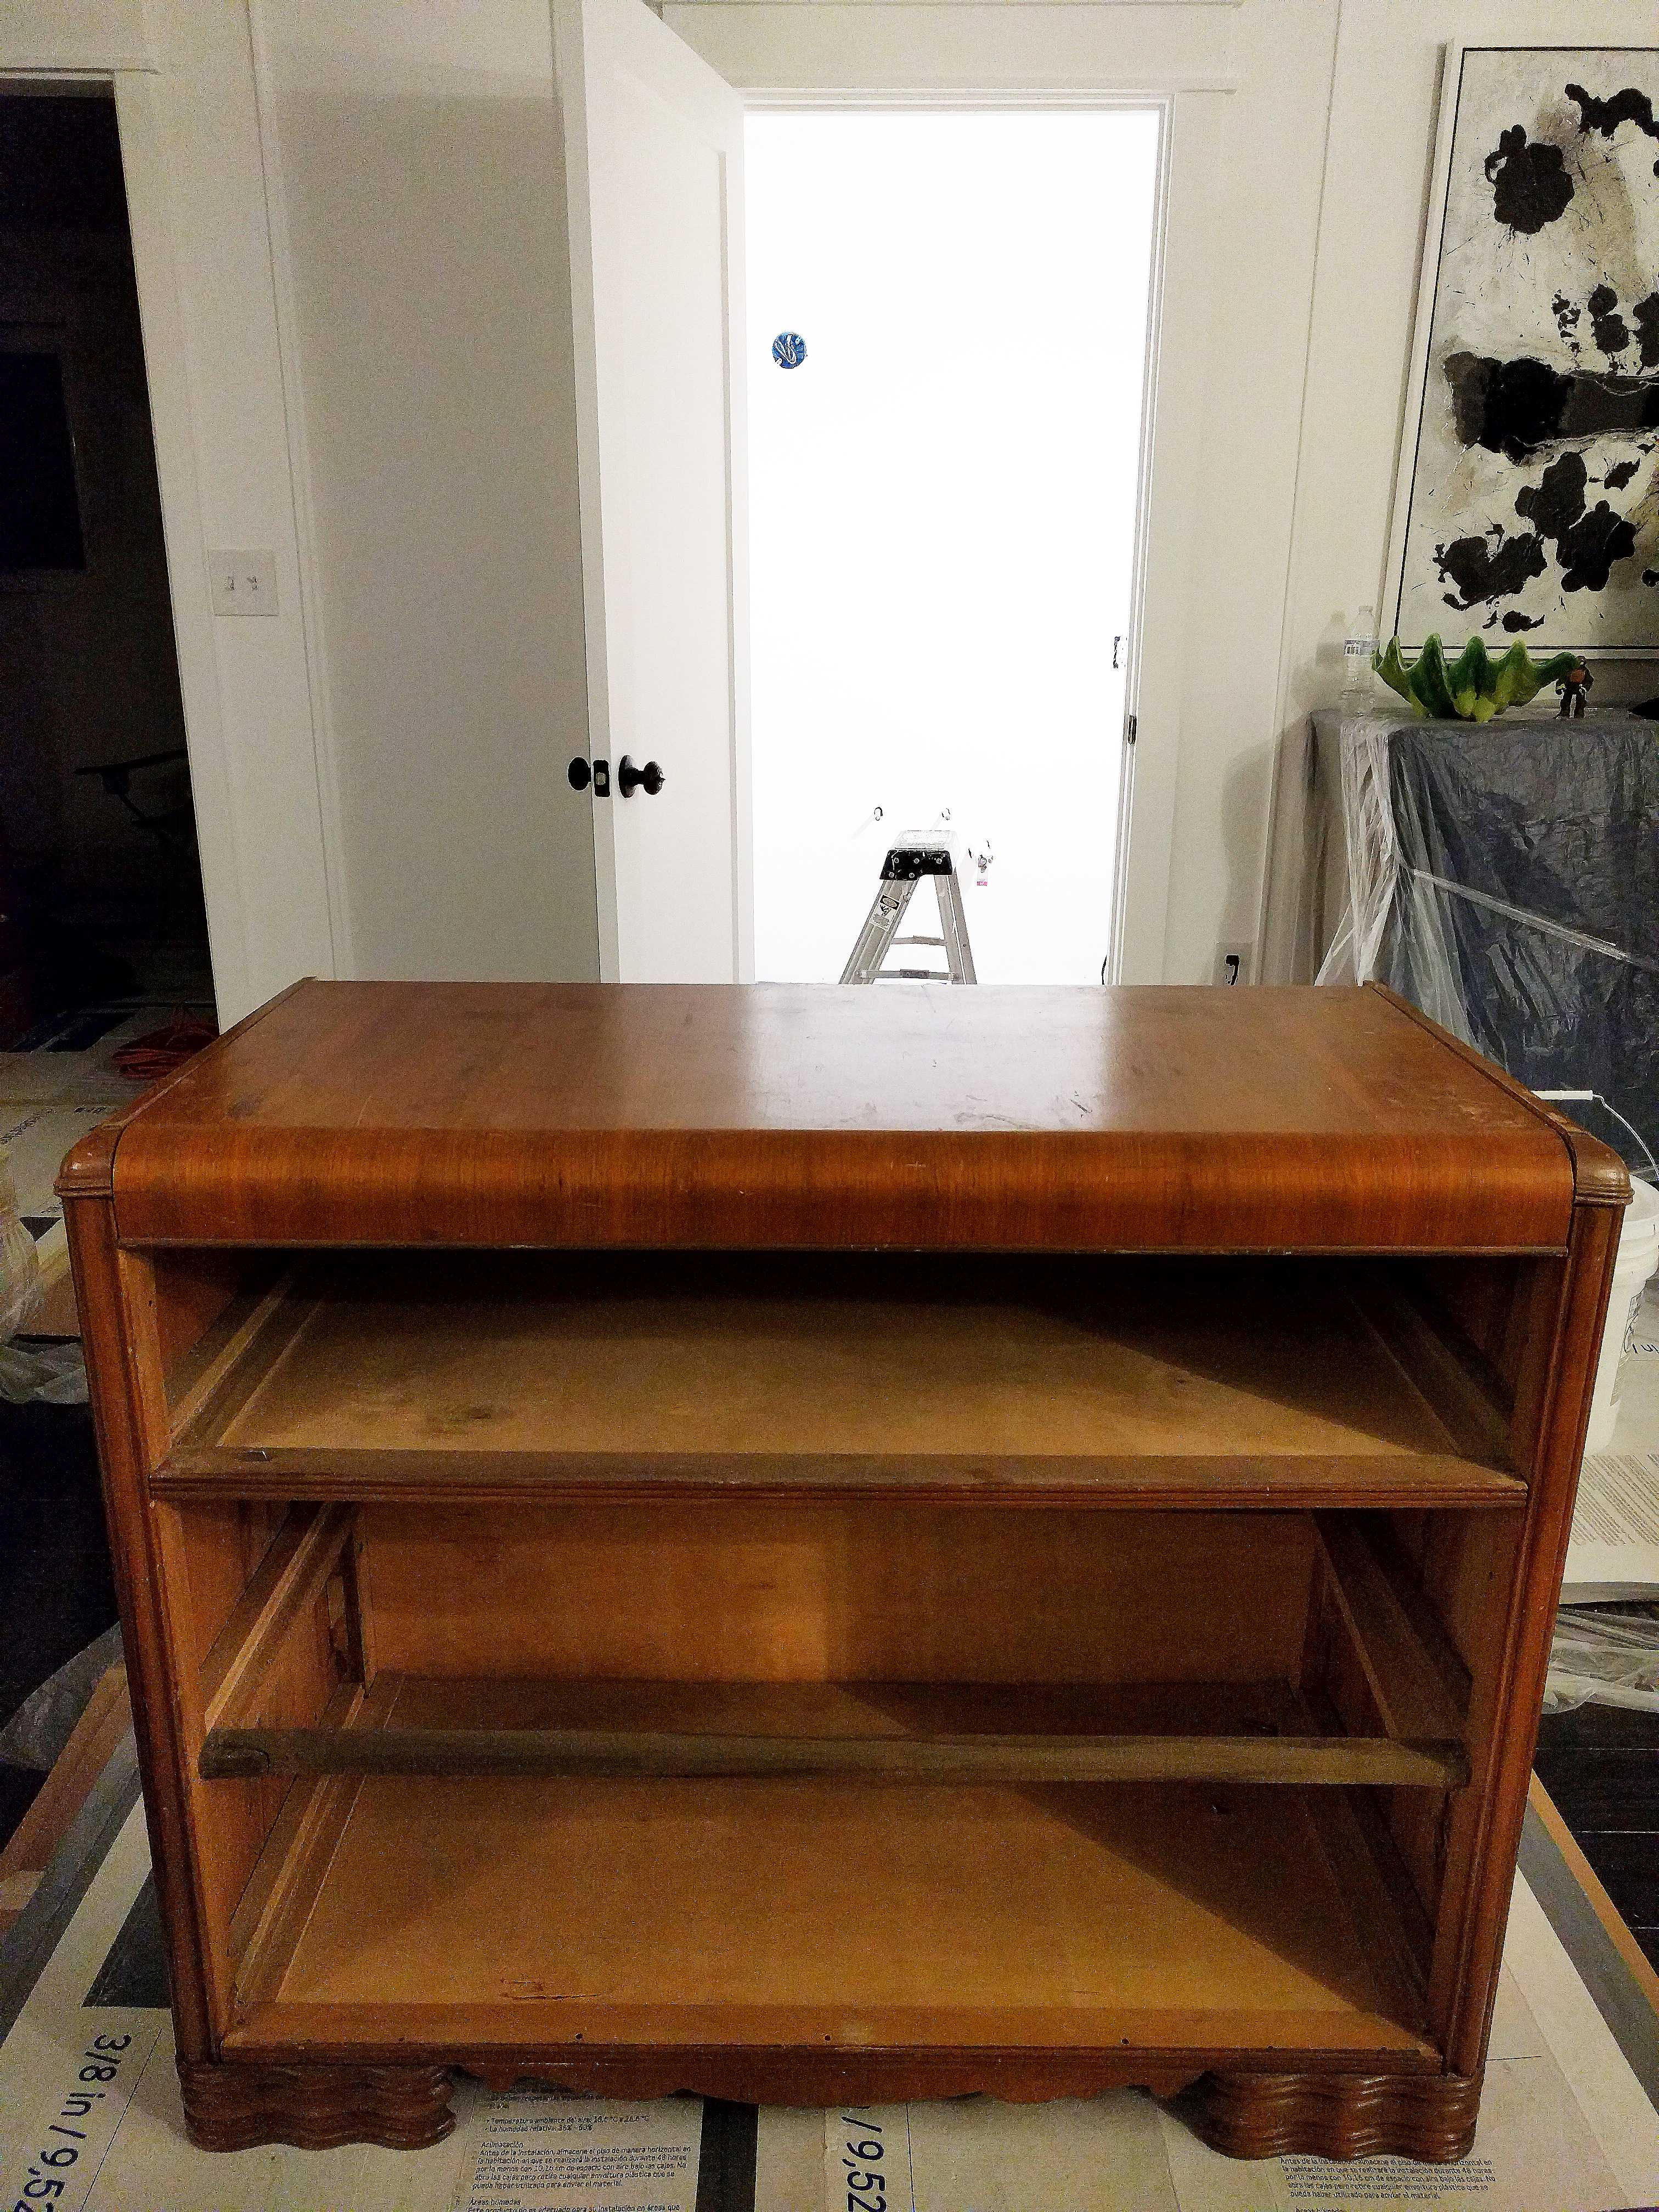
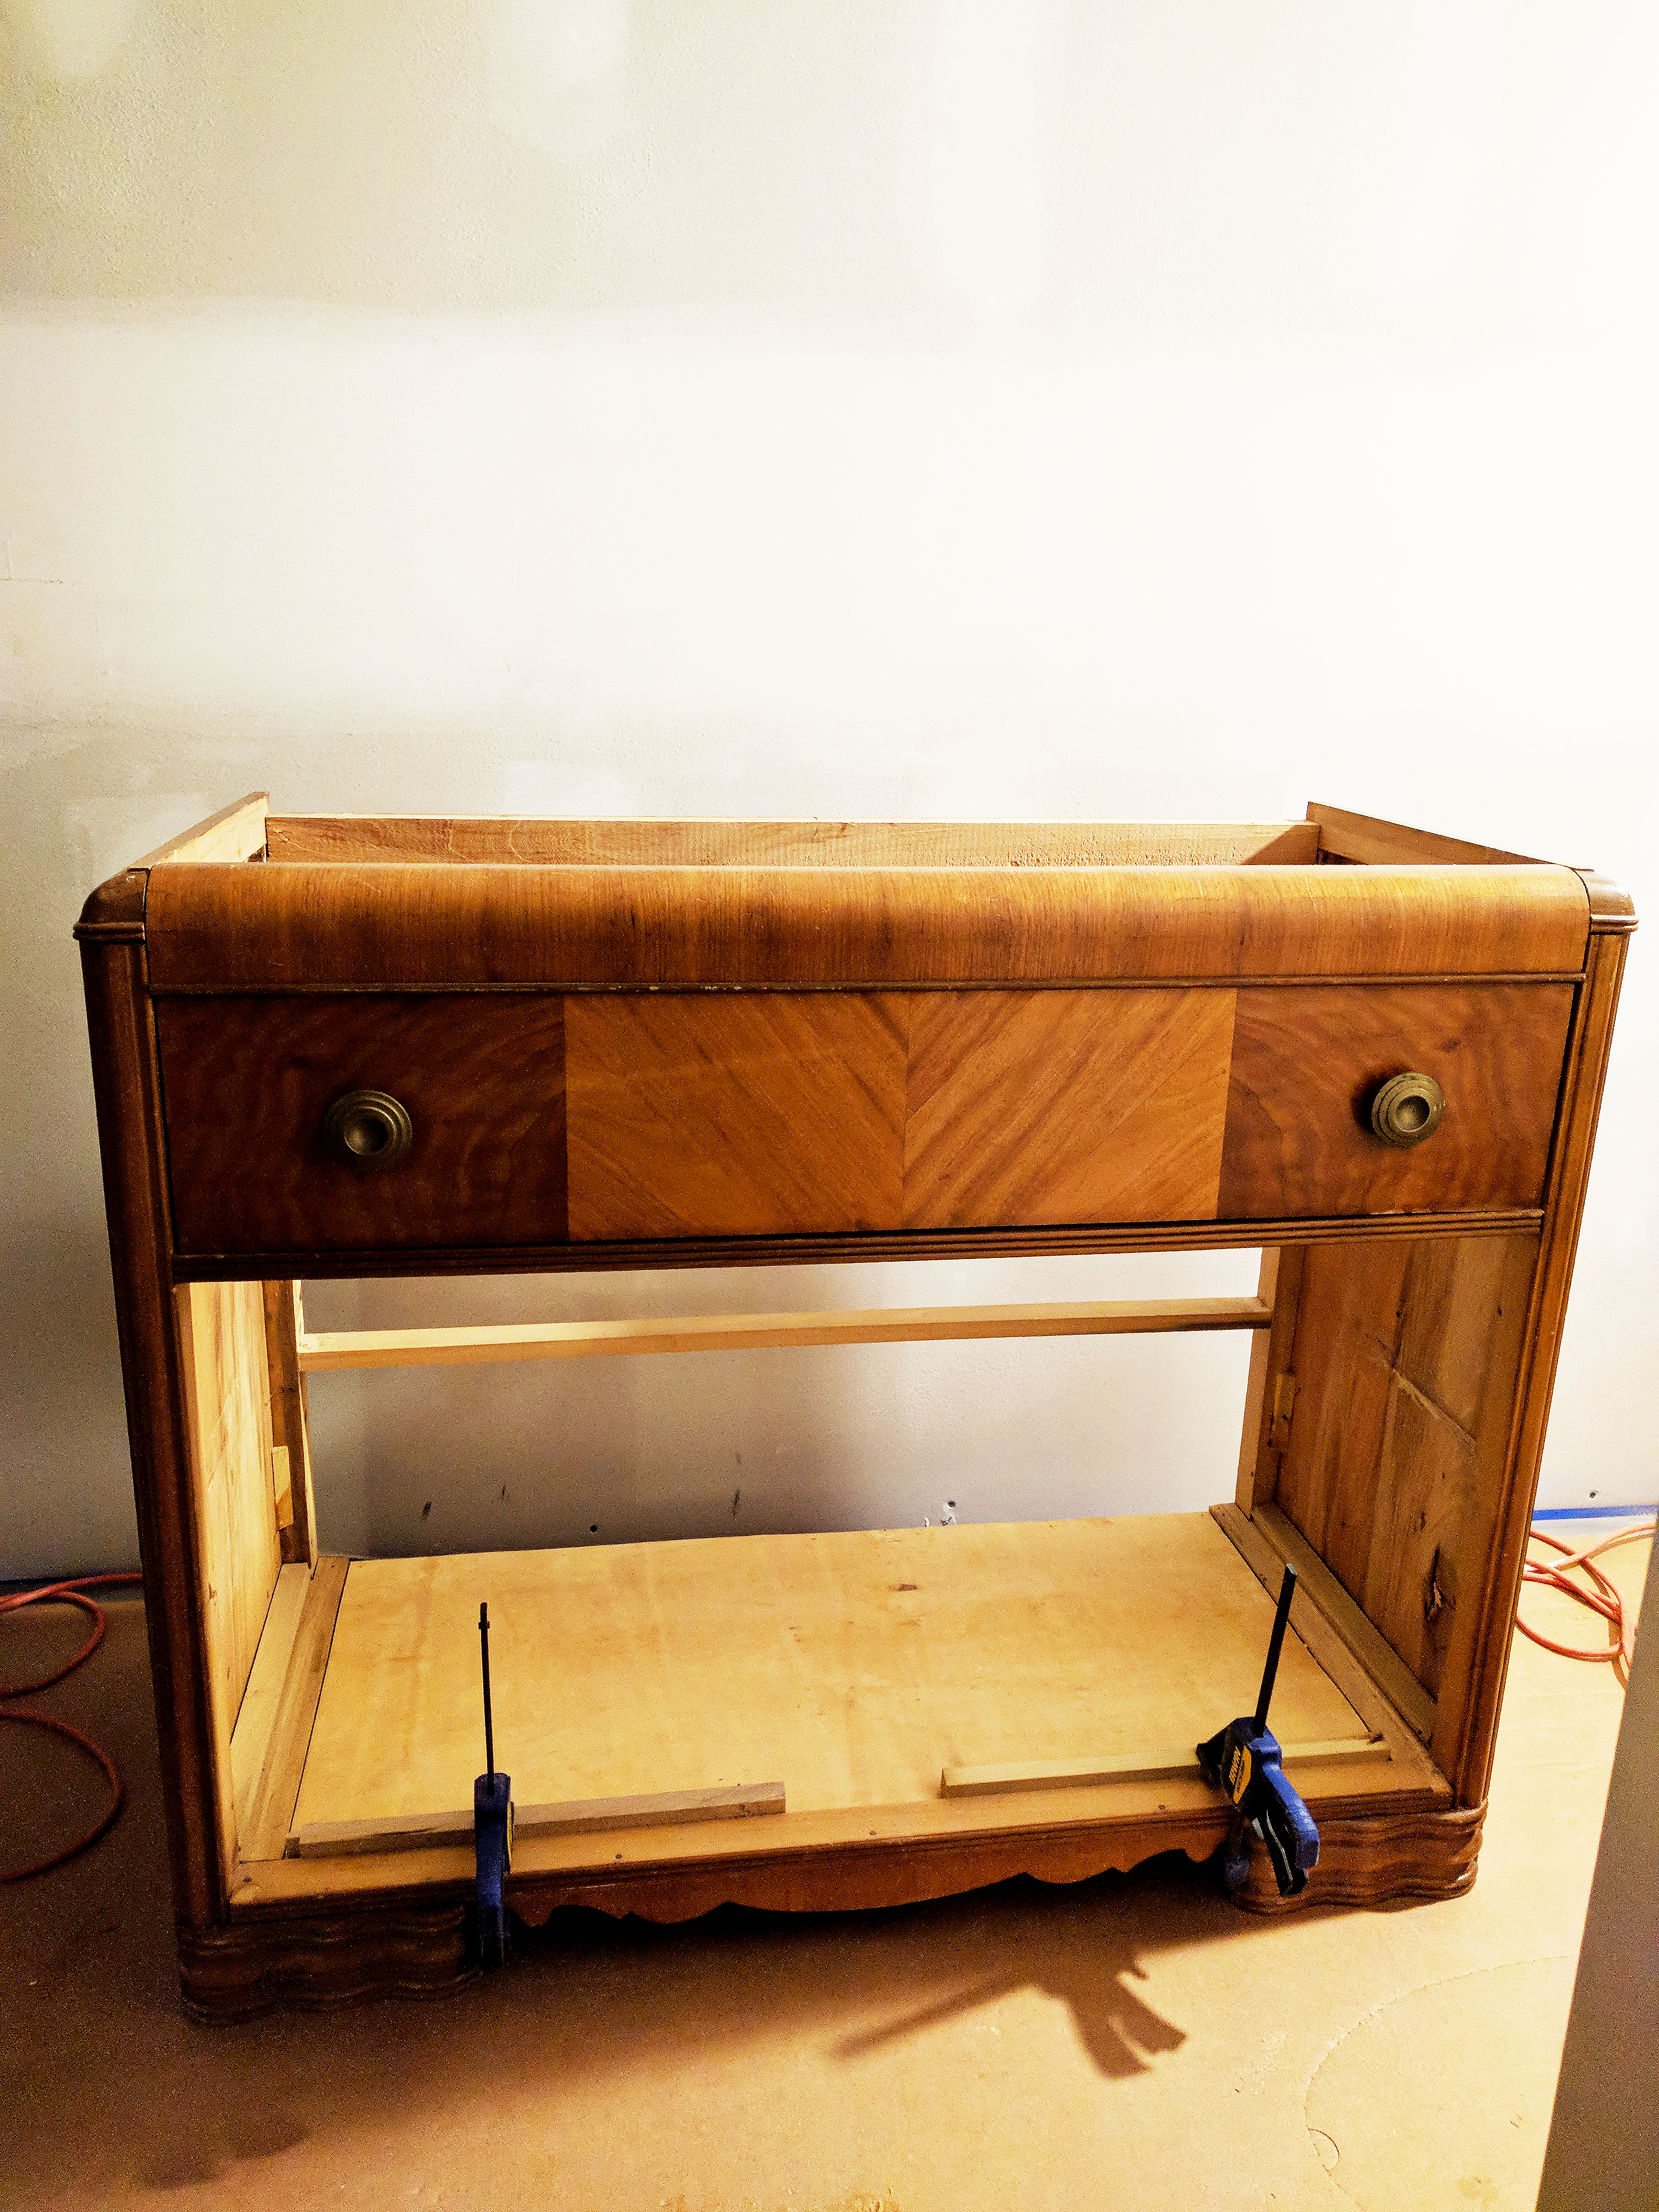
The built-ins were designed to incorporate shelves for books, and the lower cabinets for storage of all the things ranging from electronics and games to art/crafting supplies. Here, we were stripping everything down and doing preliminary measurements.

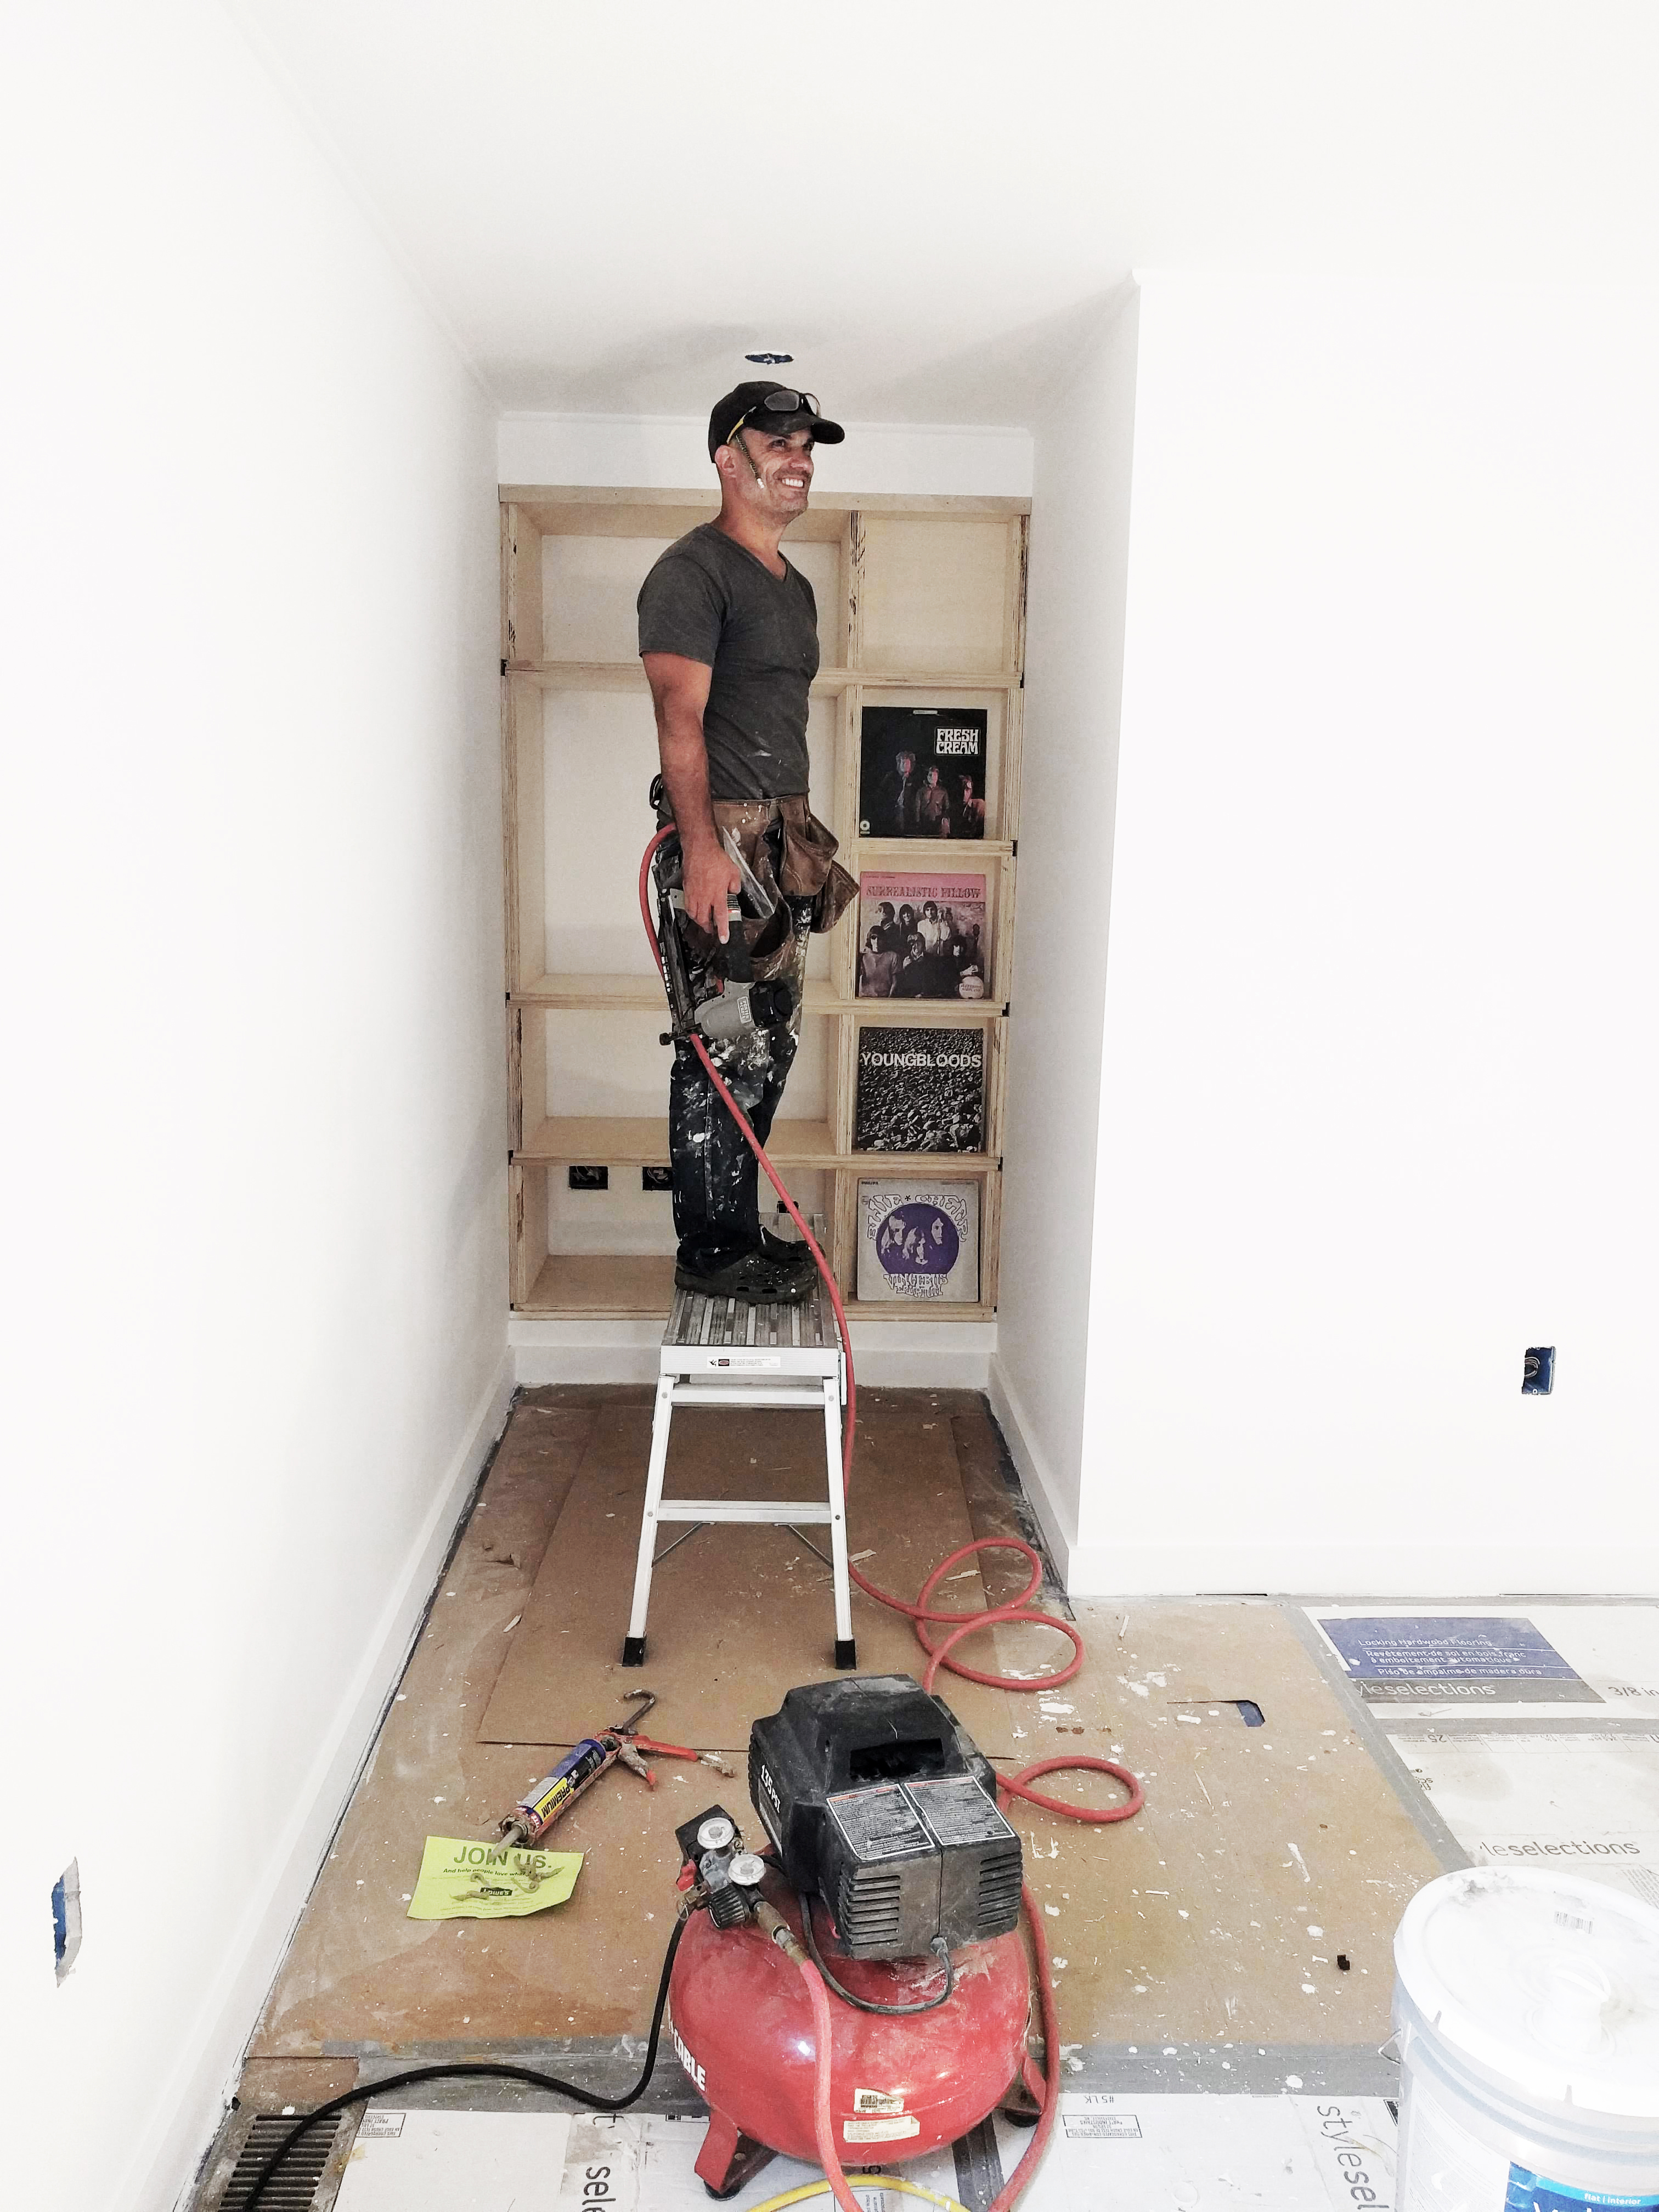
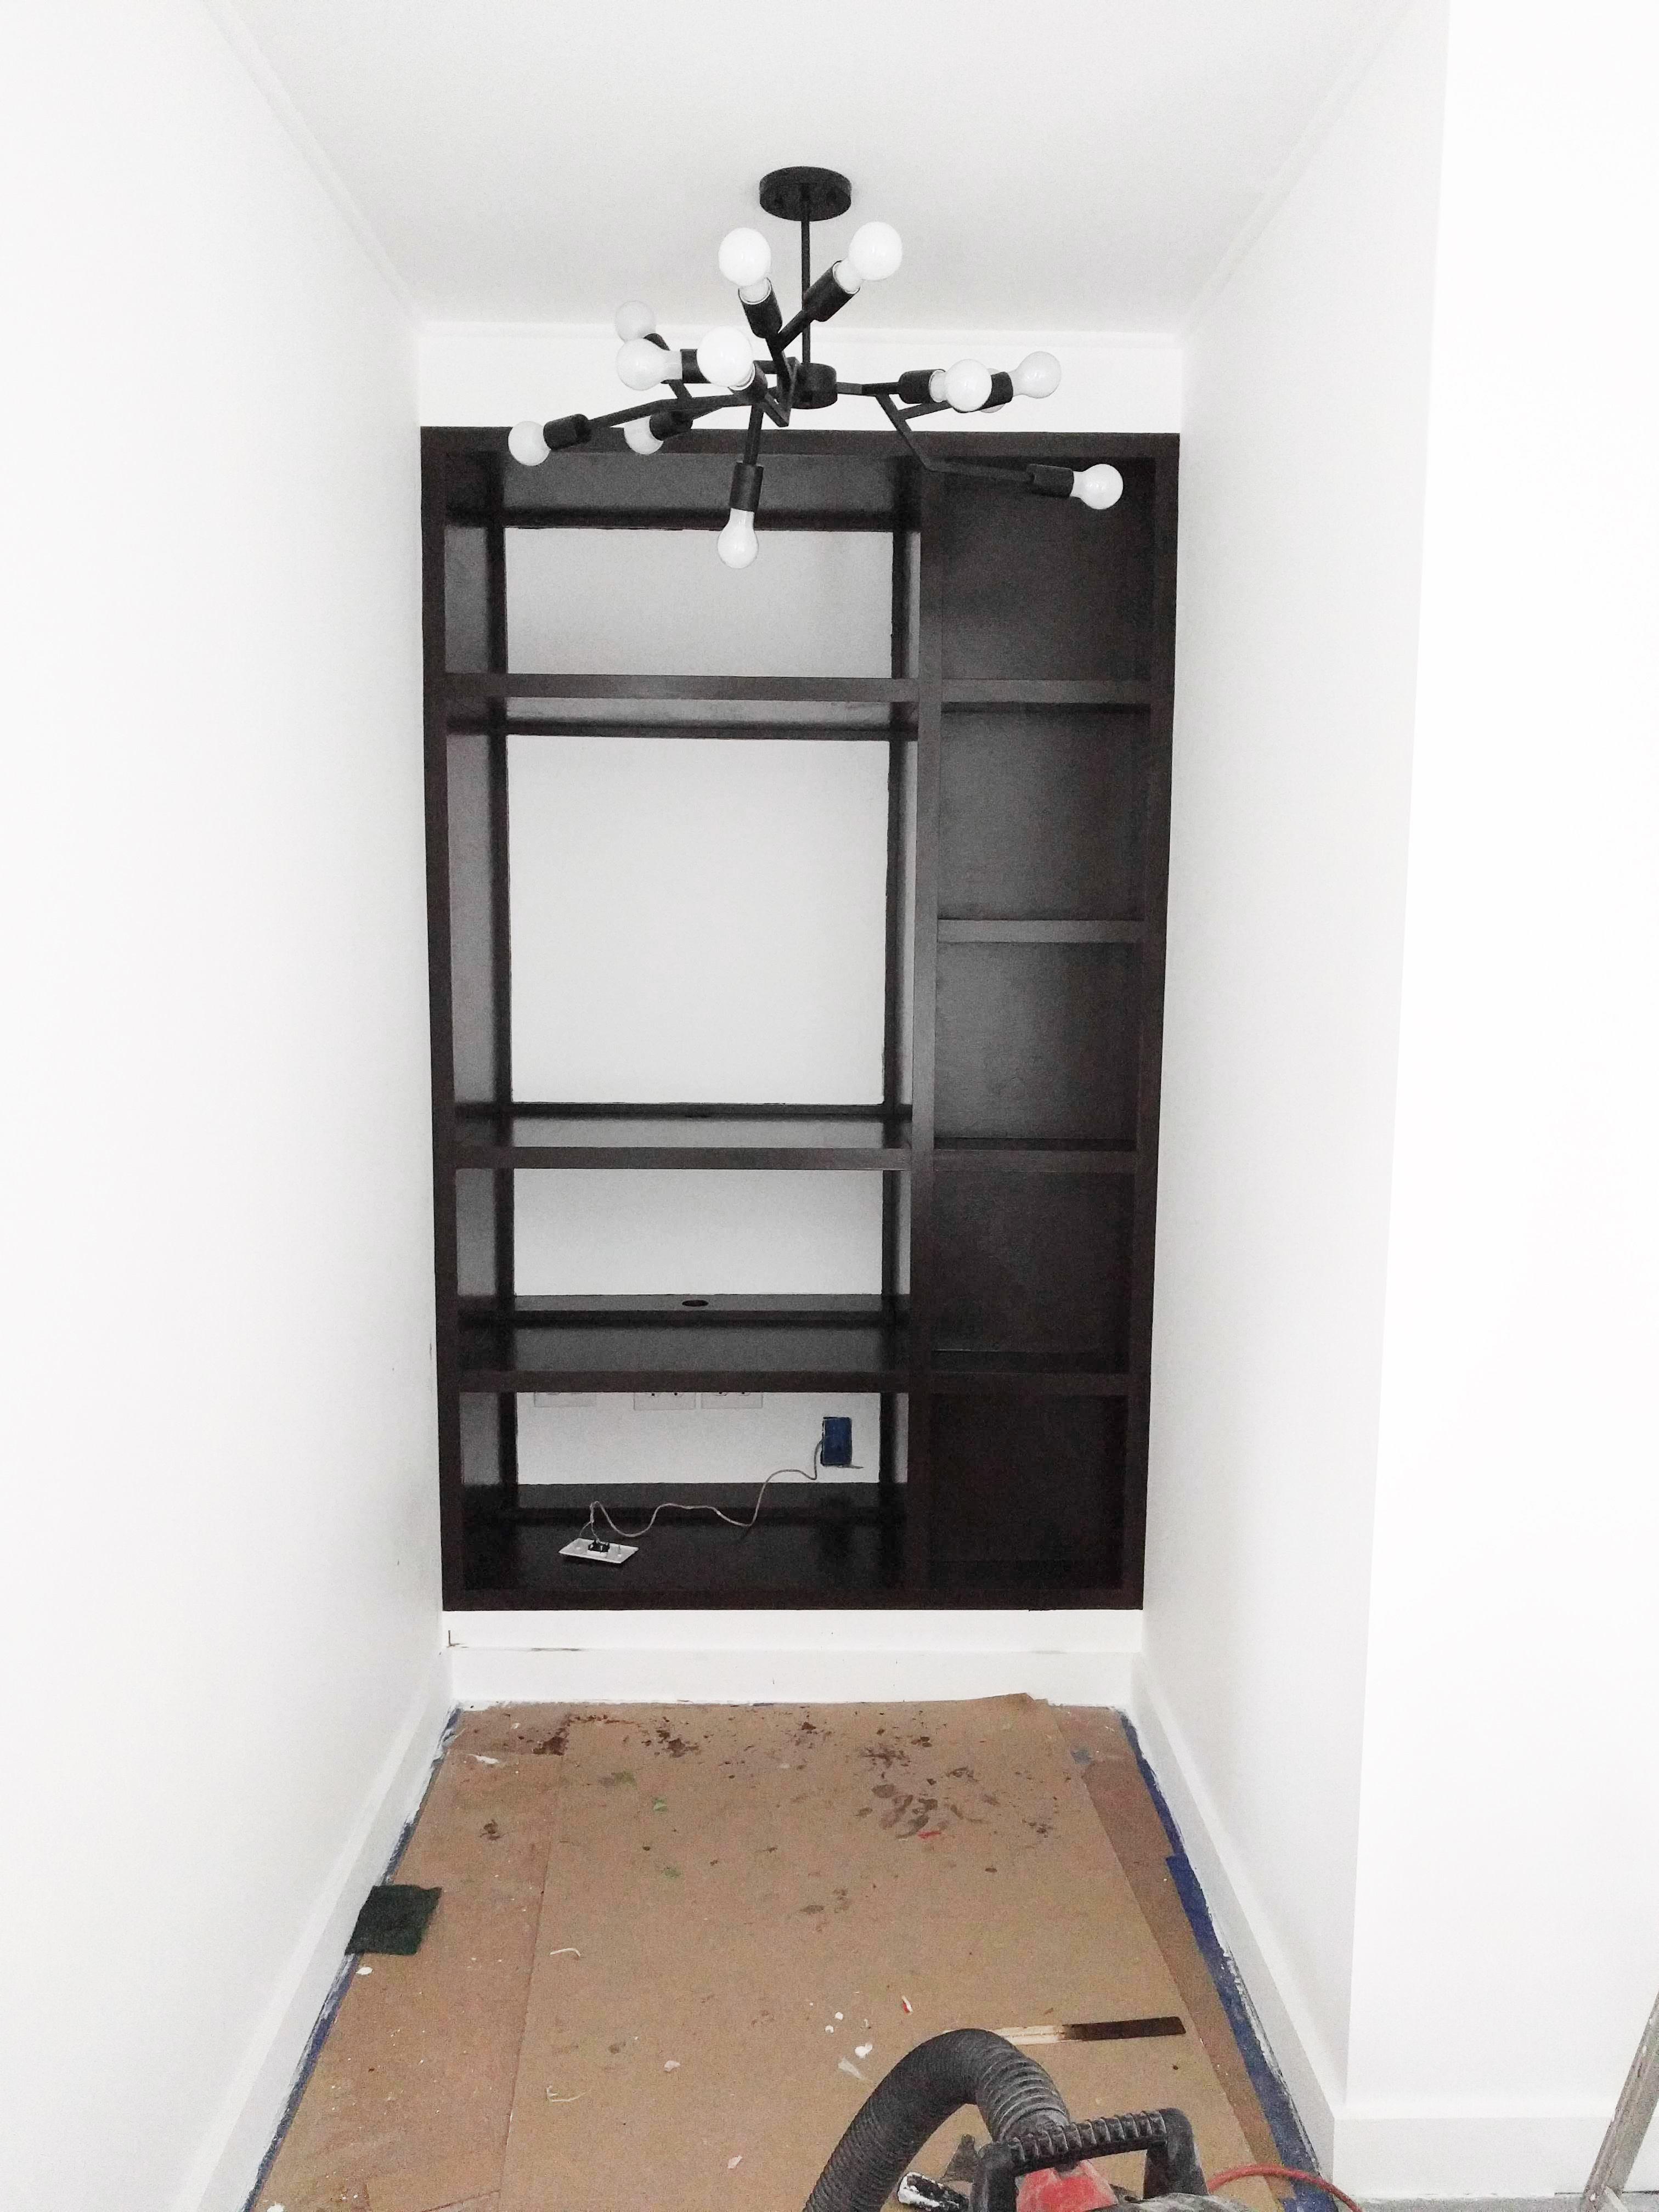
Bookshelves built! At this stage, we were prepping for the endless paint job. So. Many. SURFACES…haha! The bay with the “missing” shelf was designed to house the TV, which will ultimately be concealed by folding/retractable doors.

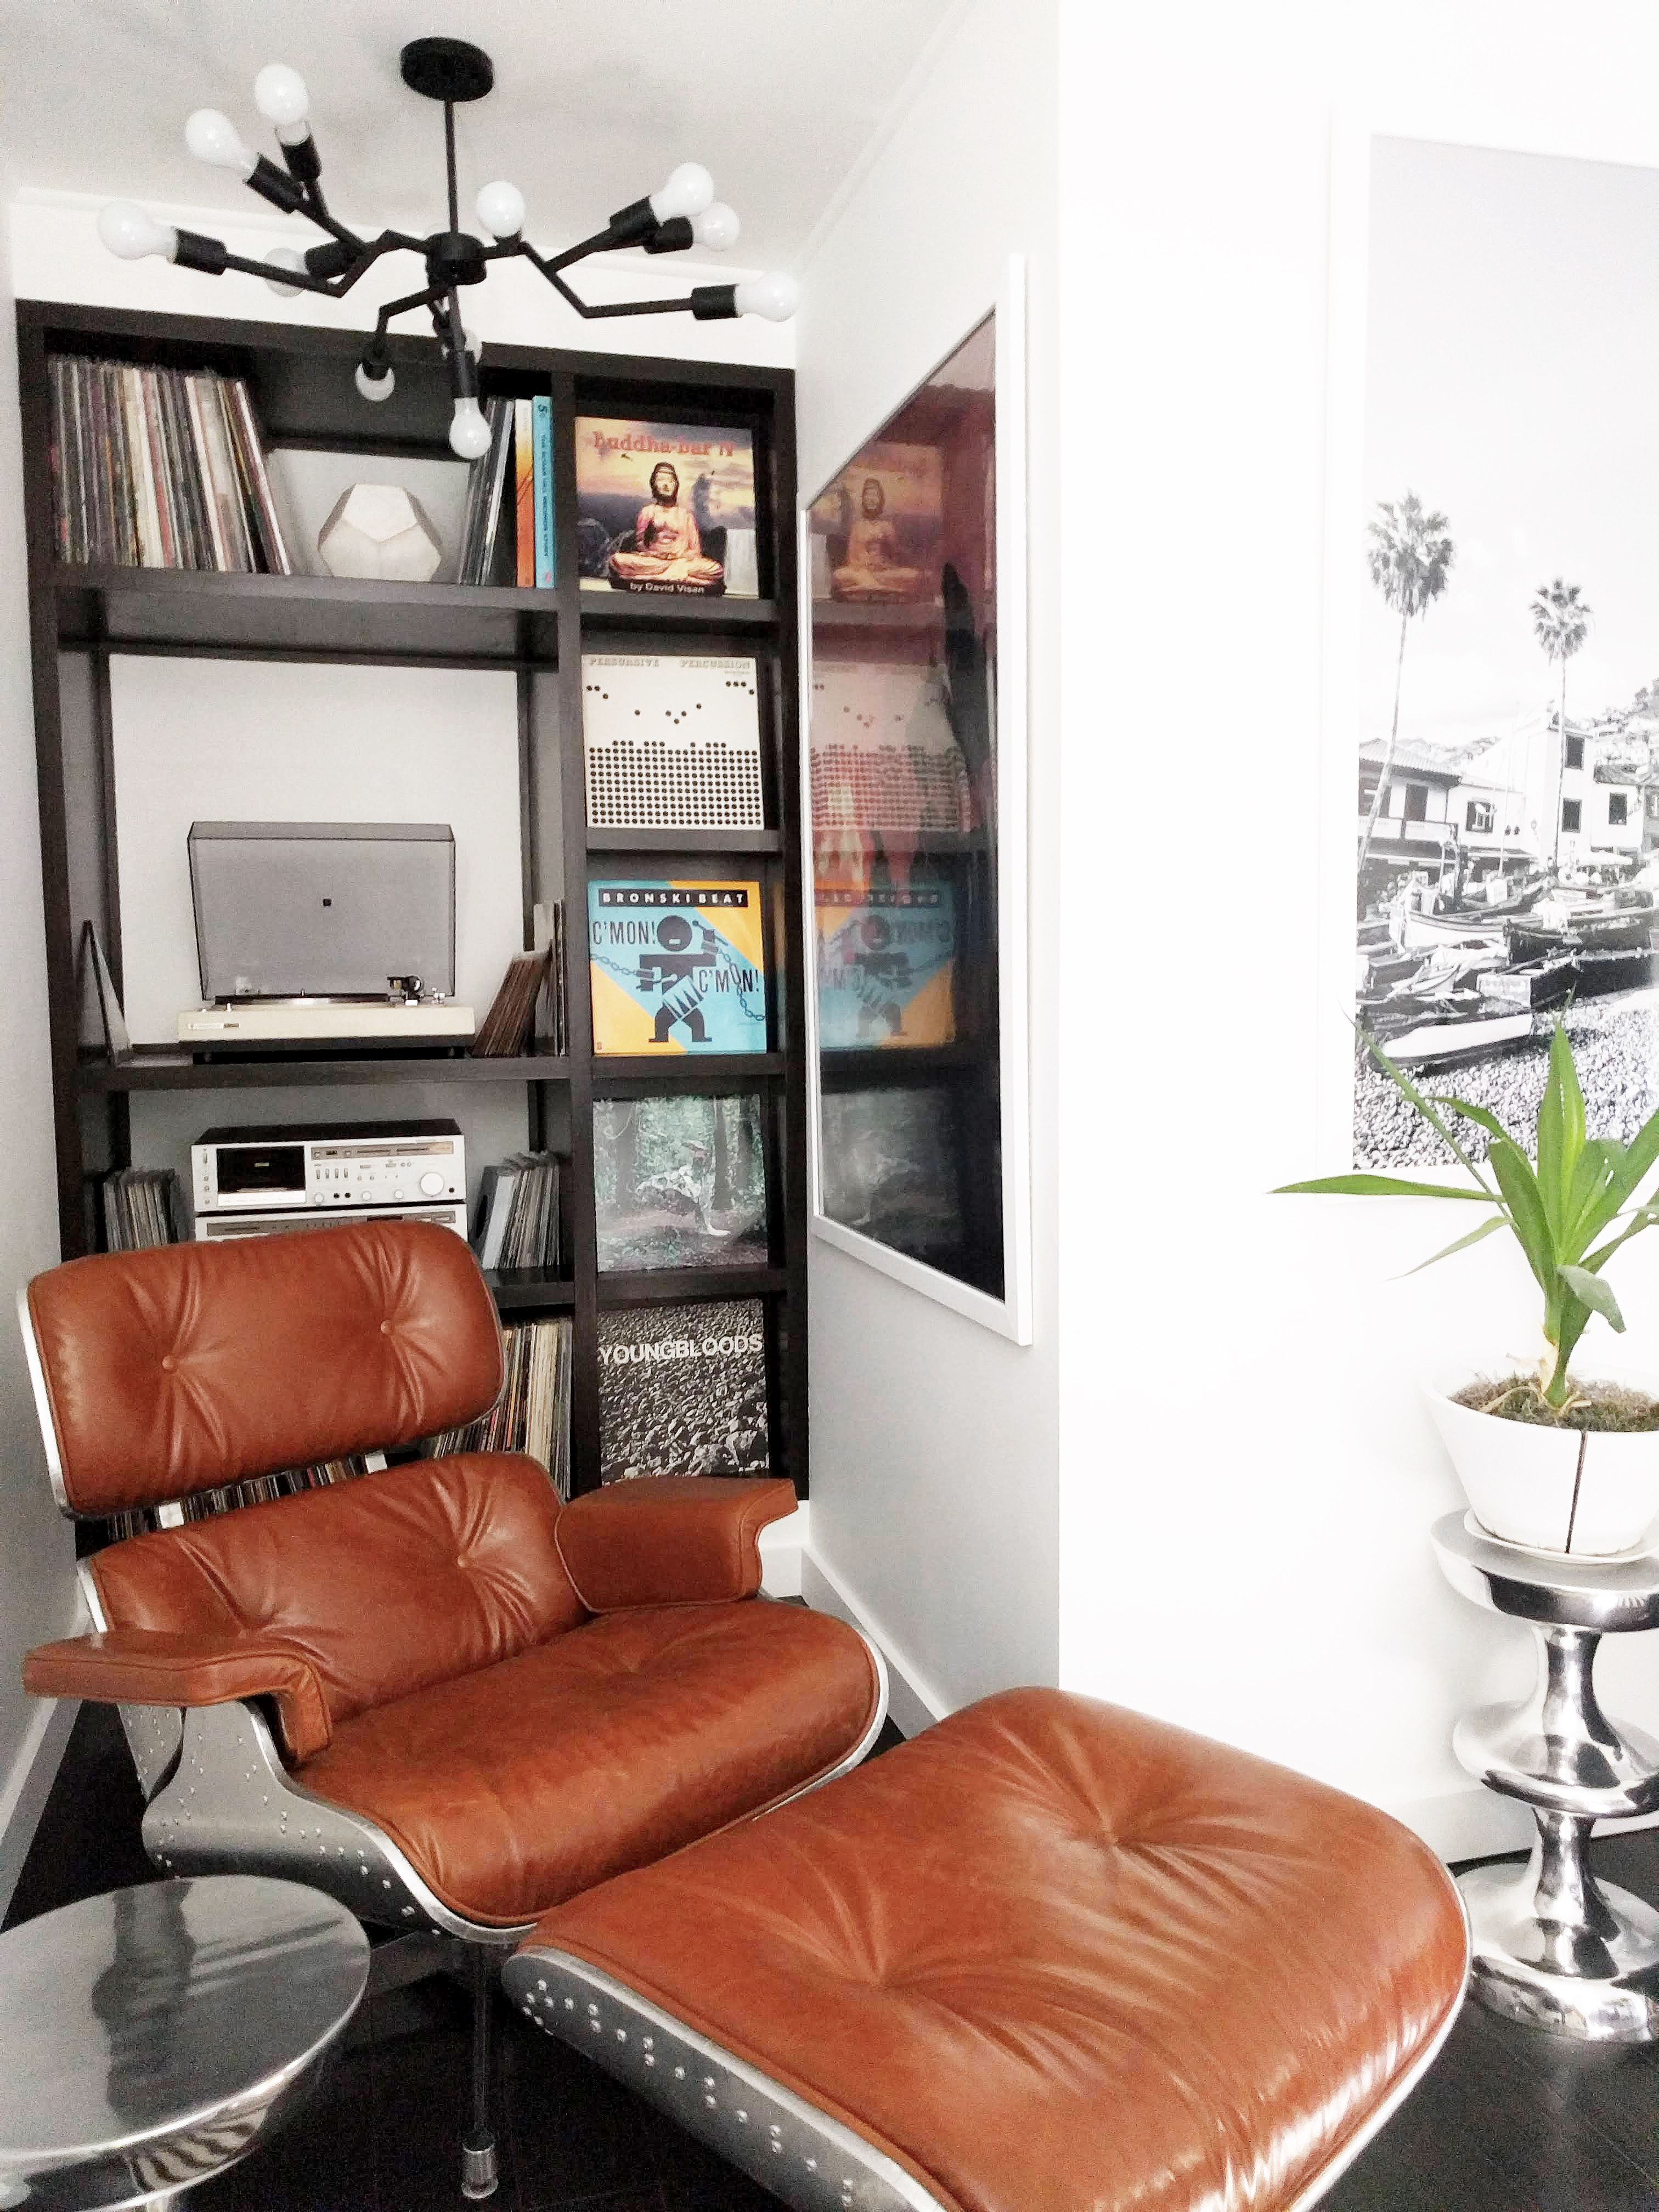
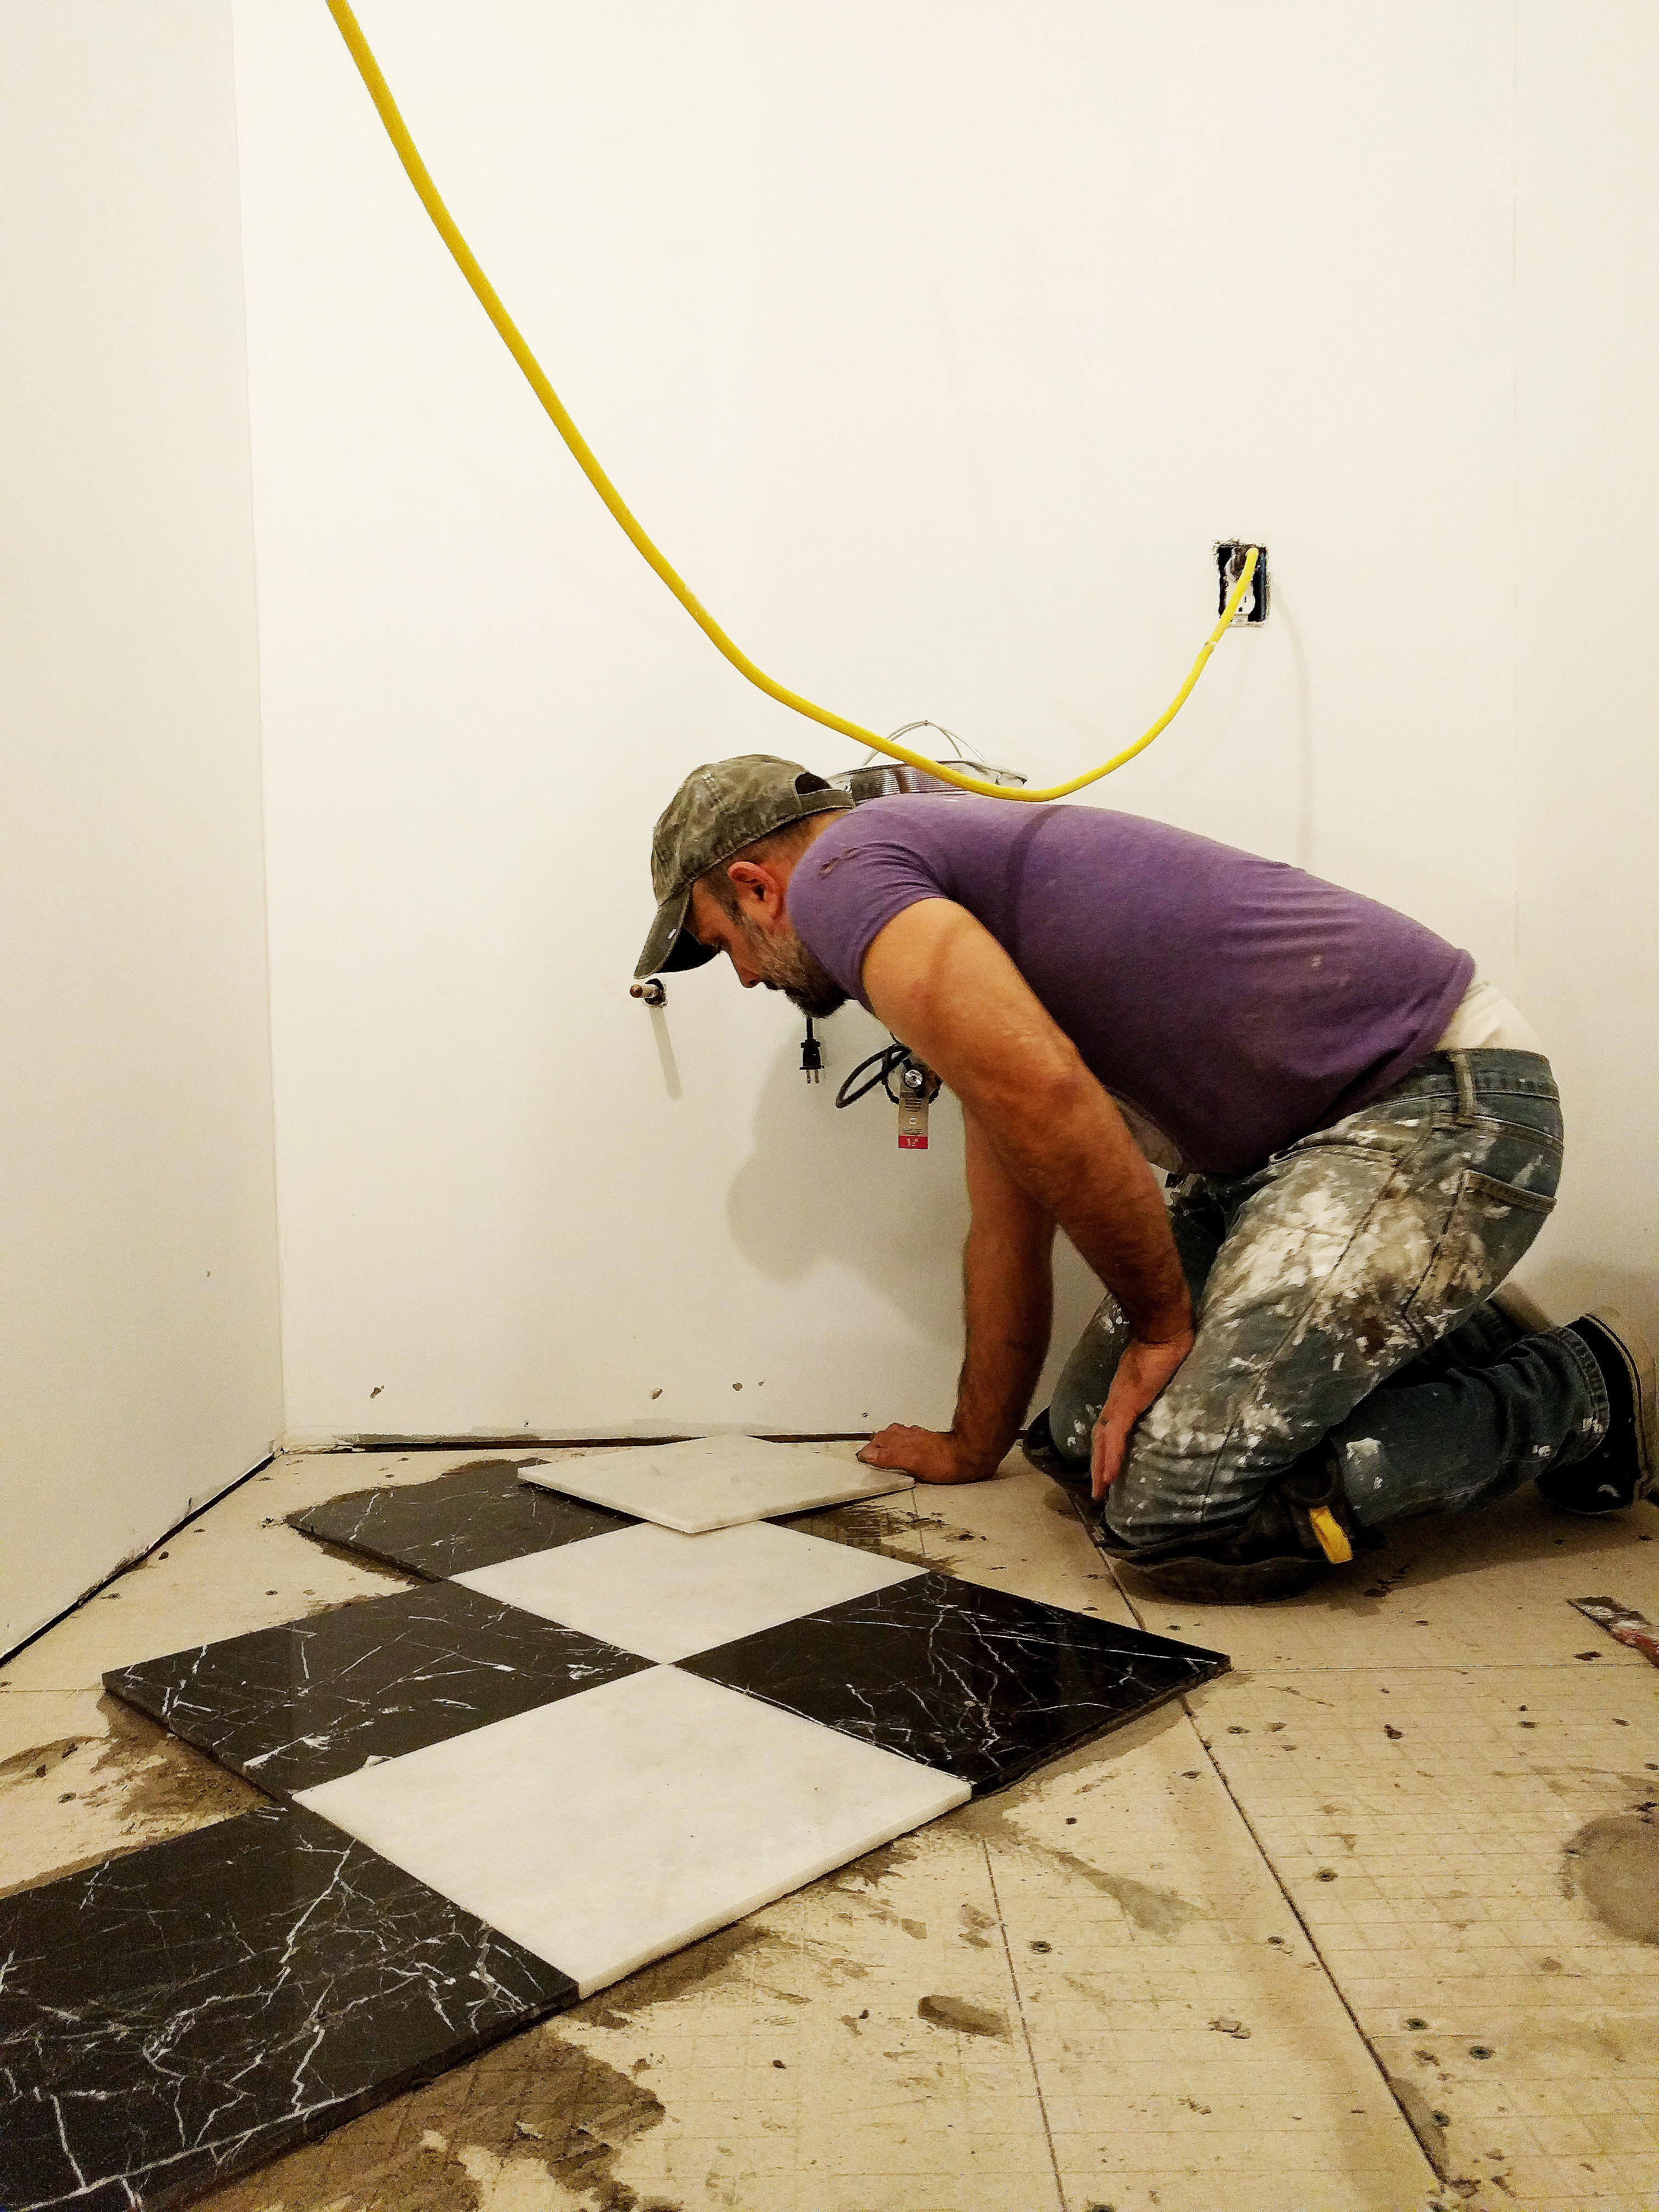
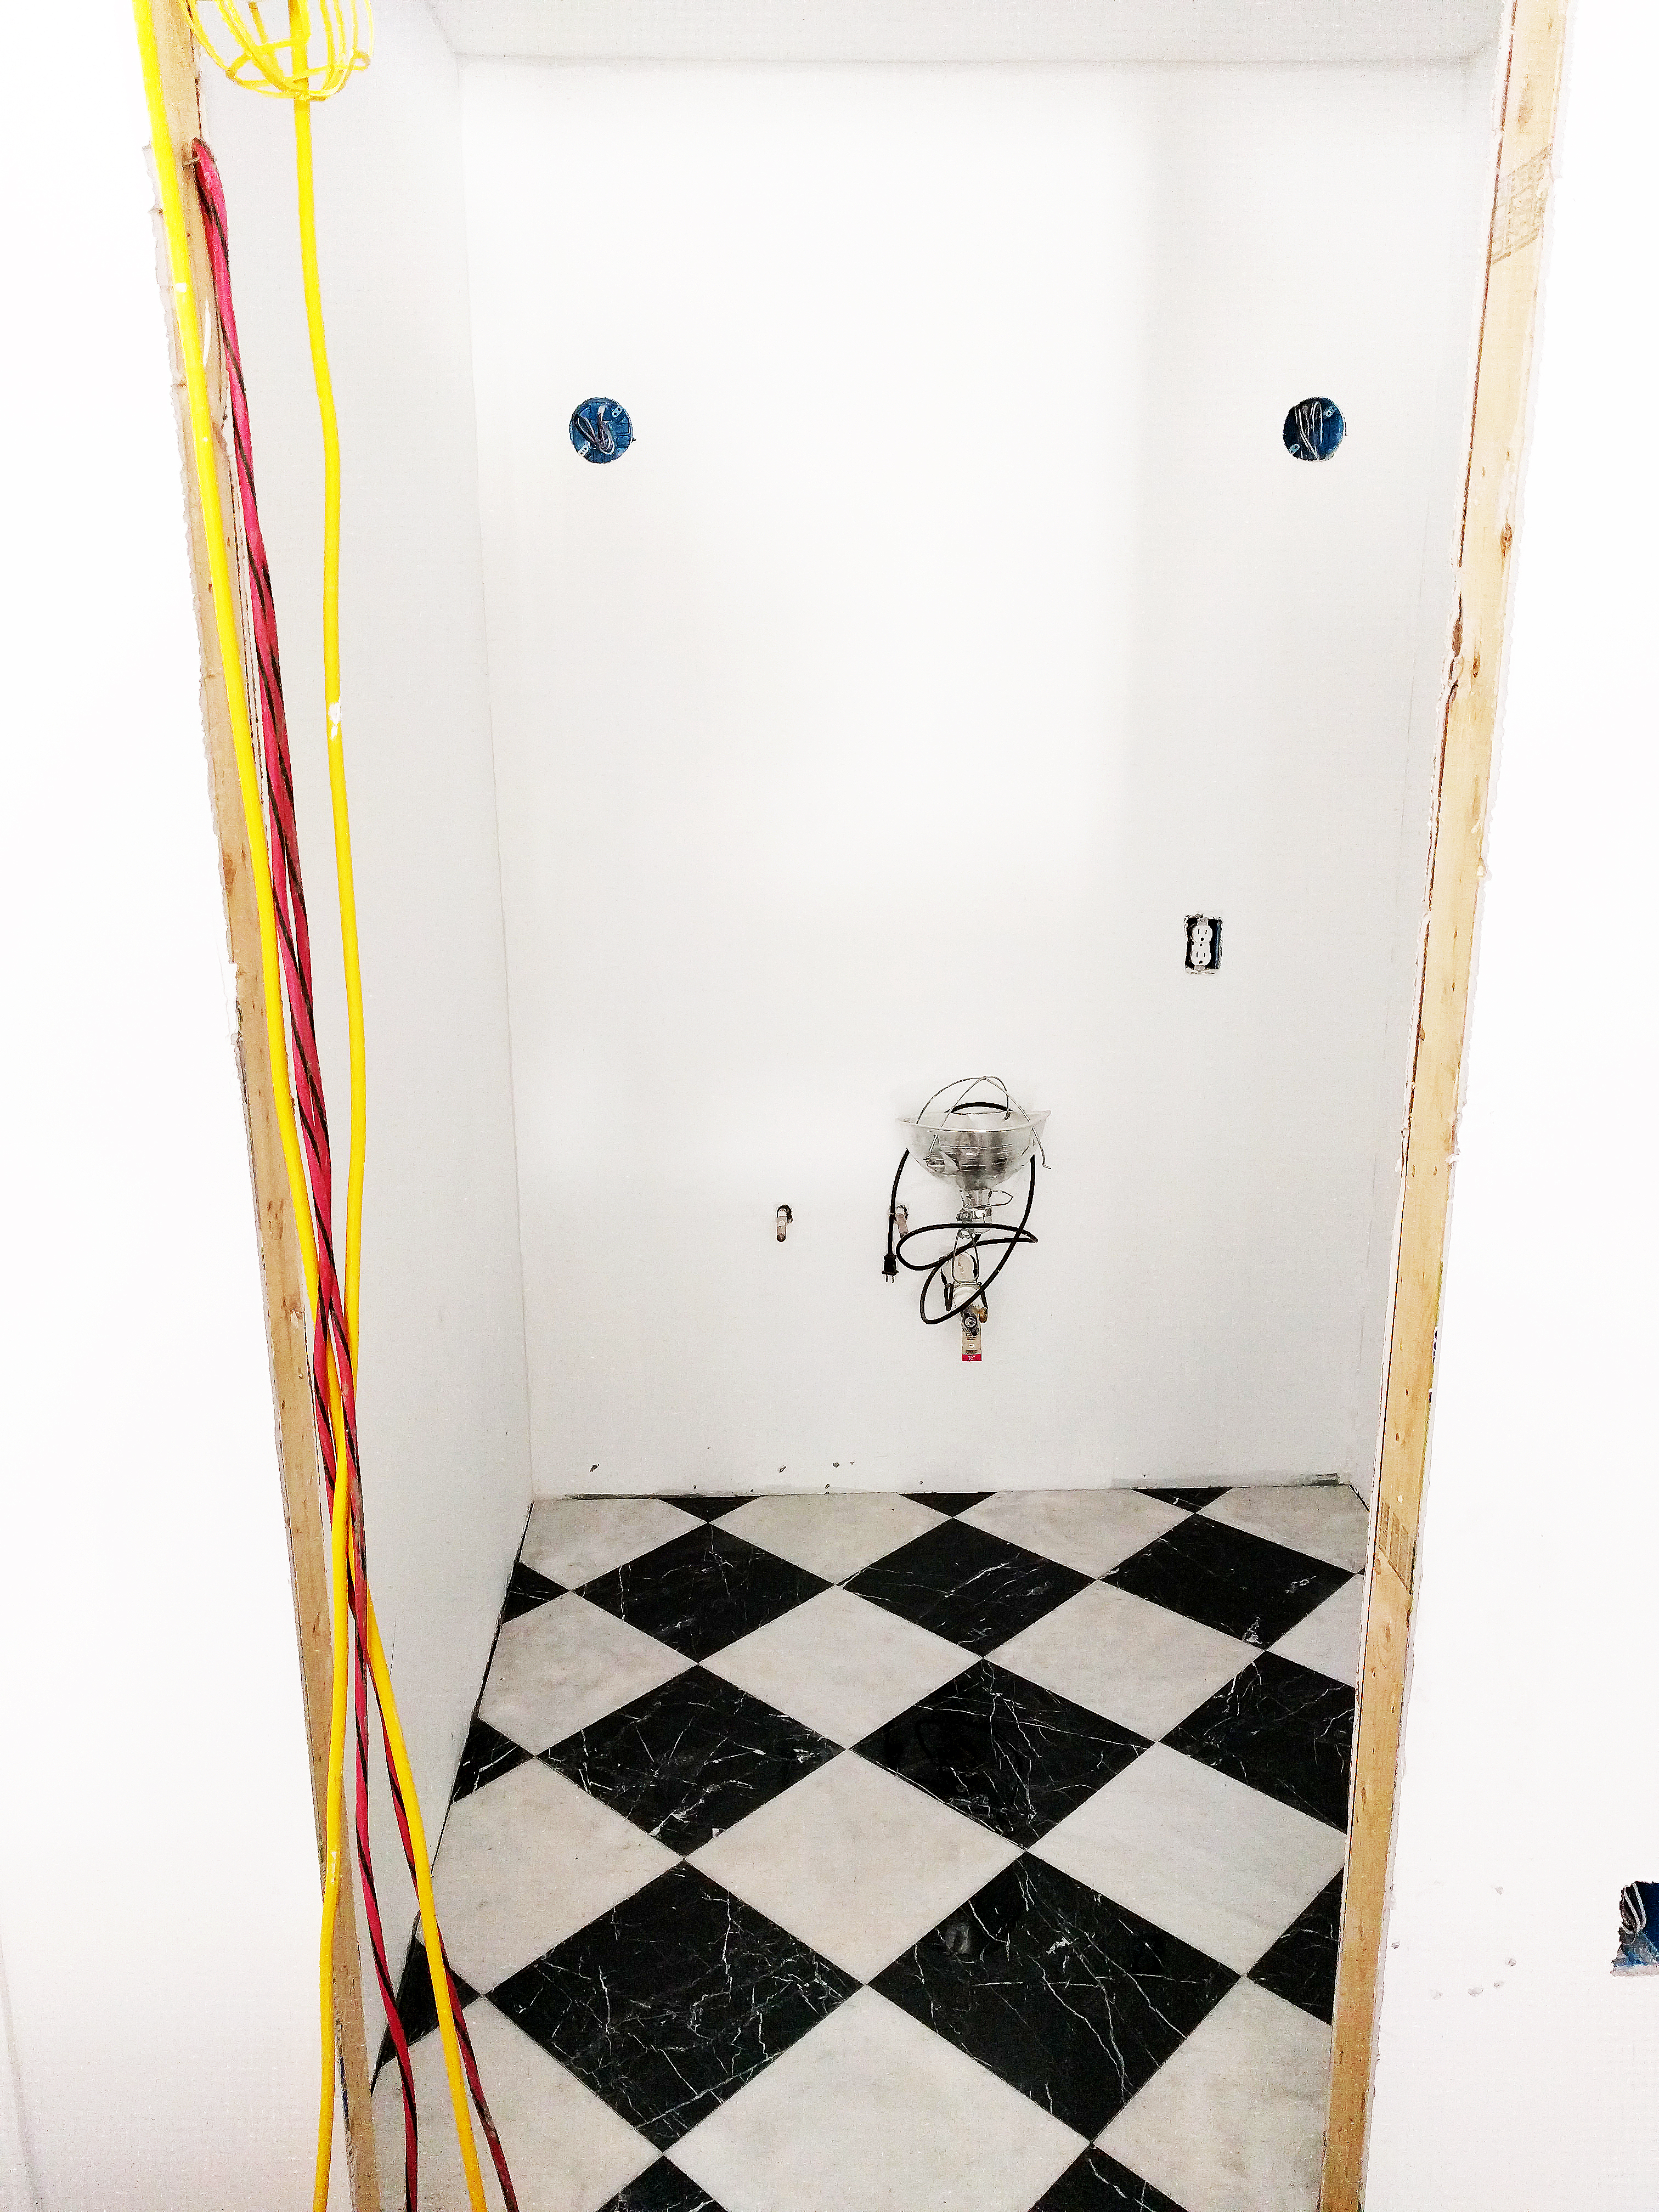
Painting marathon completed! And new floors installed as well, which at this point were covered while we whitewashed the room. And of course, now the true fun of decorating could begin! I had the absolute pleasure of collaborating once again with Raymour & Flanigan, my favorite family-owned business which has been a long-established landmark in the furniture landscape of the northeast. Without a doubt, my favorite aspect of this company is how incredibly varied their inventory is, which is a true testament to their commitment to offering amazing quality product with a style and budget for everyone. And with that in mind, let us move along to the reveal of our new family room!

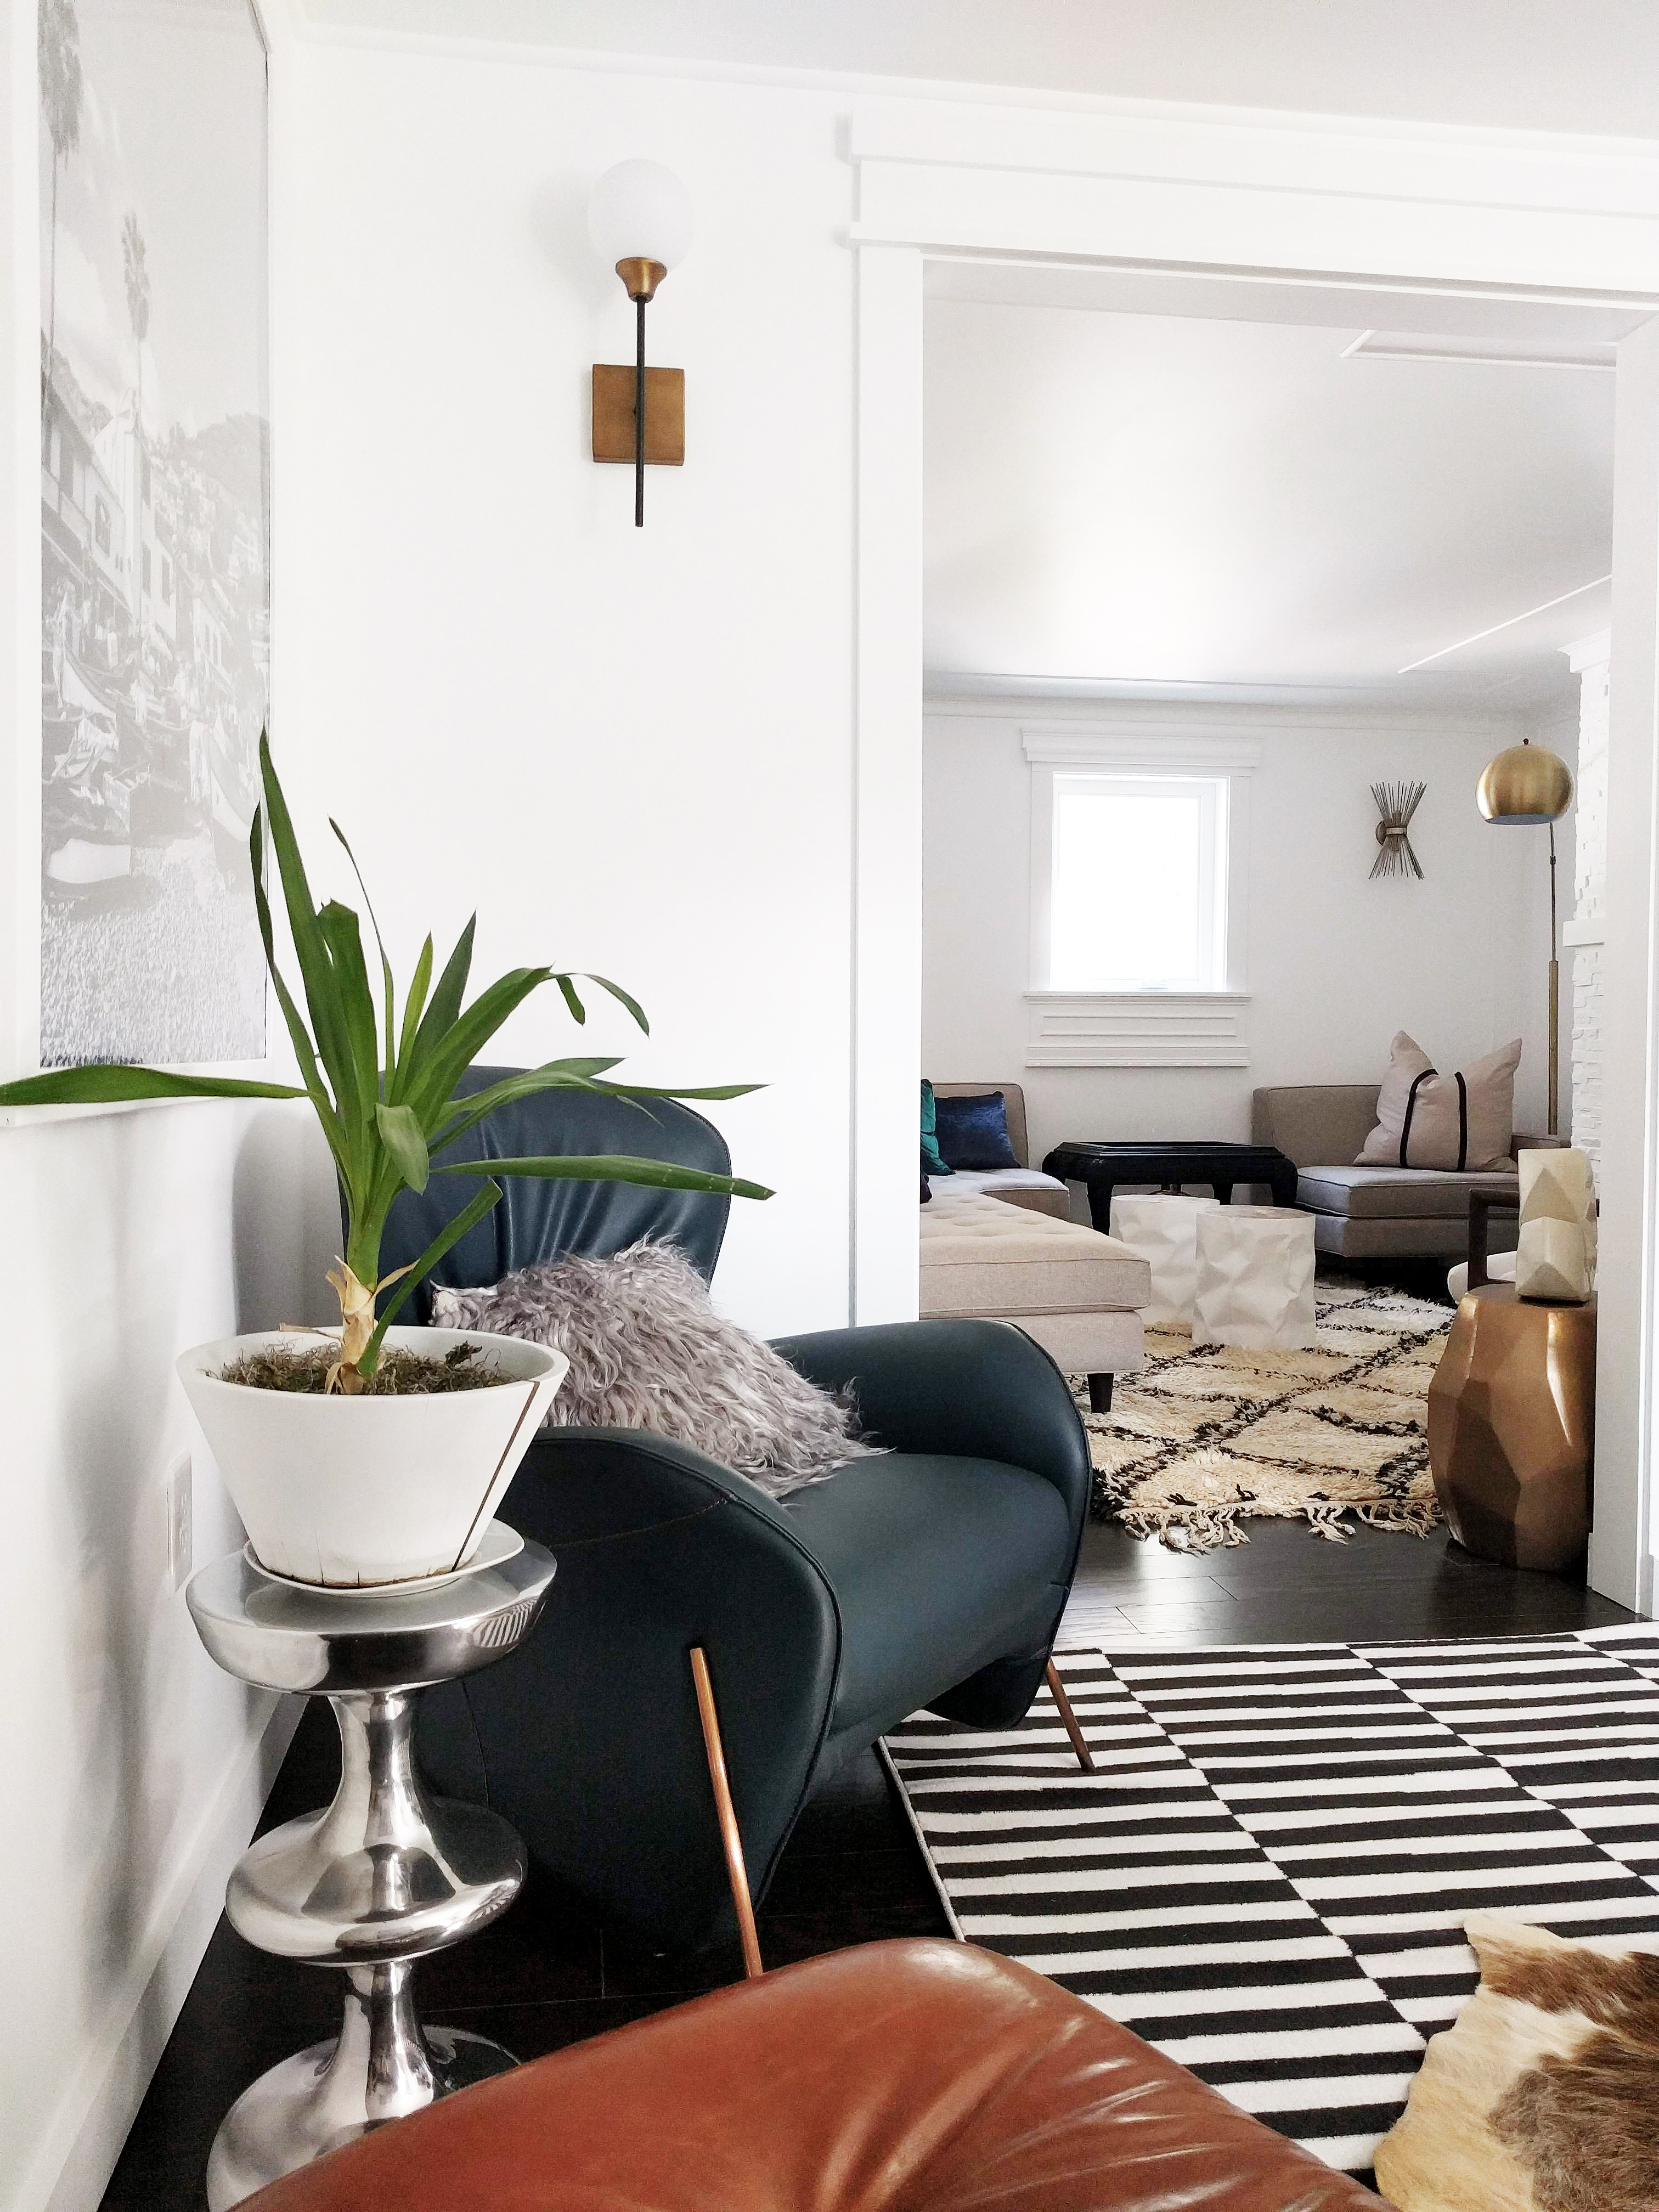
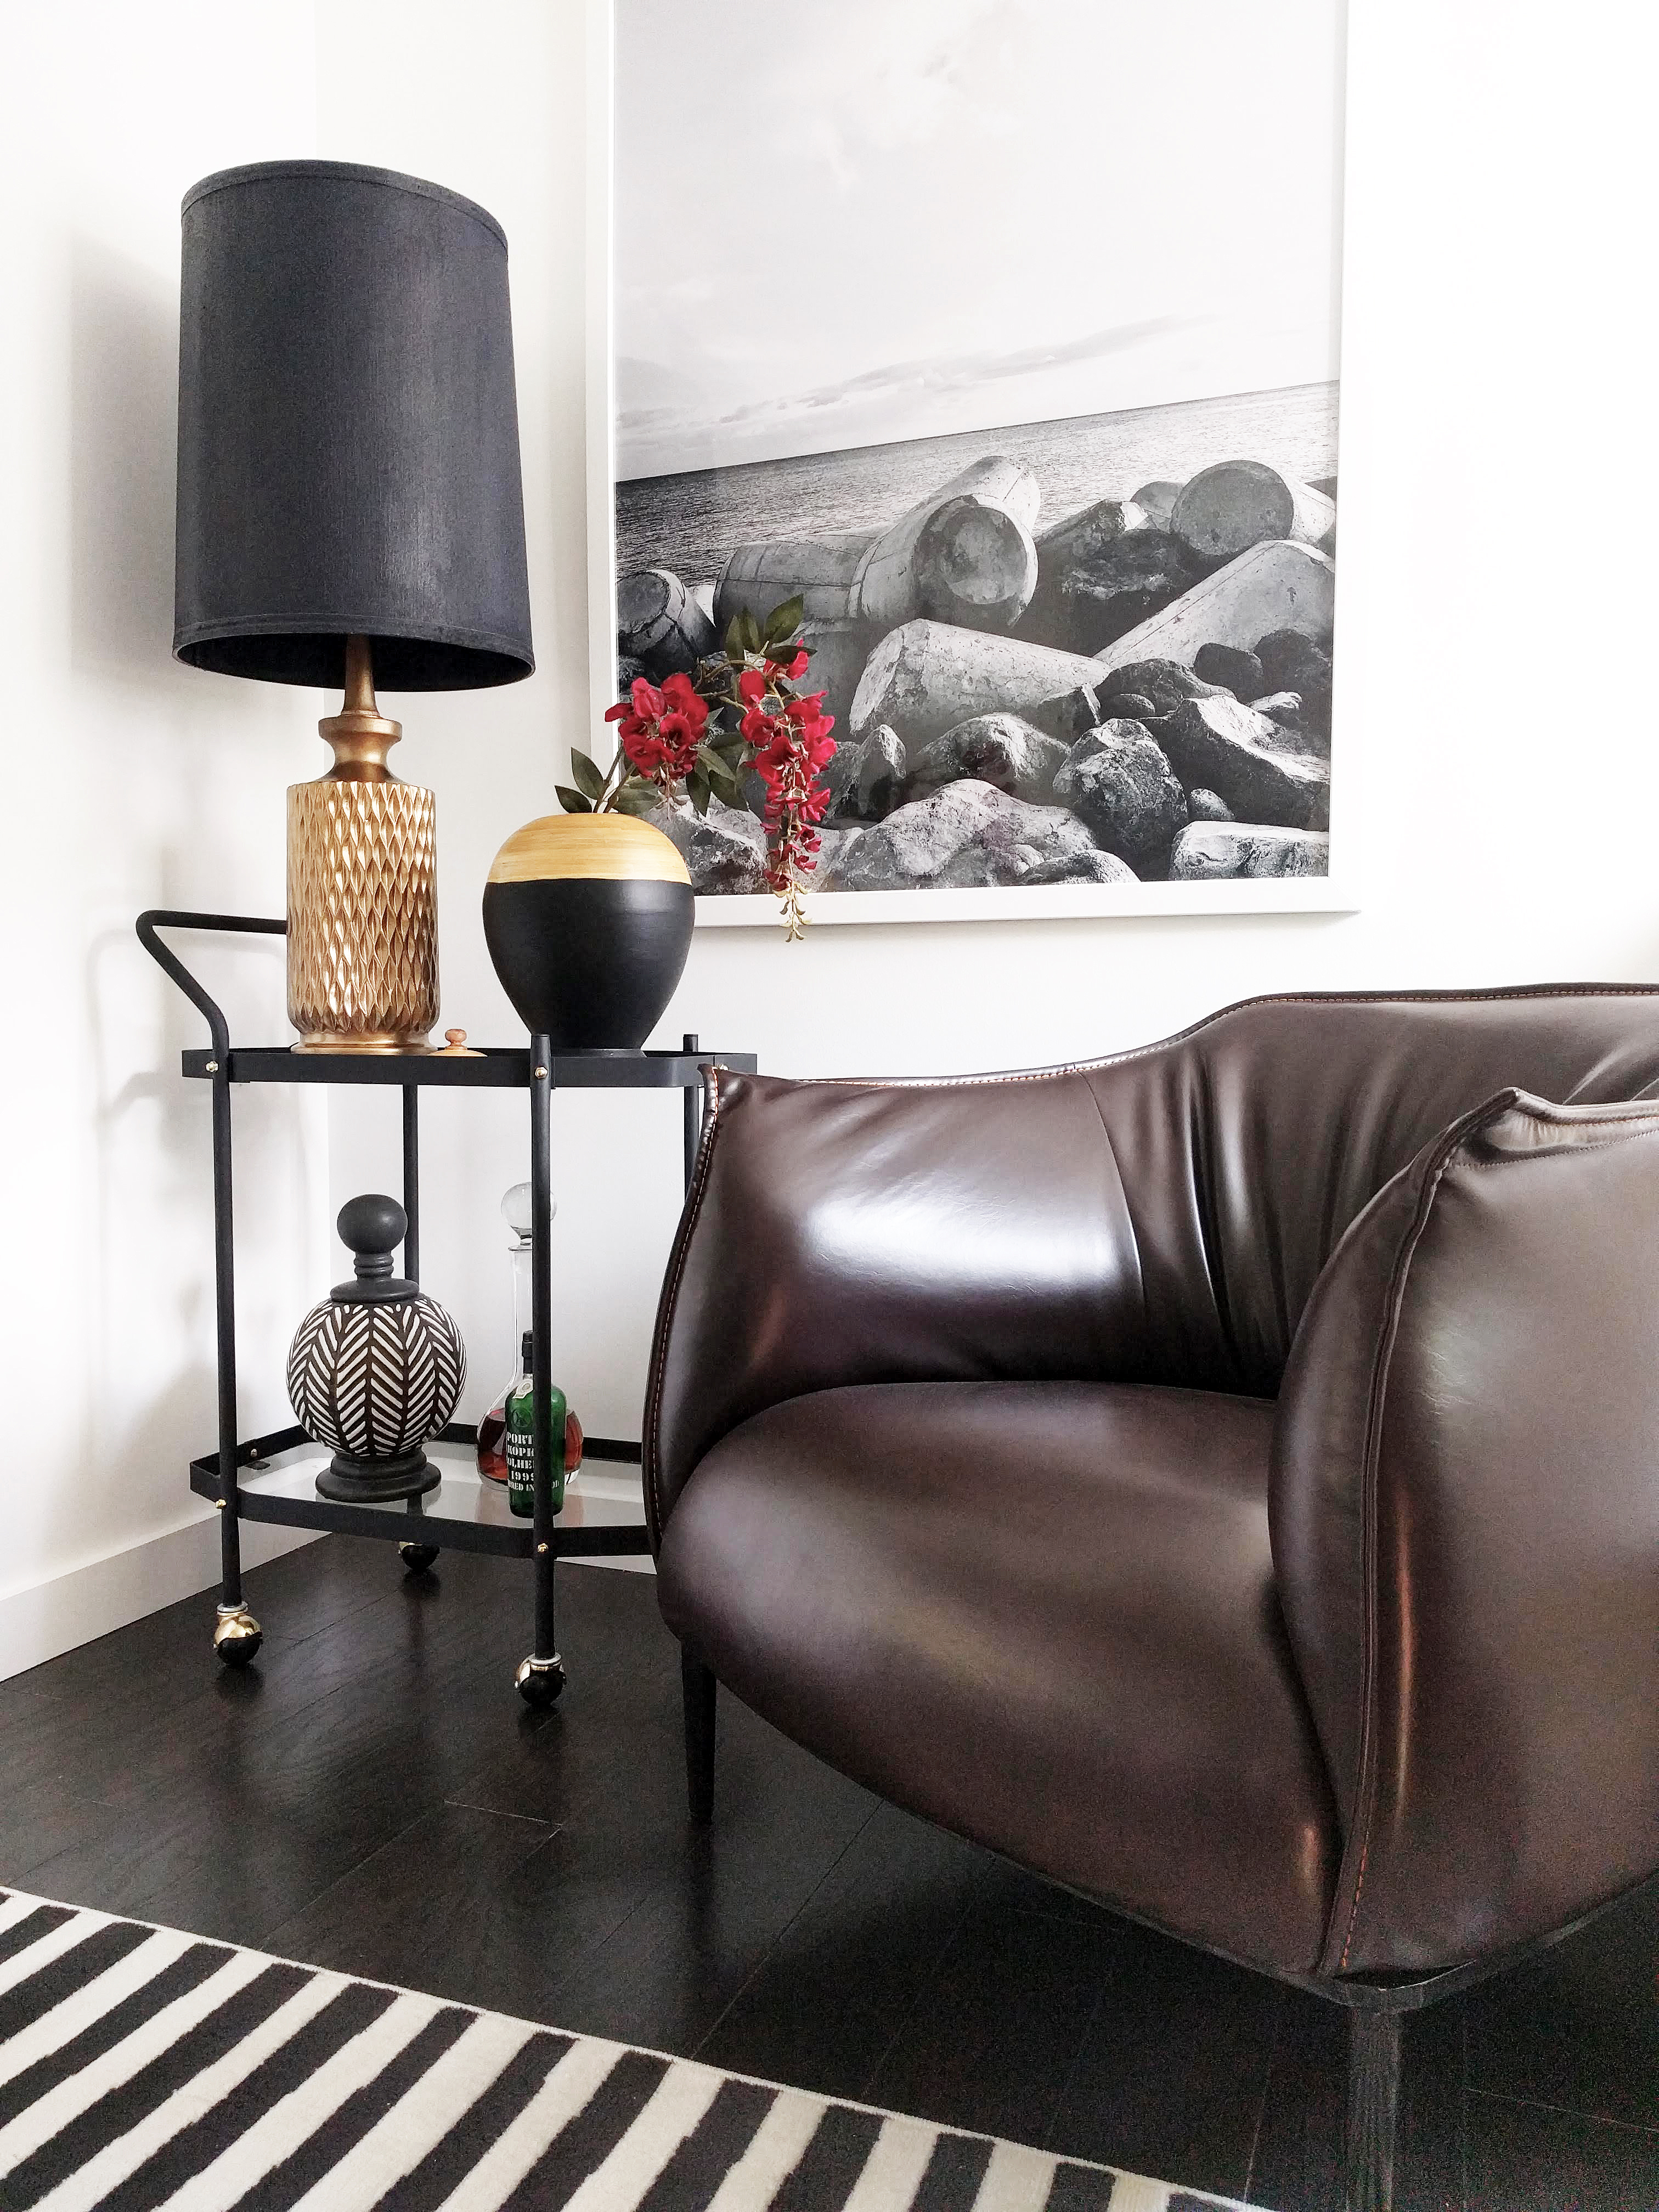
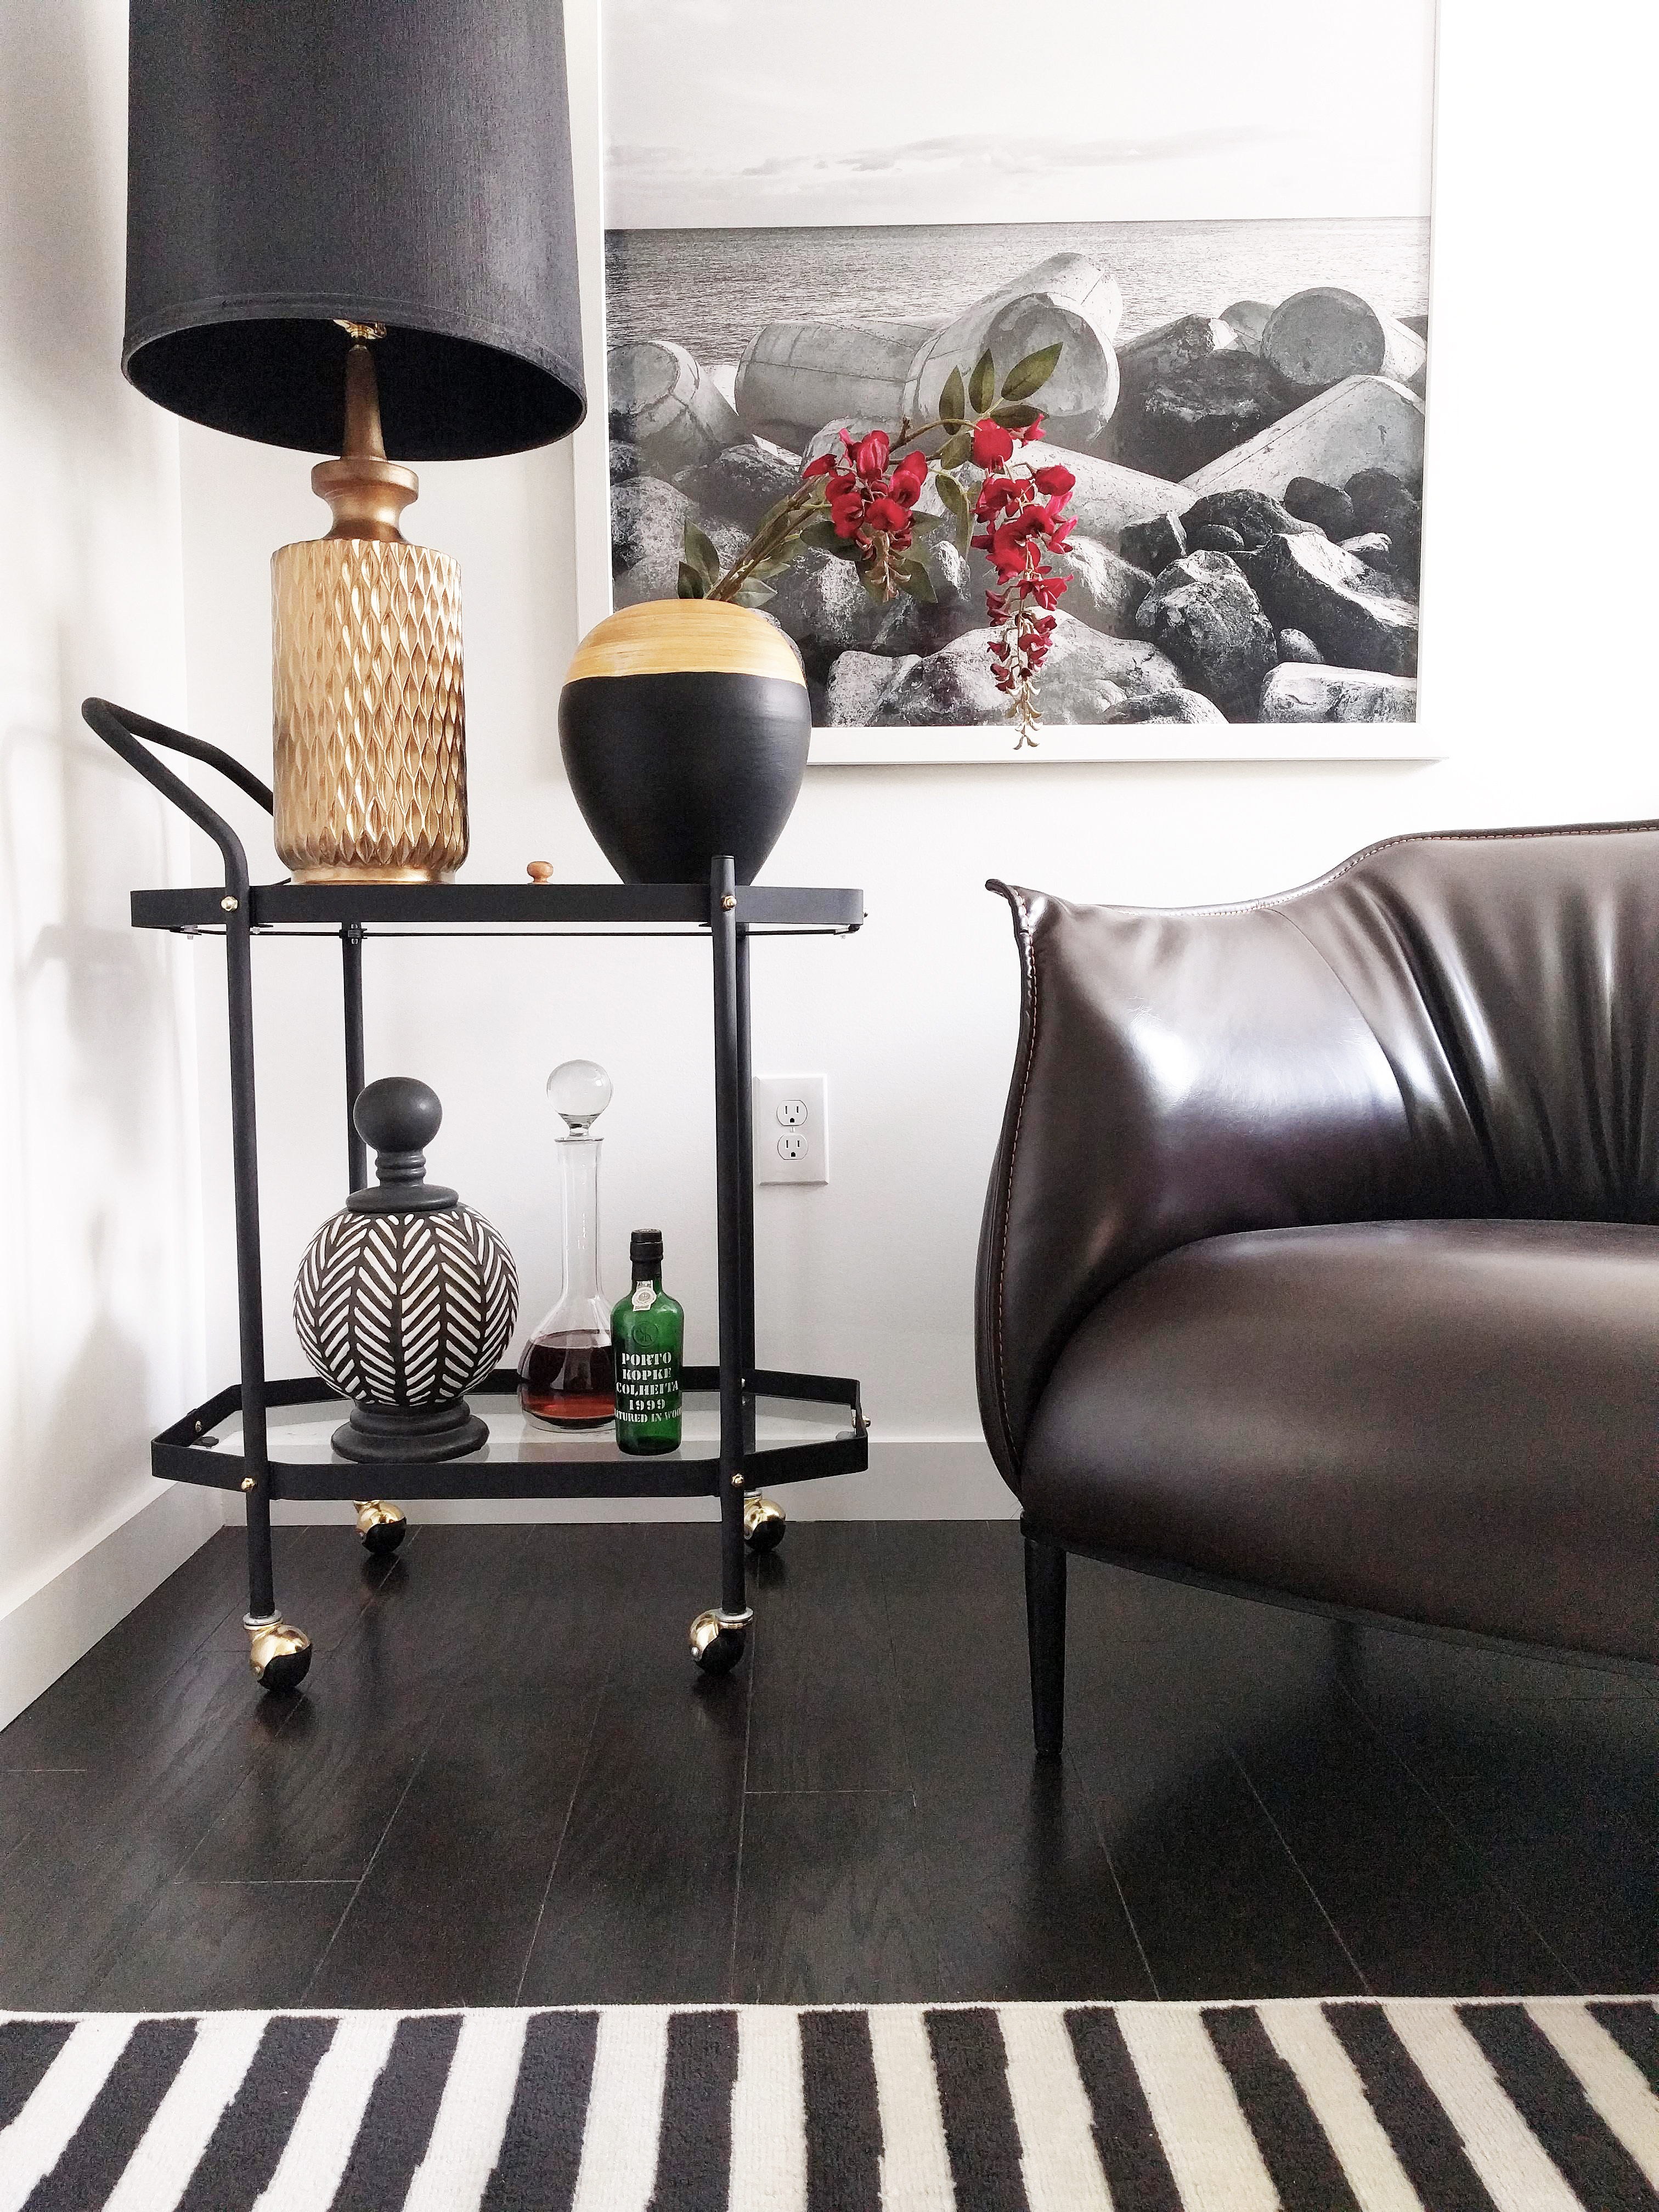
Let us discuss certain elements which I feel absolutely make the space, shall we? I chose three furniture pieces from Raymour & Flanigan which I knew would provide endless comfort, timeless beauty and functionality to this new and improved family room. First on the showcase list is the striking, black accent chair which I chose with my husband in mind. Brian has a deep penchant for MCM design and has long been an aficionado of the iconic Barcelona chair. When I came across this stunning reproduction, I knew it was going to be THE perfect addition to create a little reading corner by the sliding doors! I can’t even tell you how happy we both are with the stunning (and so very roomy!) Natalie Chair, and as expected, it has become my husband’s favorite household spot.

I wanted to incorporate a neutral-colored sofa that was comfortable, generously proportioned and plush, while still maintaining an elegant silhouette. Unfortunately, the particular model I chose (Carley Sofa in Oyster) is currently sold out but I have linked a very similar example which has a comparable profile:

https://www.raymourflanigan.com/living-rooms/sofas/cecile-sofa-200302270

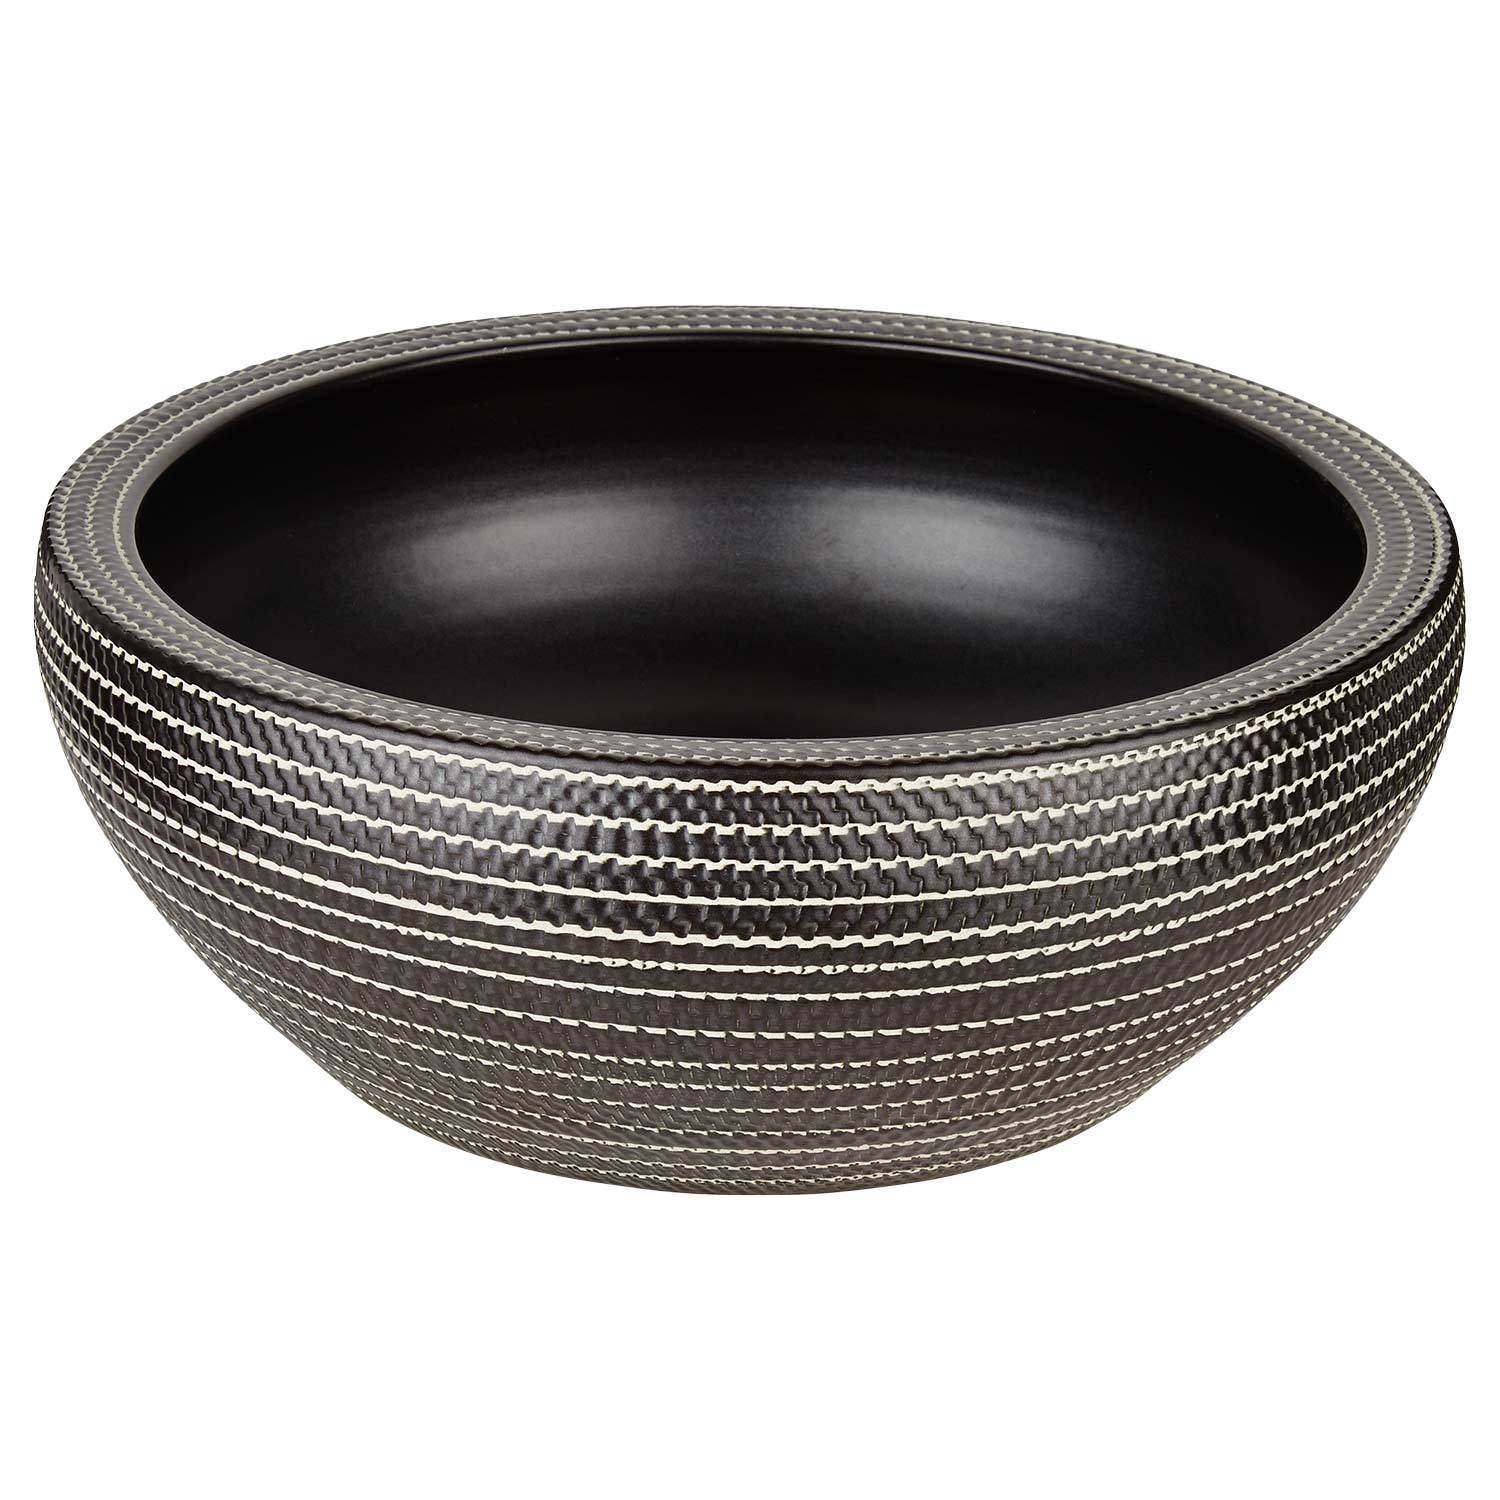
And the final piece I chose was this multi-purpose stool/ottoman which I love for its sheer versatility. It’s sturdy enough to use as an extra seat, light enough to move around the room if needed as a footrest, and practical as a non-obtrusive side table of sorts to toss a throw or a book on. This item (the Shira Ottoman in Brown Gray) is also unfortunately sold out at the moment, so I’m just going to provide a link to their entire ottoman selection instead…there are so many great ones to check out!

Just a few more shots…

And there you have it…thanks so much for stopping by and for virtually accompanying our little construction show and tell! A tremendous thank you to Raymour & Flanigan for continually proving that their company and product are sterling, and of course, infinite thanks to my ever capacious and patient husband for helping execute this vision!

  • I have partnered with Raymour & Flanigan and received product in exchange for this post. All expressed opinions are 100% my own.

*Images and text by Astrid Insieme

THE EYE WANTS TO TRAVEL – MASTER BATHROOM REVEAL

And so we have FINALLY completed our master bathroom, after a ridiculously protracted build with so many interruptions and delays, as is always the case with DIY operations! Without any further ado, let’s just get to the visuals showcasing the before, during and after, with as brief of an explanation of the process as is necessary to make sense of this rather convoluted project…haha!

So here is a “before” picture of the space where we decided to create our master bathroom. It’s essentially a 5 x 12 foot sliver of awkward real estate that runs parallel to our (unfinished) master bedroom and which meets the angled roofline of the A-frame. Confusing, I know. Because it was even more confusing to carve a functioning room out of this bizarrely configured area…haha! The other intrinsic challenge presented by this space is that it’s windowless, and as such, has a predisposition to feeling a bit cavernous. But as we’ve been renovating our modified A-frame for a few years now, we are more than used to confronting unusual architectural situations and figuring out a way to maximize each potential square foot.

This is the space in a rather early phase, down to the studs. At this stage, we had already inserted the tub and tiled the surround though, as well as completed the electrical installation and plumbing rough ins.

In the above photo, you can see the steeply angled roofline of the A-frame on the left, and how this space is contiguous. We decided to plumb out the walls and take advantage of the unused cavity by creating some recessed wall niches as well as an inset storage cabinet.

And so the real construction begins! Walls are sheathed and up goes the cement board as the plan is to tile the entire bathroom, from floor to ceiling.

Building out the recessed niches and inset cabinet between the A-frame roof and the bathroom walls in what is possibly one of the most unforgiving work spaces…haha! Honestly, I can’t even begin to describe the extent of the construction weirdness we encounter here on the daily.

Making some headway…

Here, things have started to take some shape, as the cement board has been fully installed and the tiling has commenced. Ah the joys of endless tiling…

Because the bathroom has no natural light source, I opted for white subway tile and marble panels throughout (with the occasional black trim detail) so as to keep the space from feeling too much like a dungeon. I ultimately wanted this bathroom to feel elegant and airy despite its obvious limitations, but with a deliberate injection of drama because that’s just how I like my interiors. And I truly believe that small spaces, bathrooms especially, benefit from a well administered dose of the dramatic!

Oh, and if you’re curious as to how and where we have our tools set up while we work, let us please have a collective moment of silence for the sad, sad state of our (future) master bedroom. Which continues to serve us well as a makeshift construction yard…haha!

The entry to the master bathroom from our bedroom will feature a sliding door, and the bathroom will eventually lead to our dressing room/closets in the future. I know, more architectural confusion, but that’s par for the course when dealing with a modified A-frame. All this to say that we had to add a pocket door to the back end of the bathroom in order to eventually access other parts of the house. In the foreground, you can see where the framework has been added to accommodate the pocket door.

This is the view from the bathroom into the adjoining space which will eventually lead to our closet areas, right before we installed the pocket door.

So moving on from the mundanity of walls and thresholds…haha! We decided to customize a standard pine cabinet from Lowe’s to create a vanity of our own design…

Which evolved into this…

And the flooring was where I wanted the room to show its personality, or should I say, evoke my heritage in a visually symbolic way. Being Portuguese, I have always been enamored with the artisanal beauty of our beloved tile tradition. And despite now living in the woods of New Hampshire, I wanted to be reminded daily of my first home, with its cacophony of colorful tiles, which despite their roots in history, still present beautifully in modern settings. So we used a variety of cement tile patterns, from the riotously chromatic to bold black and white, to create an abstract floor mosaic which would bring life to the space. I wanted this weird, little bathroom to be a sort of glamorous and exotic, old world meets new world refuge because, as we all know, the eye wants to travel…at least mine does!

So here is our master bathroom, after all was said and done! I plan on having it professionally photographed in the future, but for purposes of this reveal, my less than optimal cell phone shots will have to do!

This is the long view, taken from behind the pocket door. This perspective gives an idea of the long, narrow shape of this space with the angled wall area where we incorporated the tub and shower.
There are no words for how much I absolutely ADORE this blue Moroccan urn which I purchased from my friend Meg, purveyor of global goods extraordinaire at Tierra del Lagarto … I have to give this amazing shop a shout out for being the most impressively vast resource for decorative wares sourced from all around the world!
The long view from the other side of the bathroom, taken while crouched in the bathtub…haha! Here you can see the fully installed pocket door. The generously sized mirror was a fortuitous salvage find which we framed out and mounted on the wall, and which also helps to bounce light around in this tight space.
We had a thin, marble slab cut for our bathroom vanity, which we topped with a deep, rectangular vessel sink. The mirror was an upcycled, thrifted find from many years ago which has previously lived in other parts of the house, but has now found its permanent home here. Love the ornate detailing and its juxtaposition against the sea of marble and subway tile.
This is the view as you enter from the master bedroom. Currently working out the sliding door situation which will provide privacy!
Some shower details. For decorative effect, we created a chevron-patterned panel to highlight the shower fixture.
Another perspective of the entry. You can see reflections in the vanity mirror of the beam work we’ve working on in the master bedroom. Always juggling a million and one projects around here!
More details. The geometric, wooden accent table (yet another lucky, thrifted find!) is perfect for stacking towels and clothing while soaking in the tub.
We installed a rounded, glass shower door in our tub enclosure. I’ve never been a big fan of shower curtains, and in this case, the bathroom feels infinitely more open with the advantage of the material’s transparency.
Visual moments are all in the details, right? The marble-clad niches make me so incredibly happy, as they provide additional storage and dimension to the walls!
Another layout view, this time from where the toilet is positioned…haha! Here you can see the traditional shower fixture and how we highlighted its placement with the decorative tile panel.
We created a dynamic floor pattern using a variety of bold cement tiles from Villa Lagoon. (Not sponsored, but thought I would disclose the source in case someone was curious!) Great company, with beautiful and well-priced inventory!
I sheathed the orb pendant lights with silk chain covers in a wine color. I absolutely love the tactile and romantic quality it lends to what is an otherwise modern light fixture!
Here is our inset wall cabinet, which has deep storage for stashing towels, toiletries, etc. We also mounted a pair of hooks on the adjacent wall for hanging robes and/or towels.
Partial view of the interior of the inset wall cabinet and niche.
The back (and most practical) end of the bathroom, where we placed a hamper (and trash can, which is essentially obscured in the photo by the toilet).
Customized vanity close-up. We designed it to be a functional but whimsical statement piece in the space, with a nod to art deco design.
Mirror reflections. And that gorgeous blue urn, which was THE perfect treasure to animate and anchor this corner!

And there you have it! Thanks so much for stopping by and accompanying our journey as Brian and I continue to tackle the final spaces in our home. Up ahead…three bedrooms…wish us luck as we try to keep our sanity intact amidst the renovation chaos…haha!

*Images and text by Astrid Insieme

VIGNETTE REVAMPING WITH THE BEAD CHEST

With the holidays a recent memory and the new year upon us, I always feel that our interior spaces need a deliberate dose of refreshing. Not an overhaul, just a well-measured injection of new energy to revitalize the vibe in our homes to better align with the freshness of the new season. Organic elements, in particular, provide such a dynamic accent in home décor as they ground an environment and connect the senses to our more elemental core. And oftentimes, the smallest of details are what deliver the most aesthetic impact in a vignette, which ultimately sets the tone in a designated space. With these notions in mind, I was more than delighted to partner with The Bead Chest once again as I set out to add some novelty and interest to certain pockets of my home!

For those of you unfamiliar with The Bead Chest, they are purveyors of the most vastly impressive selection of beads I have ever come across, ranging from glass beads, to seed beads, to pottery beads, to my personal favorite, chunky and exotic bone beads which are as beautiful worn as they are displayed on a coffee table. I especially love this company’s laudable social mission of carefully sourcing their product through ethical trading in support of developing communities. What’s not to love?

Since I have an undying penchant for all things graphic and global in feel, I chose a combination of bone beads and a delicate strand of blue seed beads in the most enchanting turquoise hue. And here are some images of how I’ve styled them around our house!

bead chest 01

bead chest 04

bead chest 02

bead chest 10

The beauty of these is just how effortlessly they can be added to a space, and yet create such a stunning – and interesting – visual effect! Drape them casually in a bowl, pile them on a shelf for added texture and intrigue…the options are truly endless!

bead chest 05

bead chest 09

bead chest 08

bead chest 06

In partnership with The Bead Chest, they will be offering my readers 15% off all orders! (Just use the discount code AST15 at checkout on their site www.thebeadchest.com!) They are absolutely perfect to wear as is, to incorporate as a decorative home accent, or for use in any kind of creative project you can imagine. Their selections are already incredibly affordable, so this is a deal you definitely want to check out and take advantage of!

bead chest 03

  • I have partnered with The Bead Chest and received product in exchange for this post. All expressed opinions are 100% my own.

*Images and text by Astrid Insieme

CREATING A CHILL MEDIA LOUNGE WITH RAYMOUR & FLANIGAN

It’s been quiet around here on the blog, but we’ve admittedly been incredibly busy! In our quest to finalize the remaining spaces in the downstairs of our addition, we have recently been working on a rather oddly-shaped room which essentially acts as a pass-through area between our new living room (which we were also fortunate enough to have decorated in partnership with Raymour & Flanigan!) and the stairs leading to the upper level. It’s a bit of a tricky space not only because of its bizarre L-shaped configuration, but also because of its inherently petite dimensions, unsightly HVAC duct work on one of the recessed walls that needed to be camouflaged somehow, AND the fact that this weird and tiny space is open and visible to the living room. Here’s what I’m talking about:

MEDIA LOUNGE BEFORE 00

The new living room is off to the right, with a double wide passage. Notice the lovely HVAC duct that somehow needed to be concealed within the new design for this little space.

MEDIA LOUNGE BEFORE 02

This is the back wall of the room…

MEDIA LOUNGE BEFORE 01

And a view of the other wall in the room, with the start of the staircase leading to the upper floor.

So the plan for this space was to create a little lounge of sorts where we can chill and listen to music, with drink in hand. And ultimately, it would serve as a bit of an informal extension of the new living room so that people can still interact and flow between the two areas. With its defined purpose as being predominantly a media room though, the two major elements of consideration in the design were to include sufficient and attractive storage for our vinyl collection and all the necessary players and components, as well as cool and comfortable seating scattered throughout.

The first order of business was priming and painting the drywall, then designing a built-in for the recessed wall with the HVAC duct. Since it’s a narrow and recessed space, I thought it would be a perfect spot to store and display all of our vinyl in an artful way which didn’t take up too much space in an already small room.

MEDIA LOUNGE BEFORE 03

MEDIA LOUNGE BEFORE 04

My husband is clearly very happy to finally have a designated spot to house his music collection…haha!

MEDIA LOUNGE BEFORE 06

Prepping for staining…

MEDIA LOUNGE BEFORE 05

And voila…

MEDIA LOUNGE BEFORE 07

With the built-in finished, baseboard and trims installed, walls primed and painted, and lighting installed…now the decorating fun could begin!

In partnership with Raymour & Flanigan, I had the pleasure of choosing some absolutely AMAZING chairs to incorporate in this space. I am honestly always floored by the variety and quality of their pieces, and I was ecstatic to have had the opportunity to select an incredibly unique array of accent chairs from their collection that brings so much beauty and function to our little media room. I wanted the space to be modern/graphic/bold given that it is indeed a media room, so I opted for sculptural and iconic shapes for the chairs. And I am so in love with how everything came together!

So here’s a peek from the living room, looking into the media lounge…

MEDIA LOUNGE AFTER 05

And here is the space in its entirety!

MEDIA LOUNGE AFTER 04

MEDIA LOUNGE AFTER 09

MEDIA LOUNGE AFTER 02

MEDIA LOUNGE AFTER 03

Despite the room being on the small side, it was important for me to create a few different zones, punctuated by seating and some kind of accompanying table or surface. Along one wall, I placed a vintage bar cart (it was actually an unloved, roadside find but was easily elevated to something rather special with some matte black paint and new brass hardware and casters) and the GORGEOUS Chilton Accent Chair in all of its chocolatey glory. I seriously can’t get over the sumptuous form and comfort of this striking little chair!

MEDIA LOUNGE AFTER 07

It’s the perfect spot to pour a drink and perch!

MEDIA LOUNGE AFTER 06

Sumptuous and striking chair number two comes in the form of the stunning Verona Accent Chair. She’s crafted from buttery, ruched leather and is an absolute showstopper! Am seriously enamored with the design of this very special piece.

MEDIA LOUNGE AFTER 01

The opposite wall is graced by yet another beauty of a chair with unique, sculptural lines. This time, the Omega Accent Chair steals the scene with her bold, blue beauty.

MEDIA LOUNGE AFTER 11

And the final zone is one which I’ve unofficially dubbed the “man niche” (no “man cave” around here, as I truly can’t stand the sound of that expression…haha!), because I wanted this particular corner to be my husband’s exclusive spot. He has long been an aficionado of mid-century modern design, and I was SO very ecstatic to find an Eames-style lounger and ottoman that was beyond PERFECT in look and feel, and encompasses everything he appreciates in a lounge chair. The Grayson Lounge Chair and Ottoman is masculine, tough, iconic in design and so ridiculously comfortable that it’s virtually impossible to remove yourself from. It is seriously the most perfect chair for chilling!

MEDIA LOUNGE AFTER 10

MEDIA LOUNGE AFTER 12

MEDIA LOUNGE AFTER 08

And there it is! One more room wrapped up in our ongoing renovation here at Insieme House…just one more space to put the finishing touches on downstairs, then we’re moving on upstairs!


  • I have partnered with Raymour & Flanigan and received product in exchange for this post. All expressed opinions are 100% my own.

*Images and text by Astrid Insieme


ONE ROOM CHALLENGE – WEEK SIX – THE FINAL REVEAL

And so we’ve finally reached the finish line of the Spring 2018 One Room Challenge  … after six weeks of designing and doing, our little powder room is ready for her big debut!

Just to recap, this half-bathroom is a tiny, 5 x 5 ft space which previously found itself in this very crude state:

powder room before 2

My vision was to create a bold and dramatic jewel box of a room, fusing both traditional and global aesthetics in a way which felt fresh, chic and unique. I’ve always had a penchant for statement-making powder rooms, and I truly believe that the smaller the space, the more liberties you can take with your design choices! In essence, make it memorable. This powder room came together thanks to some amazing Craigslist finds, material from Home Depot and Lowe’s, some last-minute Amazon purchases, my amazing husband’s carpentry and masonry skills, and my own personal artistry on the walls. (You can check out previous posts to see the evolution.) And here she is now!

bathroom 12

bathroom 17

bathroom 14

bathroom 18

bathroom 13

bathroom 16

bathroom 15

bathroom 06

bathroom 05

bathroom 04

bathroom 03

bathroom 01

bathroom 10

bathroom 11

bathroom 09

We are so very happy with how it came together … thanks so much for following along and accompanying our design journey these past several weeks! Don’t forget to check out all of the other participants to see their transformations as well. A huge thanks to the One Room Challenge and House Beautiful for organizing and hosting this incredibly fun event!


ORC-Guest-400x218


ONE ROOM CHALLENGE – WEEK 5

We’re in the homestretch of the Spring 2018 One Room Challenge, with only a week left before the final reveal!

So let me quickly catch you up on what we’ve been doing in our little powder room since the last post. Basically, we’ve been tending to the final installations of all the disparate elements to pull the space together. This past Sunday, our plumber took care of installing the following:

Our new Kohler toilet (purchased at Lowe’s), which ended up being a perfect fit in our tiny half-bathroom. She was pricey, but so worth it!

TOILET

As well as our glorious new sink and faucet, which I had sourced years ago in preparation for this eventual room:

SINK

I can’t even properly express how much I love this vessel sink! It is absolutely GORGEOUS! As well as this antique brass faucet, with its chic, bamboo design:

FAUCET

I found a matching toilet paper holder and towel rod (on Amazon) with an antique brass finish which is extremely similar to that of the faucet. Thankfully, they just arrived the other day and were installed last night. I really love how minimal and understated they are, while still evoking a bit of a glamorous feel:

TOILET PAPER HOLDER

(These are the stock product photos from Amazon, obviously…haha!) We ended up installing the towel rod on the side of the wooden vanity as opposed to the wall, as you’ll see in the final reveal!

TOWEL BAR

We also installed the mirror, as well as the lighting. For the overhead light, I purchased an art deco-inspired flush mount fixture (Amazon to the rescue, once again!) with antique brass detailing and a low profile:

PENDANT FLUSH MOUNT

And the two wall sconces, which I’ve shown you before, were also finally installed:

wall sconce

But prior to installation, these guys got a bit of a facelift, as I wanted to infuse them with a bit of drama, color, and global flavor. I had a collection of wooden beads from India which I decided would be ideal to embellish the sconces with:

BEAD CRAFTING 02

BEAD CRAFTING 01

And I’m afraid that’s all I can show you at the moment! Check in next week to see the final reveal…I’m so incredibly excited to address the final details and start shooting in there!


ORC-Guest-400x218


ONE ROOM CHALLENGE – WEEK 3

Three weeks into the Spring 2018 One Room Challenge, and fortunately we’ve been able to make consistent progress at a comfortable pace, and get things steadily crossed off the list!

So let me show you what’s been happening around here since the last post. The powder room finally got a door, which we purchased at Lowe’s.

DOOR 01

Random but pertinent disclaimer: Please ignore the atrocious quality of some/most of these WIP shots, as Brian and I usually work on our home renovation projects at night (hence the horrific lighting) in our downtime. Haphazardly strung task lighting doesn’t exactly make for professional quality visuals…haha!

Where were we?

Oh, then the floor threshold went down and door trims were installed.

DOOR 02

As you can see, there’s some patching, sanding, and painting going on at this stage.

I was so incredibly lucky to score two vital elements for the powder room – the mirror and a dresser to be customized into the sink vanity – that were EXACTLY what I had in mind for this space, on Craigslist. For nearly next to nothing, too; the mirror was $30 dollars and the dresser a mere $20. Seriously unbelievable…some finds are truly fortuitous!

The mirror I had long envisioned for this little half-bath had to be opulent and statement-making, with a nod to the antiquities. I had come across this particular image of a mirror which perfectly illustrated what I had in mind, being sold for an exorbitant amount on 1stdibs, and used it as a reference in my mood board for this room:

ornate mirror

And after some exhaustive online searching, this is what I was able to miraculously locate on my local Craigslist:

MIRROR

Totally worth the two hour drive to the seller’s house! I am SO absolutely in love with it! It’s crafted of hand-carved wood with a beautifully aged gilt finish, and is in amazing condition given that it’s nearly seventy years old. The only thing that it needed was a bit of gluing and reinforcing on one corner, and it was ready to go!

I deeply wanted an art deco, waterfall style dresser to customize into the vanity for the sink, and Craigslist came to the rescue, again! Unfortunately, in my zeal for getting things done, I completely forgot to photograph the original piece before we started modifying it for our needs (you’ll see what I mean in a bit). But it is extremely similar to the dresser in this reference photo (taken from another Craigslist listing) that I used in my mood board:

art deco waterfall dresser vanity

So the dresser obviously has drawers, but our plan for converting it into a vanity for the sink involved repurposing said drawers into two large cabinet doors (so as to access the plumbing and increase interior storage), as well as removing the wooden top to eventually receive a marble top and vessel sink. And here’s how we did it:

SINK VANITY 07

Drawers removed. Time to cut away and remove the wooden top, using a cordless circular saw:

SINK VANITY 08

SINK VANITY 09

Here, you can see that the top is now off, and we’re reinforcing the “floor” of the dresser for stability.

Next, the drawers were completely dismantled and broken down into individual panels so that we could use the faces for the cabinet door fronts. The back part of the new cabinet doors required some additional sheathing, so we just used the sides of the old drawers. Like so:

SINK VANITY 06

SINK VANITY 02

Then, we installed the dresser/vanity in situ, in the powder room:

SINK VANITY 10

And these are the new cabinet doors, which we have not yet installed as we are waiting for special hinges to be delivered. Hopefully tomorrow! We will be (re)using the old drawer pulls on the new cabinet doors, but haven’t installed those yet either.

SINK VANITY 04

We also dry fitted a cultured marble counter top (ordered from Home Depot) and it was a perfect fit!

SINK VANITY 03

SINK VANITY 01

And currently that’s where we’re at! Check in next week to see more of our progress as we start tackling the wall treatment in here!


ORC-Guest-400x218


ONE ROOM CHALLENGE – WEEK 2

So we’re onto the second week of the Spring 2018 One Room Challenge and things are solidly underway around here!

The first order of business involved priming and painting the walls of the powder room a flat white (we used Valspar Ultra-White as a base because these walls will be receiving a painted “treatment” of sorts in the coming weeks), and installing the cement board on the floor. Like so:

TILING CEMENT BOARD

And with the cement board installed, we were ready for tiling. As I had mentioned in the previous post, we had bought black and white marble tile from Home Depot and decided to configure them in a traditional, harlequin pattern. We initially made a rendering of the tile layout to give us some visual orientation before we started, to ensure that we sourced enough material and to serve as reference during the application if needed. With the mortar mixed, we were ready to go and the installation went fairly quickly and smoothly, given the small scale of the room. Nothing like immediate and gratifying results, right?

TILING 01

Because the bathroom is so tiny and only one person could comfortably spread out in it to do the job properly, Brian did the laying while I assisted from the outside, bringing him the tile, making sure the mortar stayed wet as well as keeping the wet tile saw “hydrated”, and, of course, documenting the process.

TILING 02

(My husband is going to absolutely hate me for using these photos because his underwear is showing in tragically cliche, contractor fashion, but these are the only shots I have…haha!)

TILING 04

Masonry, in any of its forms, is clearly not a clean affair…haha! Also, here you can see the printout of the layout we created and used for reference. As well as one of the multiple cans of La Croix that was consumed while finishing the job. Keeping it classy, guys…

TILING 03

Lots of measuring and cutting involved on the border tiles. But overall, it went quickly and we have now crossed wall prep and floor tiling off the list! And voila!

TILING 05

I chose black marble tiles that were heavily veined because I find them infinitely more beautiful and dramatic than the more uniform variety. They look more organic to me, and especially in this arrangement, they make the floors look classic and elegant as opposed to diner-y. No disrespect to the latter visual, of course, it just wasn’t the look I was going for in this space!

We also just ordered the toilet online from Lowe’s, which should be delivered soon as well. Because the powder room is rather diminutive, we opted for one of the smaller models out there, with a rounded seat, and ended up having to pay a bit more than what one would pay for a standard toilet, but such is life. A standard-size toilet with a larger footprint would simply take up too much space and overwhelm the room. We went with the Kohler San Souci 1-piece 1.28 GPF Single Flush Round Toilet and here it is:

TOILET

So that’s the status quo around here so far! I’ve just found THE absolute perfect mirror and art deco dresser to be customized into the bathroom vanity – both on Craigslist for a steal – and will be showing you those next time!

Stay tuned for more next week!


ORC-Guest-400x218